Self-Publishing

Before and After of a Complex Book Interior Design and Layout

Last year I got an email from a first time author who had hired a family friend to typeset his non-fiction book. She had some experience in graphic design but his was a very complex book with many tables, images and endnotes, and his designer did not know typical book typesetting conventions. The author knew enough to realize at the “final proof” stage that that the book she had typeset was not looking like other non-fiction books on his shelf. The lack of justification of the body text was bothering him, among various other things.

He sent me a plea for help and I agreed that the original formatting left a lot to be desired. After he mourned the money he lost on the first typesetting attempt, we started completely from scratch again and designed a book he is proud to have his name on. We started with the cover design in November 2023 and then moved on to full book interior layout as well as ebook adaptation. He released his book in March 2024. Here’s what he had to say when we finished his book:

In the following post I am going to compare the original layout to my final layout and point out some book typesetting basics that need to be in place to end up with a professionally-produced non-fiction book interior. I am thankful I was able to give Drew’s book a professional polish worthy of the five years of labor he put into his manuscript.


Book body text needs to be serif font.

I have written about this extensively over here but generally speaking all non-fiction English books use serif body fonts. This makes them easier to read. The original design (seen below) used a body font that the author liked, but it just wasn’t body font material. I ended up using a typeface called “Miller” which is a bit more modern than some serif fonts, keeping the modern feel the author wanted without losing the readability of serif. We used his brand font for headers, running heads, etc. but just not for the body font.

Book body text needs to be left justified (ie: straight on both the left and right margins).

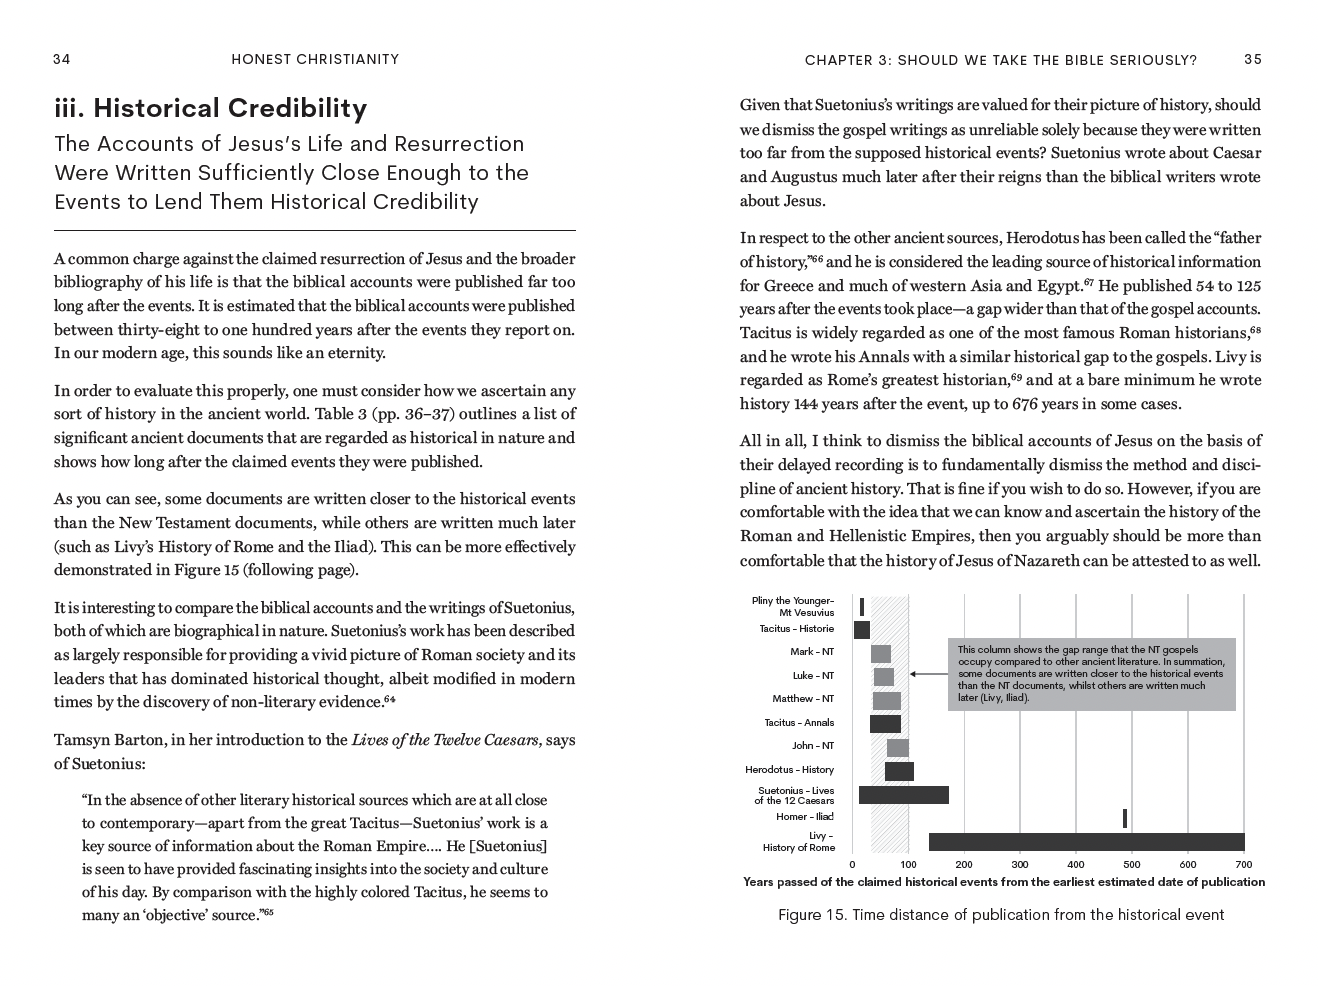
One of the biggest changes between the original layout and revised layout was that I justified the body text. This was something that the client had already noticed as a problem. Industry standard is to justify body text in a non-fiction book of this nature. The blocks of text are easier on the eyes and simply what we have come to expect in English language books. Below you see the unjustified text and serif body font…

…compared to the serif body font and left justified blocks of text. I also used thin lines to separate some headers from body text, which helped distinguish the sections without losing a lot of space like in the original layout.


The most important information on the page should be the most prominent information.

In the original layout the chapter numbers were more prominent than the chapter title, but the opposite should be true…

In the revised design, the titles are easier to read than the chapter numbers, which are much less significant. On a chapter opening page you like see below, the reader’s eye would go first to the chapter title, probably after that to the chapter number, and after that to the opening paragraph (drop cap drawing attention) or the subtitle below. This design provides a much more natural flow for information viewing.


Running headers or footers should appear on both sides of each spread (ie: on both left- and righthand pages).

“Running heads” are the bits of text that usually appear on the tops of the pages that tell you (more often than not) the title of the book and the name of the chapter or section. You will notice that in the original book the running heads were only on righthand pages. This might be permissible in a quirky or artsy book, but in a stardard non-fiction book, there should be running heads on both pages. In this case, the book title on the lefthand pages and the chapter number and title on the right. If you hire an amateur designer this is often an area where they slip up because they don’t know what the conventions are, and if it’s your first book, you may not notice their errors.

Text in the book must be legible without a magnifying glass.

Unless the book comes with a magnifying glass! 🔎 Optimizing caption sizes for the page size, reader’s eye, content, etc. is challenging for a new designer. In the original version of this book, the captions were tiny and while the information was technically there, they were hard to read….

In the revised version, I made the captions small but legible, and gave the graphics a rounded, stylish look to break up all the hard corners in other parts of the book.

The legend on the left of the table below was illegible…

…so I found a better solution. In some places the text needed to stack to fit at a larger point size. I also made the rest of the table easier to understand and added more contrast than in the original graphic.

Weaving the captions in next to the graphics created a much smoother flow in this layout. Below you see the original captions, which stretched out wider than the images and were too small. At the same time, there was a lot of awkward white space around the photos.

…and the new format that I used which incorporated the captions next to the images, and made the captions more legible:


Tables should be styled to fit the book’s page size and margins while still being readable. They should also be styled consistently.

For the tables and charts, I made them easier to read and more consistent in the styling and spacing. Here you see two of the tables from the original book…

And here is what I did with them…

Sometimes the best option for a table is to rotate it 90 degrees. I took various tables in this book and rotated them for a cleaner look. Here is one table that was squished into a half page…

…which I rotated 90 degrees and spread over a whole page.

The original designer took this excel graphic and rotated it 90 degrees, but it was difficult to understand and hard to read...

…so I worked with my assistant designer to create a graphic that fit across two pages, staying within the regular margins on both of those pages.

Note that on the table/chart pages, the editor recommended removing running headers for a cleaner look. This was done consistently on that type of page. Here you see another table…

…which worked a lot better spread over two pages, as seen below.

The following table needed more space to be understandable and manageable:

In my final layout, it spread onto two pages but was much more legible. We were able to break the table at a logical point so it did not ruin the reader’s understanding of the information. I also added a small header stating “Table 5, continued” on the second page, saying that the table had been continued from the previous page.

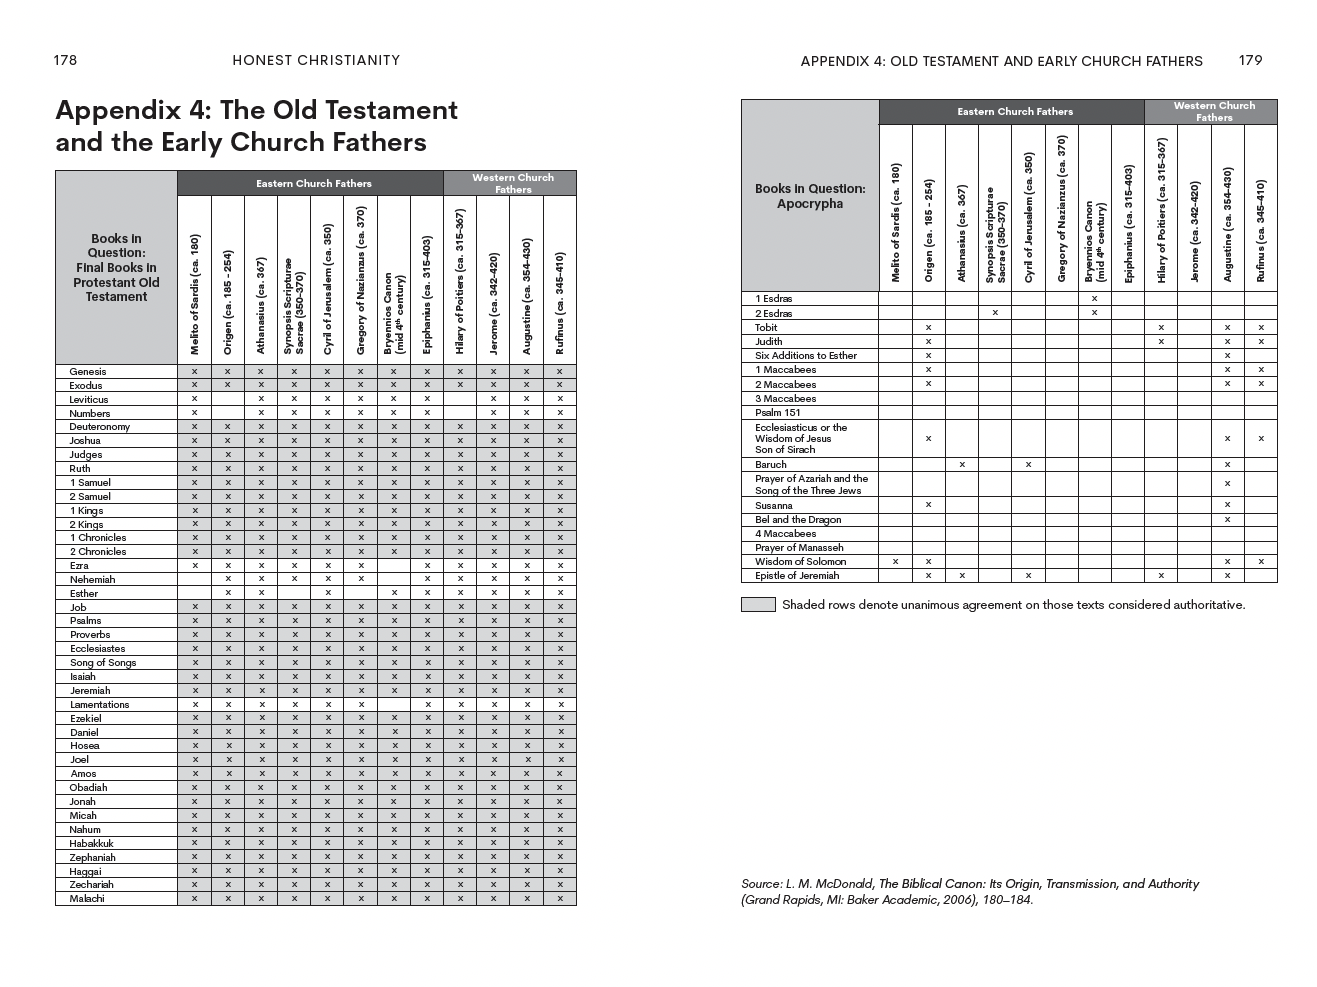
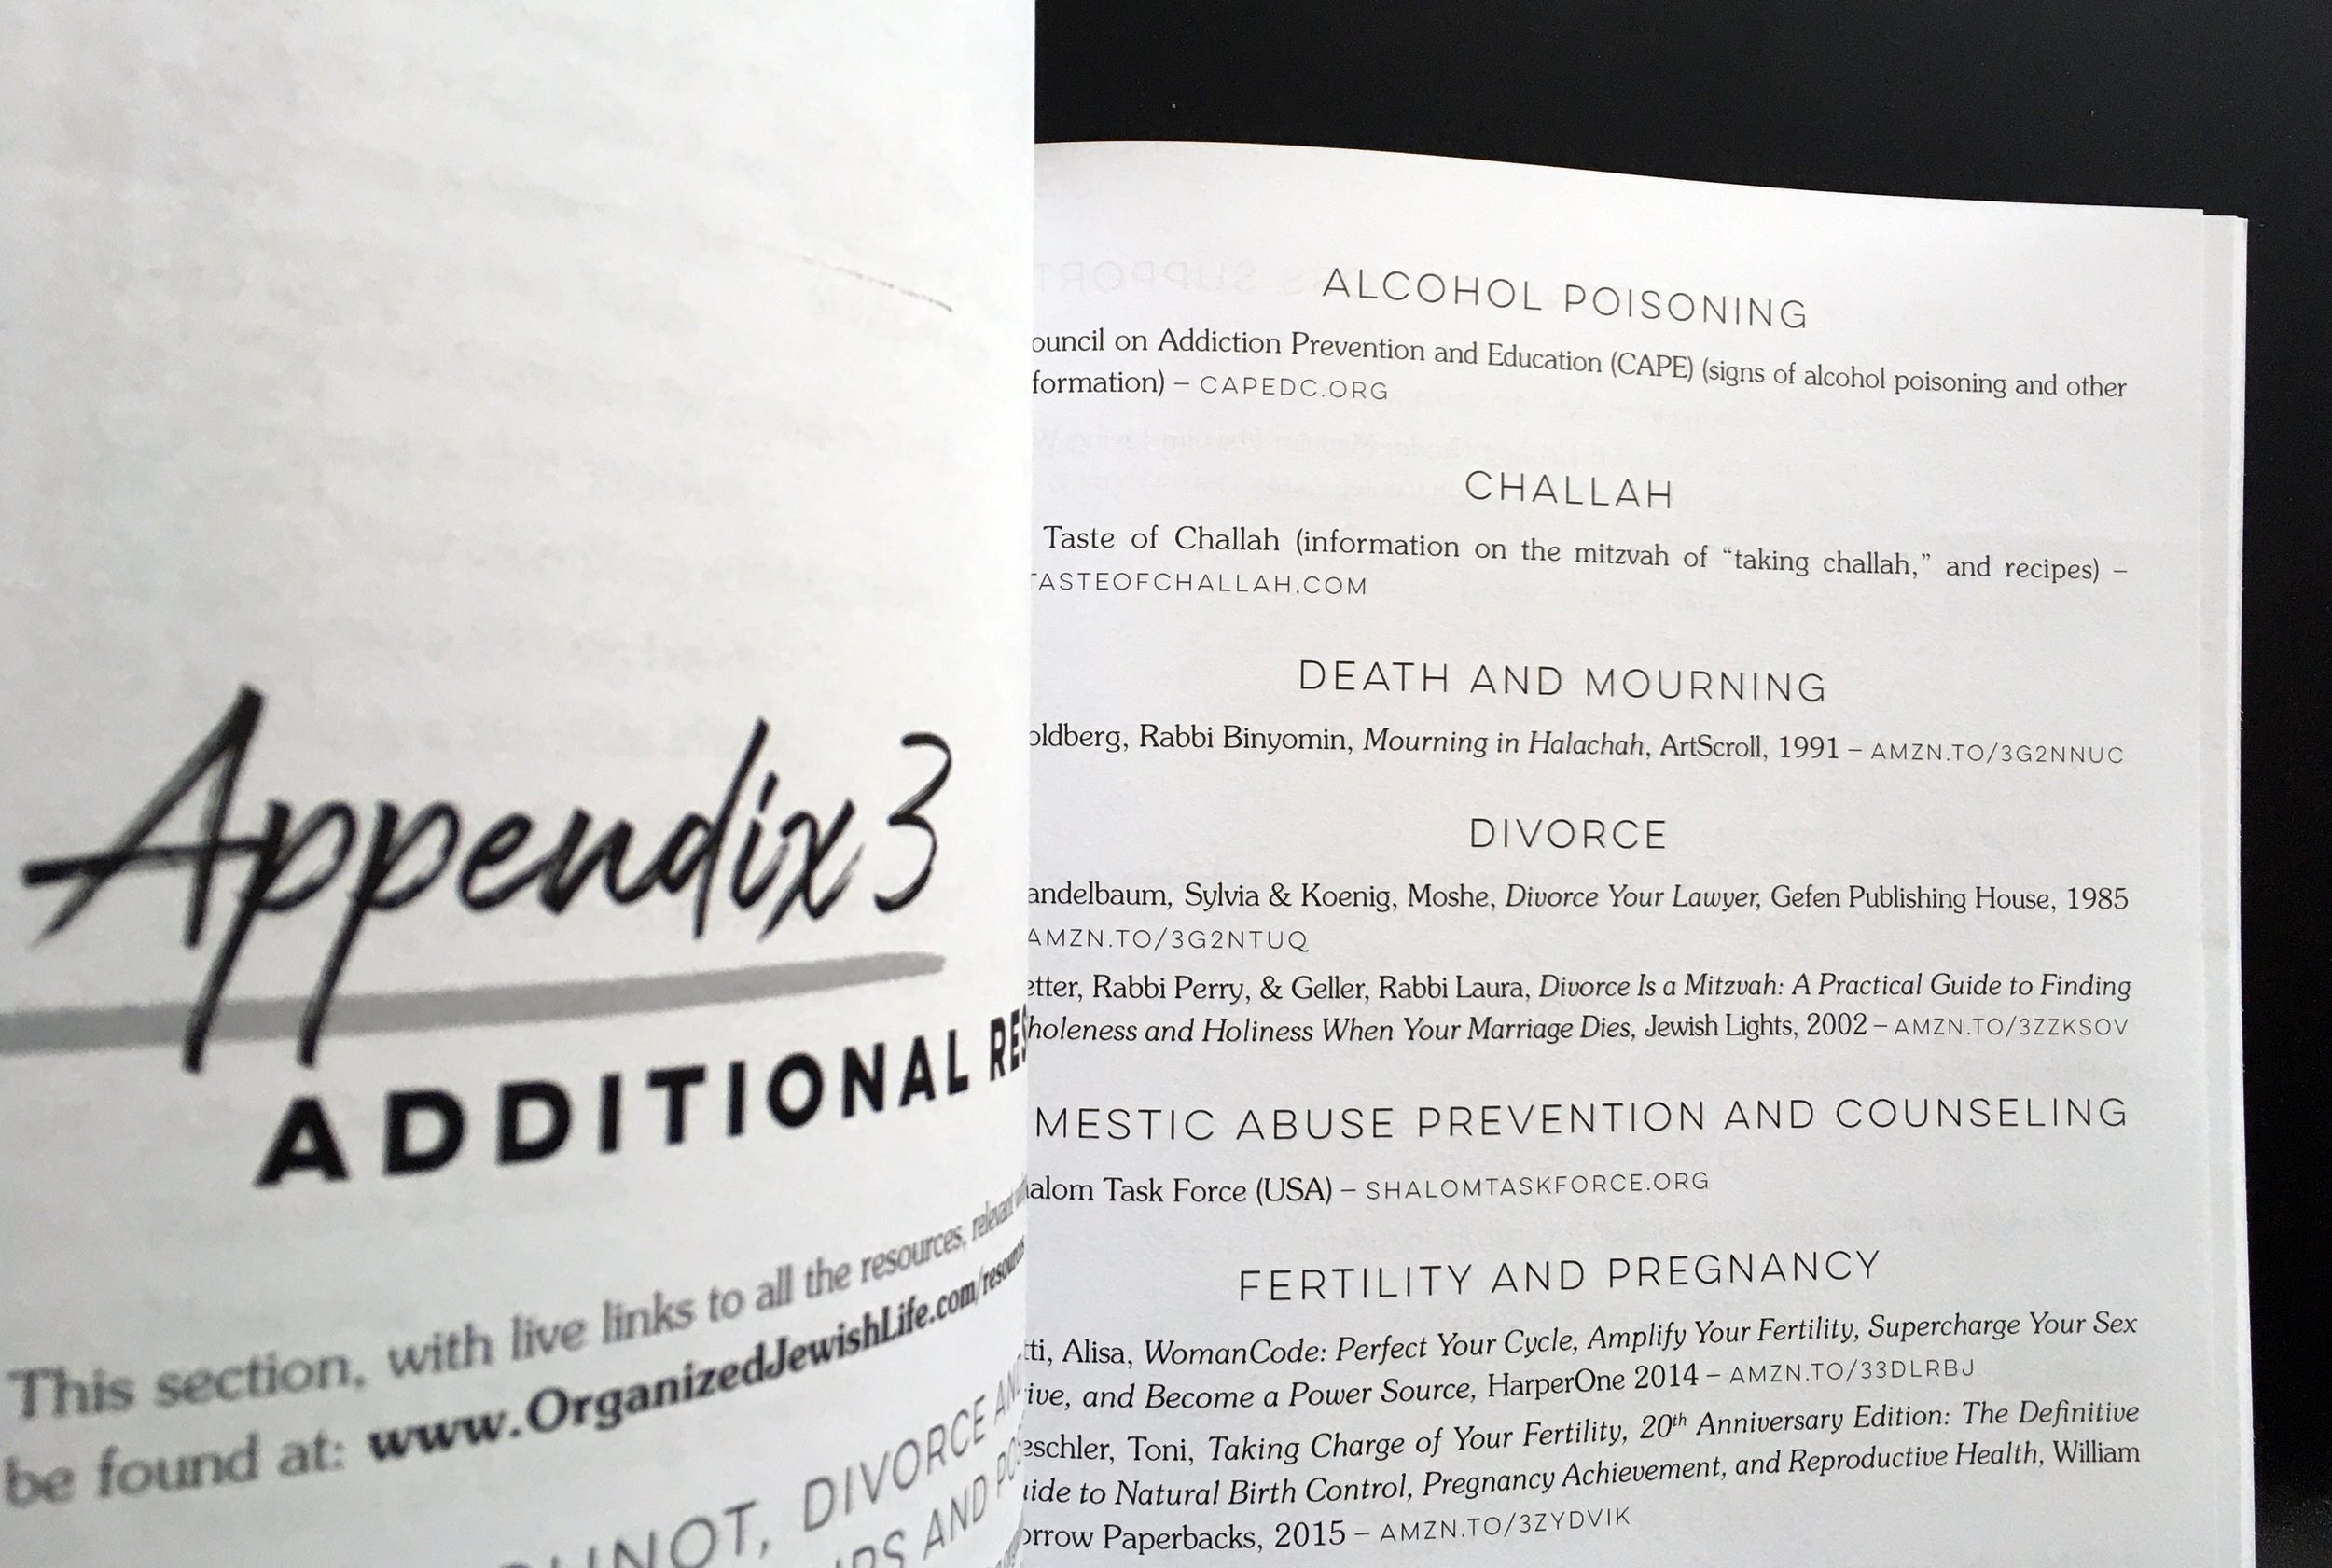
By Appendix 3 at the back of this complex book, I think the previous designer had given up hope of finding good solutions for the complex content and started pasting excel charts into the book file, even on top of other text.

The author hired me to rescue him, so my solution looked like this. It took four pages instead of two to list all of the info from Appendix 3 and Appendix 4, but it was readable and clean:


Endnotes should be legible, clean…and not blue.

The endnotes of a book are not cute on the best of days but the endnotes in the initial design of this book were too small, too close together and the links were blue (a carryover from Word styles) which will not print nicely in a black ink only interior.

I cleaned up the endnotes section, dividing the endnotes into neat chapter sections and even shortening some long URLs if there was an option to make them shorter. (See more about making URLs in your book look good and work well here.)

(One particular link was so long that my software didn’t know how to handle such a long string of text! Here’s a funny email I sent to Drew about the link he sent me, and the shorter link that I was able to find and use!)

Don’t use tables where tables are not needed.

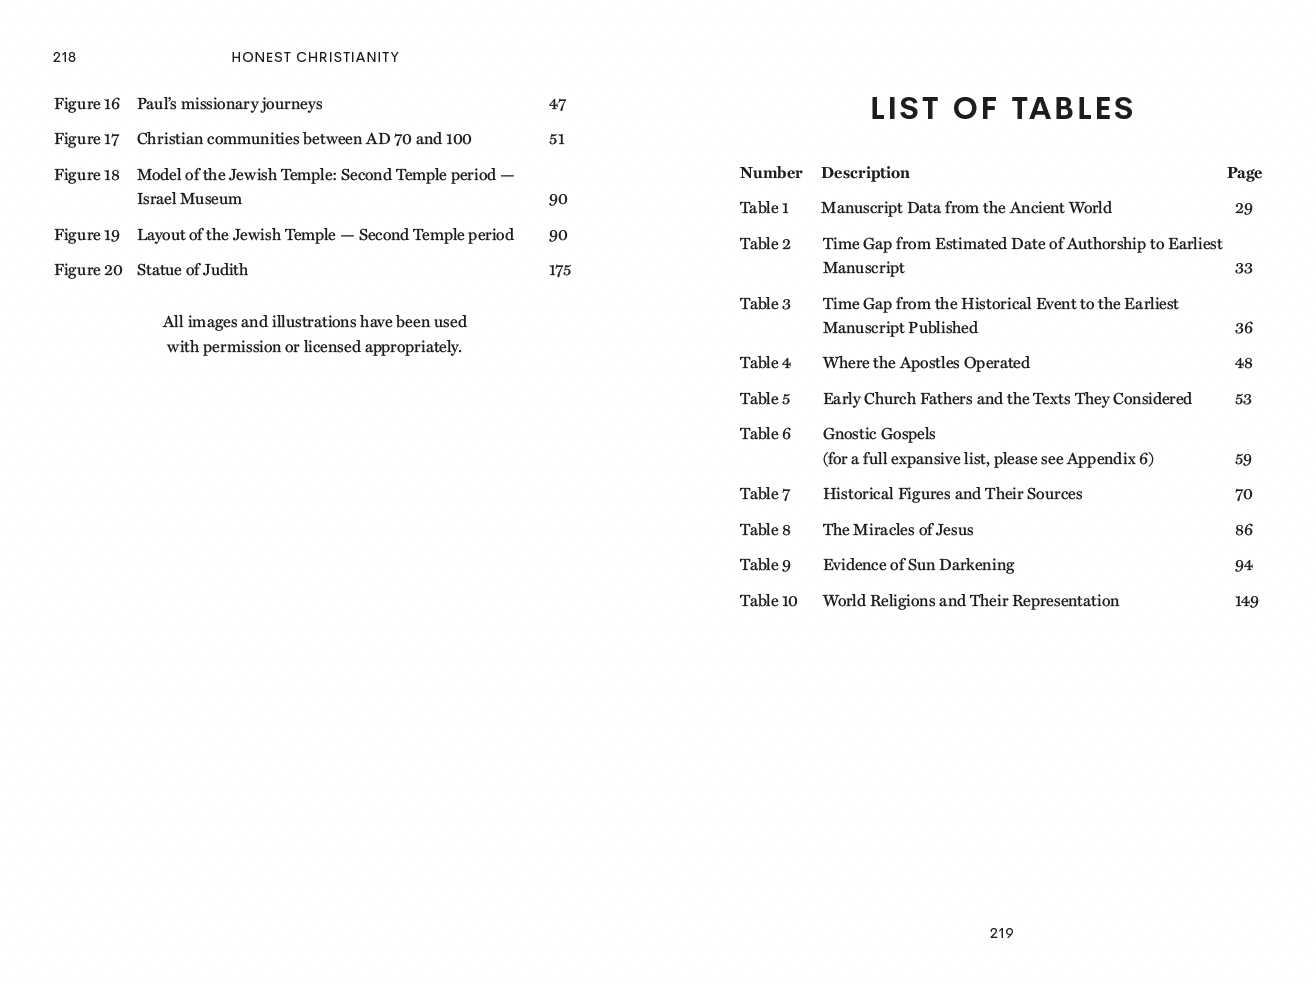
Sometimes an author provides their manuscript with certain information organized into tables but logic says that there is no special reason that text needs to be in a table. This original layout had the lists of images and tables in table format, but this just made the information harder to look at…

I formatted the lists as lists and it made them simpler and easier to understand.


Whew! Re-doing this book was a months-long endeavor but I think you can see that it was worth it! If you’re working on a complex book, particularly one with lots of tables, images and charts, and want it to have a professional look, be sure to hire someone who can show you complex books in their portfolio. Take a look at my services page if you are looking for a book designer!

Is Print on Demand (POD) the Solution for Your Book Project ?

Printing on demand (POD) has driven an independent publishing boom, as it has made printing and distributing a professionally produced book into readers’ hands much more attainable for the everyday writer. It has democratized publishing in a way perhaps the internet did for writing in general, allowing everyday people to be able to get a book out to the masses without needing a publishing contract or a huge lump sum of money for printing and distribution.

Your book might be a good fit for print on demand if:

Your book is black and white (grayscale) in the interior.

While print on demand does have the capability to print color, the consistency and quality of the color is significantly less than on a professional offset press. The cost is also signifincantly more. I have had clients print full color cookbooks on Amazon KDP, Ingram Spark, or other POD websites, but the cost of printing can be 3 to 6 times more than printing offset in the USA or China.

Your book doesn’t require any special papers, finishing techniques or spot/Pantone colors.

POD printing is great for trade paperback and hardback type books that are standard sizes, generally bound on the left or right side, use glue binding, printed on standard paper, etc. If you are wanting coil bound or gold foil on the cover or rounded corners or thick paper, you’ll have to look somewhere else (although POD companies are starting to offer more paper options!) If you need the color of your cover to be a Pantone, neon or spot color that matches your specifications perfectly, POD is not for you because it uses CMYK color. POD is for mass market use but not really for custom books.

Your book is not a journal.

I don’t recommend using POD printing for journal products because the paper and binding of a POD book is not strong and thick enough for the heavy wear and tear most journal users apply to their book. I design journals regularly but they are usually printed in Asia. I have a whole section about journals on my articles page.

You are willing to lose a little bit of quality control for a lot of convenience.

There are some things about printing a one-off book that are out of your control. Your book might look a little different when it is printed and shipped on October 7 in Mumbai than on October 8 in Munich. Color shifts, spines that are slightly off center, and sometimes the occasional worse faux pas can happen with one-off book orders. There are not 1,000 perfectly printed and matching books somewhere that you have checked and approved for distribution. POD adds the possibility of a bit of error with each printing. But someone just ordered your print book from Munich or Mumbai and got it within a couple of days—how cool is that?

You are a bit tech savvy (or have a friend who is).

Uploading your book to Amazon KDP or a similar website, troubleshooting any issues that come up, etc. can be tough if you are technologically challenged. I refer my clients to someone who can deal with a lot of the technical issues, but you need some basic computer and internet skills to keep up with your own book launch.

You are OK with paying more per unit for the convenience of not having to pay for a full print run up front.

Printing on demand has a higher cost per unit compared to traditional printing, especially for large print runs. POD printing is ideal for smaller print runs (1 or more) but can easily cost 5x or more what it would cost if you printed a bulk run of your books with an offset printer. If investing in offset printing is not a problem for you, you can save a lot of money in the long run, if you have buyers for your books.


If you have read all of these items and still think your book is a good fit for POD printing, congratulations! It really is a wonderful option for self-publishers.

And if print on demand is not a good option for your kind of book, you’re still in the right place. I cut my book design teeth at an offset book printer and am familiar with that method of printing books as well. It’s still going strong for colorful books, custom books, journals, or books being printed in a big quantity. You might want to start here, to find out what a book printer needs to know price your book printing project.

Let’s talk about your book design: fill out this form for book design projects and this form for journal design projects.

Case Study - Top Product Marketer on Self-Publishing, Branding and Launching Your Book

How long does it take to get a book to market?

It almost always takes longer than a first-time author thinks!

But sometimes extending the development, production and release process over a longer period of time is the best thing for the marketing of your book.

When Harvey Lee from London, UK first approached me about designing his book interior, I could tell he understood that releasing a book is a time-intensive project. He is a product marketing expert with 25+ years working with big brands, and knows what it takes to get a product to market. 

Harvey booked a brainstorming call with me in March 2023, we worked together from June to August of 2023, and his rockstar of a book is out now—as in, today!—February 14, 2024. ⚡

Harvey put a lot of research into his decision to self-publish, his book brand, and his book launch. He let me pick his brain so that you can understand how he made key decisions about his book as well as the timeline he planned on.

Believe it or not, even Harvey was still surprised how time-intensive some stages of independent book production were. We'll talk about that in this case study, too. I hope Harvey's insight will help you see how much planning goes into a rockin' #bookdone.


Harvey's Book Done Timeline

✍️ Writing started: Early 2019 (with a break in 2020)
📩 First contact with Julie: March 2023
(while book was being edited and proofread)
🎨 Files ready for design and layout: June 2023
🖨️ First copy of the book printed: August 2023
✔️ Book done (released): February 14, 2024 (today!)


Harvey's Book Brand: Creation, Research and Implementation

Part business book and part personal memoir, Backstage Pass is an entertaining mixture of tales from the music, video game and tech industries overlaid on stories of grit and determination, equipping readers to embark on an adventure of their own making.  

From early on in the process, Harvey developed various visuals and words that he would associate with his book which he tagged "50% Rock & Roll, 50% Business, 100% True". The red color and neon glow, backstage pass theme, tag line and lightning bolt became mainstays in his book design, book website, book marketing, and so on. This marketing thinking before the book design even began made sure Harvey developed a strong book brand. 

Being a marketing pro, Harvey did market research about how these particular visuals and words would communicate with his target audience, and discovered some interesting things, such as:

With his book's branding nailed down, Harvey moved to book cover design. His designer created a book cover that implemented all elements of his brand. When he came to me to talk about his interior, his front cover was done and he was finalizing his back cover and dust jacket flaps. I generally don't design an interior until the front cover is finalized, because I like the two to match.

When I designed Harvey's book interior, I played off of the book's branding as well as the typefaces and design elements used on the cover and dust jacket flaps (above right) to create an interior that jives perfectly with the Backstage Pass brand and the look of the book cover. Below are selected pages from the interior—lots of photos, memorabilia and direct dialogue in this book!

Don't tell Harvey, but I removed scratches from this original photo of him in Reno, NV to improve this half-page picture [insert joke about Harvey's 90's short shorts here!]

Harvey and I decided during our brainstorming session that it didn't make sense for him to pay upwards of 3x as much for full color POD book interior printing. The print interior would be in grayscale. (As he said, "I am an author, but I am also a businessman!") But my developer Luca and I took a few extra steps to make sure the photos were in color in the ebook, for ereaders that can display color.

The body text in the interior was based on the style of "The Lives of Brian", a memoir with a font size Harvey found comfortable to read. I ordered a print copy of that book and matched the body font size, line spacing and typeface as closely as possible, to make Harvey's book an equally easy read. Harvey and I reworked various paragraphs where the line breaks were awkward and reworded sentences or changed letter tracking, justification settings, etc. to make every line perfect. When Harvey finally received his first print copies, he sent me a video of them and said, "My book doesn't 'look self-published'. It looks like a professional book from a big name publisher!" I told you it would, Harvey! 


Why Harvey Choose to Publish His Book Independently (Self-Publish)

You may be wondering whether self-publishing is a good idea. Harvey had the same question and did a lot of research about whether he should self-publish or sign a deal with a traditional publisher.

Here is what he learned: self-publishing used to be for people who could not get a traditional publisher interested in their book. But this is no longer the case;over the past ten years, the self-publishing industry has exploded. 

Some self-published book end up on the New York Times or Sunday Times bestseller lists. Being an Amazon bestselling book within a particular category has become possible for independently-published books. A huge range of support services have emerged for self-published authors, depending on the author's needs and budget. Because of this, there are and more high-quality self-published books.

A critical factor for a self-published book reaching a wide audience is the author's own platform or network. Through social media (anything from LinkedIn to TikTok), today's authors have direct access to their target audience and can share their material in a cost-effective and scaleable way. (Even traditional publishers rely on an author's platform to reach a wider audience, so this is important no matter which way you choose to go!) 

Self-publishing gave Harvey the freedom to:

  • Control the content he wanted to include in his book.

  • Set his own timeline for the entire project. Traditionally-published books are usually released 18-24 months after a book deal is signed and unless you are a household name, you have little say in the publishing date.

  • Choose his own book formats. Ultimately Harvey chose to release it in hardcover, paperback, e-book, and audiobook.

  • Determine the pricing and give away ebooks or run promotions whenever he wants. 

  • Handle his own marketing (especially good if marketing is your profession!), manufacturing (in this case, he used Lightening Source POD for printing), and distribution. 


Important questions every independent author should ask before getting started on their book

  • What is my key objective in publishing a book? 

  • Should I self publish or work with a publisher? 

  • What is my book's genre?

  • What books would compete with mine?

  • What is a reasonable timeline for releasing my book?

  • What costs will I incur and what can I charge per book?

  • What visual identity do I want my book to have? (ie: branding)

  • What formats (softcover, hardcover, ebook, audiobook, etc.) should the book appear in?

  • Which channel(s) will I use to promote my book?

  • Which team members do I need to accomplish this goal?


Harvey's Tips For a Successful Independent Book Launch

1. Define clear objectives. 🎯

The cornerstone of an effective book launch strategy is defining clear objectives. Take time to think through your end goal in creating and producing a book, as it will dictate your subsequent decisions. 

On my (Julie's) book project questionnaire, I ask people to share their objectives with me:

2. Make decisions about book formats. 📖

The choice of book format—hardback, paperback, ebook, or audiobook—is pivotal. While certain formats may be mandatory, such as producing at least one paperback, the associated time and cost considerations vary significantly. Creating both a hardback and paperback creates a few additional complexities and it's important to determine whether it is worth the extra effort or expense.

Audiobook production is also a nuanced process. Ask yourself if your book is suitable for audio format, and whether you should narrate it yourself or get someone else to narrate it. Harvey ultimately chose to narrate the book himself and have the audio files professional mastered, but it was a time-intensive process! 

3. Make smart decisions about release timelines. 🕒

Just because your book files are ready does not necessarily mean it's time to release your book. Print-on-demand might make it easy to say that your book is launched, but allowing time for a pre-order campaign and to build your author platform may allow you to rank higher on book distributor websites when your book becomes available. Audiobook distribution requires a longer lead time than POD printing, and to have all formats available at once, you must prepare the audiobook well in advance. (Julie's recommendation is to record it after the print copy is finalized, because content changes always occur after typesetting!) Research what time of year is best to release books in your genre or to your particular audience. Harvey picked February 14, 2024 as his release date because it is memorable (💘) but also to allow enough time to build awareness of his book and get more pre-orders. He could have released in November but learned from Nielsen Book Data that Q4 was full of big book launches already and didn't want his book to get lost among many other new releases. January is not a good month for book sales, so February was the next best month to enable him to meet his original objectives for his book release.

4. Recognize how important your author platform is to obtaining a wider reach for your book. ✍🏽

Ann Handley says that authors are in the business of sales. Building your author platform ahead of time gives a great boost to your marketing, whether your book is traditionally published or self-published.

5. Strike a good balance with your marketing, to limit unnecessary costs. 📢

Marketing is critical to getting your book to a wider audience, but it is also often a weak spot for independent authors. While you can choose to hire all of your marketing done for you, the slow, organic process of word-of-mouth marketing and the power of social proof, reviews and a well-prepared market are even more powerful. 

6. Plan the time you need for overseeing proofreading. ✏️

Despite having a substantial team helping him with his book editing, design and launch, Harvey discovered that he had to personally, meticulously oversee multiple rounds of proofreading. Keeping track of various file versions takes great attention to detail, and errors can sometimes be introduced during format conversions. While you can (and should) hire professionals for proofreading, the onus is ultimately on you, the independent author, as to what content is in your final book. 


How Harvey got book endorsements

  • Before design and layout (one year before release): Harvey gave home-printed manuscripts (before design and layout) to about 30 early beta readers. This was part of the review and editing process. He got some great endorsements/quotations.

  • After design and layout (six months before release): 

    • He asked me to make a special copy of the book pdf labeled "Review copy. Trade only." This pdf had the front and back covers embedded in the same pdf as the interior layout and could be read on-screen or printed.

    • He printed copies of the "trade only" version and sent them to influencers and tastemakers from his own network.

    • He also got his PR team to distribute the PDF to media outlets. He found the digital PDF was great as a "first show" but that those who wanted to read the whole thing asked for a printed copy. All told, he printed about 200 trade copies.

    • Harvey used Book Sirens for general advanced reviews but found it to be most useful for advanced digital distribution for the ePub/Kindle or PDF versions for media.

    • He collected the endorsements he received and used them in his marketing.


Of course, a book like Harvey's came with a playlist!


Along with the boom of self-publishing, I have seen a boom in marketing professionals coming to me for the design of their self-published books.

Marketers are full of ideas and fun to work with. Harvey was no exception. Thanks for sharing your insights with other marketers and writers of all backgrounds, Harvey!
 

Follow Harvey on
Instagram 
or 
LinkedIn.
or via his
website.


Launch your book this year!

Or take longer if you need it. I hope Harvey's planned and well-timed approach has given you some ideas about all the details behind a successful book launch.

Usually authors reach out to me about two to six months in advance of needing my print book design and ebook services. Even if you don't know exactly when your files will be ready for design and layout, you can get on my schedule ahead of time and I'll get started when your manuscript is complete. 

Fill out this book project questionnaire (journal projects have their own questionnaire) if you're ready for an estimate. 

Hang in there! Soon you'll be on the other side with your #bookdone. ✔️

Tips for Marketing Your Book

Some time ago I started following Emily Enger from Good Enough Book Marketing. We both apparently like the color yellow (though I go a bit more mustard and she goes a bit more lemon) and we both work with authors getting their books out into the world. While marketing books is not my shtick, I often end up in conversations with my clients about marketing ideas and I feature their best marketing ideas in my newsletter. And so it was time to talk to someone who knows more about all of this than I do, and pick her brain for some advice for you. Marketing your book should start before you're ever ready for my services but never really ends. No matter where you are on your author journey, I hope you’ll find Emily’s marketing tips and tricks in this article helpful!

Emily, I was interested in your business as soon as I saw the name “Good Enough Book Marketing”. How did you pick that name and why?

Haha. I knew that name would be a risk: people would either love it or hate it. So I really debated whether to use it. But I am a recovering perfectionist, so my journey into the marketing mindset I have today was hard-won. And I wanted to honor that journey in the name of my business. There have been a few negative comments from people who think I may be teaching authors to be lazy with their marketing or that success is bad, but overall I get great feedback on my business name. I think it gives authors permission to prioritize their writing. The marketing gets to be secondary when you’re an author. That’s okay.

Yes, the vibe I get from you is that book marketing is important, but not the be all and end all of being an author. I like that.

Maybe a good initial topic is developing a brand guide. What is this and how can an author or content creator develop this?

A brand guide is a document authors create to help them define what they want their “brand” (or public image) to be. It helps authors figure out things like:

  • Who is my target audience?

  • What is my professional “tone” or voice that I use when marketing my books?

  • What is the mission statement that is driving my desire to be a writer?

  • What do I want to be known for?

Many people think the idea of a “brand” is too business-focused to apply to authors, but the truth is that all of us are a type of personal brand. Especially if you are on the internet.

By gazing inward to develop a “brand guide,” authors learn more about who they are both personally and professionally. And it helps them keep their messaging on-point (no distractions) as they market their books.

Once a writer or author has thought through their brand guide, they can start to think practically about marketing their book. The biggest mistake I see first-time authors make is thinking they only need to start marketing once they have their book in hand. Can you talk about when book marketing begins?

The success of book marketing really does hinge on how early you start. Marketing is like a slingshot—the farther you pull it back before your book is out, the farther your book will launch on release day.

Is there such a thing as too early? Yes, there can be. When you are writing the first draft of your book, it is important to remove any distraction—and that includes marketing. So if the marketing is getting in the way of your creativity, then it’s time to hit pause. Just hone in on your craft and enjoy the story.

Once you have an initial draft created, then I recommend some “light” marketing, usually in the form of networking (or building relationships). Go to a few writing retreats, which will provide both connections as well as support for your craft as you are revising your book. You can also create social media accounts or a newsletter at this point, if you don’t already have them. Since you have at least one complete draft, you can be confident that your book is coming together and feel less imposter syndrome about showing up online as a writer.

Once your final draft is done (and you have had it professionally edited and proofread), the marketing will vary by publishing path. If you are going to traditionally publish, then keep maintaining the “light” marketing as you pitch to agents. If you are self-publishing, it’s time to research and submit your book to professional reviewers or trade magazine reviews (Kirkus, Publisher’s Weekly, Library Journal, etc.), because you won’t have a publisher to do that for you.

Do you have any advice for an author who is wanting to get his or her online presence set up? What is needed and what is the best way to go about it?

I believe websites are an important part of an author's online presence. While they are not a big connection point with one's readers, they go a long way to make a positive impression with other professionals inside the book industry, including journalists, book reviewers, book event coordinators and more. I even had a client's website help land his publisher! Websites used to be much cheaper to set up than they are now. If you have some technical abilities, Wordpress is still the cheapest route for DIY options, but it can get complicated. Take the time to price out some local web designers in your area, because they might be cheaper in the long run than doing a more expensive drag-and-drop website building platform—those have started getting pricey. I would also be cautious about platforms that "specialize" in websites for authors. They are usually priced high, too, in exchange for the convenience. Remember that you will have this website forever, so that monthly fee to maintain/host your site matters. Sometimes paying a large amount up front to a designer, but smaller maintenance fees going forward actually ends up being less money long-term.

The other piece about an online presence that is often forgotten is high-quality photos! In order to have a professional, engaging social media presence or website, you need to have several photos of yourself. These photos should not just be boring headshots! Go on a fun photo shoot with a friend and find some of your favorite spots—a state park? a coffee shop? a bookstore? Stage some photos that match your personality but also look like you are an approachable, engaging person. Maybe you are laughing or rolling your eyes or enjoying a giant cup of coffee with your eyes closed and a relieved expression on your face. You will want an entire folder of fun photos that you can pull from at a moment's notice when you need something to post.

If you are going to start a podcast, the most important thing you need is a quality microphone—you can find lots of inexpensive options online or at Target. You don't need the fanciest one out there. Any external microphone is going to be good enough and much better quality than your computer's internal mic. There are a lot of other podcasting tools you will find for recording or uploading each episode. Whatever you choose to use, I always recommend using either the cheapest option or tools that are free. Remember that you can upgrade as you get more confident and your platform grows, but when you are just starting, you don't even know if you like podcasting yet. So don't throw a lot of money into something until you have been doing it for awhile and know that it fits your style and is actually helping your career grow.

Whatever you decide for an online presence, remember to start small and attainable. The key to marketing has always been consistency. If you do too many things and can't regularly show up for them all, your career will not grow. It is better to pick a couple of paths and regularly give them your attention.

What are the book marketing strategies that you think are working best right now?

The best strategy to focus on before your book comes out is your platform. Your "platform" is any online presence you have that connects directly to your readers. So that could be social media, a Youtube channel, a podcast, a newsletter, a blog, etc. Pick just one or two places you want to show up online and give it/them your attention. What do you talk about before your book is out? You have to find topics that those who enjoy your future book will also love—because you only want your audience to be made up of people who will eventually buy your book. So you could recommend books by other authors who are similar to you (maybe even interview some of those authors on your channel!) Or you could focus on topics that come up in your book. Will your book deal with women's issues? History? Food? These are all things that could make great angles for your posts/episodes now, too!

My favorite strategy is applying to have your book promoted on a promotional email list. There are so many, but here are a few of my favorites for you: BookBub, Written Word Media, Robin Reads. These companies email their massive list of followers, segmented by genre, about really cheap ebook deals currently available. And they are pretty good about only including a handful of books per email, so if your book is listed, it won’t be lost in a huge sea of other books. And remember: these emails are opened by people for the express purpose of finding a book to read today. So the conversion rate is usually great. It is worth it to put your ebook on discount to be included in these!

Another important marketing strategy people forget about is building relationships with bookstore owners, particularly at local bookstores. Book sellers love pushing local books because readers typically enjoy discovering local authors. When you make a relationship with a bookstore, you have salespeople who are pushing your book on your behalf, so you don’t have to do so much of the “sales” talk. Do keep in mind that bookstores need a wholesale distributor to buy your book from, not Amazon. So if your book is exclusively on Amazon, you won’t be able to pursue this path. (I recommend IngramSpark as a print on demand wholesale distributor.)

You talk about book marketing activities you can stop doing today. Can you tell us about some of those and why?

Which activities you can stop doing depends heavily on your genre. It also depends on your goals for that marketing strategy. Is your goal awareness or is it book sales? Those are very different things—both important, but they require different marketing tactics.

Let’s start with social media ads. These are not very effective at selling books, and they are getting more and more expensive. Why are they ineffective? Because when I am scrolling Instagram, I am busy looking at photos of my friends and tutorials from influencers. I am not thinking about buying a book in that moment and am not in the mood. Save your ad money for places like Amazon or another bookseller site—or for websites like BookBub that email subscribers good deals on books. Those ads will target readers right when they are looking to buy a book, thus will have a better conversion rate.

However, if your goal is not book sales, but platform growth, then social media ads are very effective. So if you just need a little boost in followers, then go ahead and take out an ad on the social media platform of your choice.

Another marketing tactic I find unnecessary is the trend of “writing to market.” This is when an author researches the topics and genres that are currently popular and then writes their book along those lines. It’s meant to be a way to “crack the code,” per se, of writing a bestselling book. And it could work if you are a very fast writer. But trends are changing faster than ever before and the market is bouncing around like a ping-pong ball. So getting your finger on the pulse of what is truly popular is difficult to do. I recommend writing the book you want to write, the one that keeps you up at night. Because the more you love your book, the more that love (and excitement) will be noticed by others.

When an author publishes with a publishing house, what is their responsibility in terms of marketing?

This varies from publisher to publisher. It also varies based on how valuable an author is to their publisher. Traditional publishing can be very unfair and biased when it comes to marketing, I’m afraid. If you are a publisher’s golden goose, they are going to fully take care of you so you can keep laying them golden eggs. But if you are a debut author that they are taking a risk on, the marketing support is going to be more limited for you.

The most important thing you can do in a traditional publishing deal is communicate well. Make sure there have been discussions—ideally in writing—about which party is going to do what. And don’t be afraid to nag or remind them of what they promised to do if you notice they aren’t fulfilling their end.

Typically, though, at bare minimum a publisher will distribute ARCs (Advanced Reader Copies or Advanced Review Copies of your book) to media and trade magazines, they will reach out to their media contacts list requesting feature interviews or their bookstore list for reading events. This could be personalized emails to those contacts on your behalf, or as basic as a mass email blast listing all their upcoming titles for the year. You don’t really know how hard they are going to advocate on your behalf, so it doesn’t hurt to follow up to some of those known bookstores or reporters yourself, too. In fact, it can only help your odds because it will remind the reporter about you and increase your name recognition in their mind.

Regardless of your publishing house, it is always the author’s responsibility to do any direct-to-consumer (or direct-to-reader) connecting. This could be through social media, a newsletter or blog, a podcast, etc. The way in which your nurture relationships with your fans is all on you.

Do you have any tips in particular for authors who are publishing for the first time or only publishing with Amazon KDP or another print-on-demand service? What are some tips to help your POD book get found on Amazon?

Amazon wants to make money off your book. But their best chance of making money is to push the titles that are already selling because there is some safe, “guaranteed” popularity there.

So if you want to stand out from the noise on Amazon—and have Amazon’s algorithm organically feature your book to new audiences—you have to prove that your book is popular through reviews. You need to convince your audience to not only buy your book, but to then leave a review once they have finished it.

The other important way to get Amazon to notice your book is to make your book available for pre-order before it launches and focus substantial marketing effort to convince readers to buy in that window. A bunch of early sales gets the attention of Amazon’s algorithm and they will then favor your book in hopes to keep making money off of it.

Can you share any tips for getting Amazon reviews and Amazon preorders, since these seem to be central to being successful with Amazon sales?

The key to success with Amazon reviews is to concentrate on them early. Although no one can leave a review until your book is live, you can start preparing to get reviews during the pre-order phase or when you are sending out ARCs (Advanced Reader Copies or Advanced Review Copies of your book). I like Book Sirens , which distributes your ARC to interested reviewers whom you would otherwise have no contact with. They are fully compliant with Amazon's Terms of Service and are very affordable. But you need to submit to them before your book is officially launched. So it requires some preparation. There are other services you can use that connect you to book influencers on social media. These influencers usually also post their review to Amazon and Goodreads (if they don't, just ask them to!) The service I have used is Book Influencers. However, this is also paid and will end up being more expensive than using Book Sirens. So it always helps to be "on the ball" and start working on this stuff as early as possible.

Of course, don't forget to just ask your current fans and friends to leave a review: make social media posts about it, newsletter topics, etc. And if someone mentions liking your book, follow up with them and ask that they leave an honest review on Amazon. I don't recommend immediately begging for a review the minute they give you a compliment—that can come off as desperate. But maybe a day or two later, send them an email saying "Hey, I was thinking of your kind words about my book. I really appreciate your feedback. Would you be willing to leave an honest review of your thoughts as an Amazon review, too? That would mean so much to me."

Sometimes my clients even ask for reviews on the final page of their book or journal. Depending on the genre, this can be effective, too!

Do you think book merchandise or swag is worthwhile to create? If so, what works best?

This also depends on your goals as a writer, as well as your genre. Some audiences adore swag, while others would never consider purchasing it. Knowing your audience is key to understanding if it’s worth it for you.

The other big piece to consider is what your goal with the swag is. Swag makes great pre-order bonuses, which encourage more pre-order sales and can help you get the attention of Amazon or land bestseller lists. So even if you don’t make your money back on the swag, if it increased the number of pre-orders enough to open new doors or hit important goals, then the expense was worth it.

I also think swag makes good “awareness” marketing—meaning your goal is not book sales, but just to get your name out there in people’s minds. But when you are choosing swag for awareness, keep in mind that you need to find products that are both useful and long-lasting.

I do not recommend bookmarks or stickers. Paper products tear too easily, only to end up in the garbage shortly after they’ve been given away. Those things don’t last long enough to get you a good ROI (return on investment). Look into things like pens, t-shirts, tote bags…things that people would use regardless of whether or not they like your specific swag. For example, your t-shirt might not be the favorite shirt I own, but I will probably wear it anyway, even if it’s just on laundry day.

My favorite swag is pens. They are cheaper than t-shirts or tote bags, but very useful. Until the ink is dry, no one throws away a pen!

Agreed! I recently had to go out and buy a bag of everyday pens because some swag pens that had served me for almost a decade all started to die at once!

Thank you so much for everything you have shared about book marketing! Where can my clients/readers find out more about you and learn more from your marketing insights?

They can learn more about me at emilyenger.com. I have a free download they can get titled “7 Book Marketing Activities You Can Stop Doing Today.”


Thanks for reading this post about book marketing! For more marketing insights, follow Emily Enger! Check out these ideas for journal marketing and how to use the final page of your book for marketing. Dig through my case studies for more ideas (search for the word “marketing” — most of my featured authors have shared their best marketing tips!)

A Non-Fiction Book Copyright Page Template for Self-Publishers

Authors often contact me about where to get an example of text to put on their copyright page. Editor Chandi Lyn gave me this template for a Non-Fiction book copyright page, which you can copy and paste and update to suit your book. Your book may require less or more information than is included here.

The copyright page of your book usually appears on the back of the title page, and contains your book’s copyright notice, publisher notice, edition notice, copyright restrictions, credits, your biographical record, legal disclaimers and any third-party permissions. The following text can be centered or left aligned on the copyright page.


Publisher Information
(If you are publishing under an imprint, include Name here.
Contact information for the publisher is optional.)


Edition Notice
(“First Printing” or “Second Edition”)


Copyright © (Year Published) by (Name Here)


Cover Designer (Name Here)

Illustrator (Name Here)

Book Interior Designer (Name Here)

Editor (Name Here)

Photographer (Name Here)


ISBN number (Number Here) [Purchase here]

Library of Congress number (Info Here) [Request here]

Printed in (Country Name Here)


Author’s Note

No part of this publication may be reproduced, stored in a retrieval system, or transmitted in any form or by any means, electronic, mechanical, photocopying, recording, scanning, or otherwise, without the prior written permission of the author.

This publication is designed to provide accurate and authoritative information in regards to the subject matter covered. It is sold with the understanding that neither the author nor the publisher is engaged in rendering legal, investment, accounting, or other professional services. While the author has used their best efforts in preparing this book, they make no representations or warranties with respect to the accuracy or completeness of the contents of this book and specifically disclaim any implied warranties of merchantability or fitness for a particular purpose. No warranty may be created or extended by sales representatives or written sales materials. The advice and strategies contained herein may not be suitable for your situation. You should consult with a professional when appropriate. The author shall be liable for any loss of profit or any other commercial damages, including but not limited to special, incidental, consequential, personal, or other damages.


Third-Party Permissions

If you’re reprinting content under copyright from third parties, this info should appear at the bottom of your copyright page, after the Author’s Note. You must first obtain written permission from their publisher. You’ll need to contact their publisher’s rights-department in order to make this request. Keep in mind that reprinting grants are a source of revenue for publishers, so expect to be asked for payment. Here’s an example of a permission grant:

Our deepest fear…” from A Return to Love by Marianne Williamson. Copyright © 1992 by Marianne Williamson. Reprinted by permission of HarperCollins Publishing, Inc.


Please do your due diligence to make sure that your copyright page includes the details and information that you need for publishing a book in your state/country. We accept no legal liability for the content of this copyright page. If your book is particularly complex, I suggest talking to a copyright lawyer.

Why You Can’t Afford NOT to Work with a Professional Editor

One of the most common problems new authors face is knowing whether their manuscript is really ready for design and layout. Inevitably, they send their work off to be designed but still wonder if their manuscript really was as finalized as it should have been. But rest assured. I am here to help. 

One of the most important things to do before formatting and design is have your manuscript (including all endnotes, footnotes, appendices, etc.) professionally copy edited and proofread. Most new authors skimp on professional editing and proofreading either because they don’t think they need it, or think they can’t afford it.

I bounced some questions off of Chandi Lyn, an editor who regularly helps first time authors get their manuscripts ready for publication, to help authors understand why neither is true.

Photo credit: iStock

Julie: I occasionally come across a first-time author who does not understand the value of hiring an editor. How would you explain how essential an editor’s services really are to an author? I mean, they can write, right? Isn’t hiring a proofreader to fix a few comma errors here and there enough?

Chandi: First, writers should do a little reading on the differences between editing and proofreading. This will save them money and time. You don’t need a proofreader until the very end of your project—right before formatting and designing. You need a developmental editor at the beginning. And a line and content editor in the middle.

Anyone can write. But most can’t write well—at least not on their own. As the writer, the creator of your masterpiece, you know everything. You know the characters and plot. You know your advice and expertise. You are too close to be objective and really see your creation through your reader’s eyes. A great copy editor can draw your attention to things you didn’t know you needed to address. They can fix character flaws, point out that copywriting and copyrights are different, save you some unwanted criticism for poorly-worded phrases. And your copy editor will point out that if your character has blue eyes on page one, they must have blue eyes on page 75—unless you have a really good reason for the transformation. A great copy editor will also let you know where you are breaking with your target audience—where your writing is causing you to lose credibility and the trust relationship is weakened. 

Copy editing is more than just fixing a few commas and running a manuscript through spell check. It’s making sure that your message is being communicated effectively.

How can an author actually save money in the long run by hiring a copy editor earlier on in the manuscript preparation process? 

Right now I am working with an author who had their nonfiction book designed and their cover art finished. They were ready to go to print. Then someone noticed an error. Then another. And another. This author hired me to proofread. After completing the project, I let the writer know of some major issues in their manuscript. I gave them clear feedback and they said they had “wondered if this wasn’t an issue.” This writer had used friends and colleagues to edit for them. The advice they received was wrong. Now we are doing a full overhaul of this book. All the way back to the chapter outline stage. There is no way around it, all of the book design and layout will have to be done again—though they can keep the cover art. This writer would have saved thousands of dollars and months of work if they had hired a professional from the beginning. 

Even when you are at the developmental thoughts-in-your-head stage, talk with an editor. When you draw up your chapter outline or character traits, talk with an editor. These critiques and brainstorming sessions are inexpensive and will make your writing stronger. And if you can start with stronger writing, you will have fewer edits and revisions—that saves time and money. I have prevented a lot of bad plot holes, developed nonfiction book layouts that actually make sense, and saved my writers a lot of frustration by being involved early in the process. Once a plot hole is written into the book it’s much harder to adjust.

How important is it to have an editor who has experience with your particular book’s subject matter? I have noticed that sometimes editors give significant feedback about the content of the book (ie: the appropriateness or veracity of the content), well beyond just fixing sentence structure here and there.

Editing is all about making sure you are communicating your message clearly. If you are writing for an expert audience with lots of industry lingo, you need an expert copy editor who knows the industry. If you are drafting a terrifying thriller, you need someone who knows the obligatory scenes of your genre and has a myriad of ways to describe ice running through your veins—don’t use this line, it’s not good. While I am a general factotum, I shouldn’t copy edit a textbook on phlebotomy—though I could proofread one. 

Find a genre-specific copy editor in the beginning of your project. Get all the advice you can as they critique your plot, characters, and outline. If they are too expensive for general copy editing, it’s ok. There are some fantastic editors who are multi-disciplined—like me—who can provide excellent service.

I recently had a client bemoan that she had paid a significant amount of money for editing and still did not have the final product she had hoped for. How can first time authors avoid expensive mistakes like this one? Does an editor guarantee their work somehow?

That’s frustrating for her and, unfortunately, it happens a lot. 

Let me answer the second question first because it’s the simpler response. There is no guarantee. 

On sales: You can have the most incredible literary masterpiece the world will ever know and never sell more than a few copies to your friends and family. Ultimately it all comes down to marketing, audience purchasing patterns, and whether you are connected to the right people. If Oprah is your mom’s best friend, you might be ok. 

On writing: An editor’s job isn’t to change your writing. We help writers to write better and point out what’s wrong and what’s right. We can’t make you accept our edits or suggestions, nor should we. A great copy editor should be invisible in your work. What your work looks like is ultimately up to you. It’s your name on the cover, not mine.

Now, how to avoid hiring an editor and not getting what you want in return. Whew. This is a big question.

First, ask around. Good copy editors have a reputation and you probably know someone who can point you in the right direction. If you are hiring someone on a freelance platform, be clear in your job description. What is your genre? What is your deadline? What is your word count? Being specific will help you attract better matches for your manuscript. Once you have some editors to interview, look at their client feedback. See what their clients are really saying about them. Phrases like “They turned in their work on time” that aren’t followed up by something like “And I would definitely hire them again!” can be a red flag. Ask lots of questions. “Do you use Grammarly?” should be your first one. If they do, let them know that you will know if they just run your book through Grammarly and call it copy editing. This does happen and there is no excuse for it! There is no program currently on the market that can do what a human brain can do. I have had some clients hide a random word in their manuscript just to see if I found it.

Second, be clear with your editor. Tell them exactly what you want them to do. They will tell you whether they can. (I don’t edit and proofread at the same time unless it’s short like a social media post or email.) Most writers want their work edited using track changes (MS Word) or suggestions (Google Docs). They want to see every change. Some writers want their editor to just fix what’s wrong and don’t care about seeing the changes. If you are expecting your editor to rewrite your book, tell them—then be prepared to share the author credits. Be clear. Be communicative. Be open about what you don’t know and let your editor help you through the process. 

Third, ask for a test edit. Many editors will do this for free, but you should offer to pay for it. Before agreeing to any contract I ask the writer for a few pages of their work. I want to see the quality and style of their writing. Then I return those few pages with my edits and suggestions. This way they can see my style and opinions. It weeds out a lot of grumpy clients who can’t handle being truly critiqued and bad editors who just pretend to edit by using Grammarly.

Fourth, if you are really concerned, start with a small project. Hire an editor to run some articles you wrote. Or a short story. Don’t go straight for the 84,000 word masterpiece. I have a client who hired six editors to work on articles to find the right one to edit their major works.

Do most editors and proofreaders work on a per word or per hour basis, or a set project price? How can an author be sure that they are paying a fair price?

I think all editors should charge per word or per hour. Sometimes an editor will agree to edit a book for a set price not realizing that the book is 150,000 words. I had a client hire me for a set-price project. What was supposoed to be a 40,000 word book turned out to be 80,000 words. I told them to either double my rate or find a new editor—of course in a much more professional way. I personally prefer per word price for long form copy (think books) and hourly for short form (think articles and social media posts). 

The industry standard for copy editing is $0.02–0.05 per word. You can always offer to pay less than this but you won’t get quality for cheap. I had a potential client ask me to edit their book for $0.0015 per word. This is so low it’s way below minimum wage for skilled work. They understood that but defended their position by saying they were offering consistent work. I responded that so was the grocery store but for more money.

If you expect expert work—or even intermediate work—be willing to pay for it. And if you think hiring an expert is expensive, try hiring an amateur. (Not my quote, but good advice.)

I notice a significant difference in manuscripts from experienced authors vs. manuscripts from first-time authors. Experienced authors understand how important it is to have a polished manuscript to give to their designer. How many errors would you consider normal for a proofreader to find after full layout and design?

A good proofreader should identify the majority of your errors. Some suggest one error per 1000 words is acceptable. Others say three errors per 10,000 words. I encourage my nonfiction writers to hire a few proofreaders—hoping more eyes will catch more issues. My fiction writers typically only go through one round of proofreading. Always have your proofreader use track changes or suggestions. Don’t trust them to proof properly. I had a client whose proofreader changed woke to awakened. Awakened was grammatically correct but wrong for the message being conveyed.

You mentioned once that every book has a few errors even in the final print. Is that really true? How many errors might be normal to find in a printed piece that has been professionally edited and proofread?

It’s quite normal for books to go to publishing with some errors. If you buy the first printing of a book you will likely find some—though some of those may be reader errors, not writer errors. And spell check doesn’t catch everything. It’s just how it goes. Not everything is perfect. And if you try to make it perfect, you may end up editing your work to death. At some point you have to say “This is good enough.”

What’s the worst thing a writer can do when going through the editing/revising process?

Once your editor has done their work, don’t make major plot, character, scene, chapter layout changes. This is the worst thing a writer can do. This usually happens after edits and revisions are complete and the writer has let family and friends beta read their book. They get so many new ideas that are sometimes pretty awesome—usually not great—and they just have to add them! Then they send the book off to proofreading not realizing that these changes cause cascading effects for the rest of their book. The chapter transitions may not work now. The character is inconsistent now. The pace and flow will be off. If you must make significant changes after edits and revisions are complete, you need to be willing to pay your editor to review the book again.

Any final advice or thoughts?

Hiring a copy editor is essential. And this person shouldn’t be someone who is emotionally involved with you in any capacity. As an editor, my job is to make you look good, not feel good. I can’t be honest if I am worried about your feelings. Your parent/child/SO/spouse/friend isn’t objective. Of course they want your masterpiece to hang on the fridge. We all do. 

Someone recently gave me some great advice: You never know when your work might go viral. So write what you want to be known for. If you don’t like YA fantasy, don’t write it, even if the marketing professionals tell you this is what’s selling.

And just have fun! If you have a book somewhere in you and you just can’t help yourself, put in the time to do it right. Put in the effort to do it well. It can be brutal soul-sucking work! But it’s worth trying. Who knows, you might be really good at it.


One of the most common mistakes my clients make is sending me manuscripts that aren’t really ready for design and layout. I appreciate Chandi Lyn’s willingness to help you understand how essential it is to get your book copy edited. She has helped various clients of mine polish their messages and truly be ready for design and layout. If you are looking for an editor who will tell you the truth about your manuscript and make you look good, give Chandi Lyn a shout!

How to Make the URLs in Your Book Look Good and Work Well

It is common (in particular for non-fiction books) to have a lot of URLs, whether in the endnotes, footnotes or resource pages. Here are a few things that can be done to clean up your resource list or endnotes so that the text in your printed book looks as neat and easy-to-read as possible! These are ideas that I’ve come up with or seen other authors and designers use over my 15+ years in book design.

Take off the https:// or even the www if you don’t actually need it.

Some (not every) URL will work just fine with www but without the https://.

If you can write:
www.mybook.com
or
mybook.com

instead of:
https://www.mybook.com
why wouldn’t you?

Note: usually for something more formal (where a certain kind of formatting is expected, like endnotes) you should keep the www. to make sure it’s clear that you are referring to a website. But for a marketing message or copyright page text that is directing readers to your website, dropping the www. might make for a quicker read for your audience.

Take the final slash or hash off of the end of any URLs.

Instead of
www.mybook.com/slash/
make your URL read simply:
www.mybook.com/slash
It’s neater, cleaner and easier to read quickly.

Some URLs also end in an unnecessary “#”, which can also usually be removed, just double check that the URL still goes to the page you’re expecting it to go to.

Replace obnoxiously long URLs with shorter ones that direct to the same place.

Sometimes if you followed a link on LinkedIn or social media, you may have been given a super-long URL, like:
www.mybook.com/ifoundthislinkonFacebook/00010001/longlink
Through a quick google search, you may find that there is a much shorter link to the same article, like:
www.mybook.com/longlink

Another option can be to use a service like Tiny URL to make a shorter URL for a web link. Long and complicated links that have hard-to-type number sequences are hard for a reader to follow (except in the ebook!)


Please note that this kind of clean-up should be done during the editing and proofreading process, before your book is designed and formatted. Often an editor will help you to create and format your endnotes correctly and consistently, if you have not done this already before submitting your manuscript to the editor.

When I receive a list of cleaned up URLs for design and formatting, here are some things that I do, to make the list present and work well. (When you work with me, watch to make sure I have done these things for your book, too!)

Make sure URLs are not hyphenated.

I always turn off hyphenation for Endnotes, resource lists, or similar, so that a link doesn’t end up with an extra hyphen that does not work. URLs already have a lot of hyphens in them, and it can be very hard to catch a hyphen that should not be there!

Depending on the look of the book, sometimes I even insert a soft return to force a URL to start on the next line, if I see that it is going to break over two lines. Sometimes it looks better to have two shorter lines of text than to have a long URL broken awkwardly over the end of a line.

Make sure body text with lots of links of different lengths is not left justified or full justified.

Generally body text that has lots of links in it should not be justified, because justifying lines of text that are not hyphenated and have long “words” like URLs can make the spacing look awkward.

Make URLs a different color or different font, or start them on their own line, to keep them distinct and easy to scan.

The book below has a fun tone and is full color, so I made the URLs brown to break up the solid resources pages in the back of the book. Please don’t make your links blue and underlined—the goal is not to make your text look like it was formatted in Microsoft Word!


Put a disclaimer about links in your book before press time.

It’s possible for you to proofread all of the links in your book one week and to find out even a week later that one of them no longer works. So this last tip is more related to the functionality of the links, than to how they look. I encourage authors of books with lots of URLs to put a note near the front of back of the book that says something like this:

”The internet is always changing and you may find that some of the links in this book no longer work. Visit mybook.com/links to be updated as to any changes to the links in this book that have come to our attention since the last printing, or contact me at author@mybook.com to let me know about any problems you have had accessing any of the references in this book.


Putting a book out into the world is an exciting achievement! And even more so, putting out a well-researched book with a helpful resource list! I hope this list helps your endnotes, footnotes or resource list be everything it can be. Let me know if I can help you get your book done: message me for a free consultation!

Can I Print My Book in Both Soft and Hard Cover with Amazon KDP?

Just a few months ago, Amazon KDP launched their hardcover print-on-demand (POD) book printing service. Previously most self-publishers who were wanting hardcover books used IngramSpark for print on demand printing, because Amazon KDP did not offer any POD hardcover services. But times have changed!

So, can you print your book in both soft and hard cover through Amazon KDP?

Yes, if you are using one of the sizes which they offer in hardcover.

As of this month, Amazon KDP offers sixteen book sizes in softcover, but only these five in hardcover:

  • 5.5" x 8.5" (13.97 x 21.59 cm)

  • 6" x 9" (15.24 x 22.86 cm)

  • 6.14" x 9.21" (15.6 x 23.39 cm)

  • 7" x 10" (17.78 x 25.4 cm)

  • 8.25" x 11" (20.96 x 27.94 cm)

They will probably begin to offer more if their POD hardcover service is successful, but for now, if your book is not one of those five sizes, you cannot print it in hardcover with Amazon KDP. Check here to see all the sizes IngramSpark offers in POD with hardcover.

Yes, if your book’s page count is between 75 and 550 pages.

This means that for a 32-page kids’ book, for example, you can’t print in hardcover. If your page count is between 75 - 550 pages, you’re golden!

Yes, but you need two different cover files.

The interior file for your hard and soft cover books can be the same one, but you will need two different front cover files, because a hardcover book cover is a different size and needs extra image around all edges to wrap around the board.

If you already know at the beginning of your project that your book will most likely be released in both softcover and hardcover formats, this is something you should tell me at the beginning of the project, so that the image I create for your cover has enough margin to wrap around all the sides of the book.

If you already have one cover file but need it adapted to suit the other style of cover, contact me so that I can see if I can adapt the files you have. It is best if we can work from the original, editable cover files (like InDesign or Photoshop files) created by your cover designer, but depending on the visuals of the design and the type of file your designer gave you, we may also be able to work from a print-ready pdf.

Book Planning and Timeline Information for Self-Publishers

I often receive questions from authors about planning which service providers they need for their book, and how to figure out their book timeline. The more complex their book, the more service providers are involved, and the trickier figuring out a realistic timeline becomes, especially if you’re self-publishing for the first time or creating a complex non-fiction book that has a variety of appendices or resource lists, passages in a foreign language, or lots of endnotes / footnotes / captions. I get questions like:

  • Does the proofreader look at the manuscript before or after design and layout?

  • When does the indexer work on the file?

  • How far ahead do I need to find and book an editor, proofreader, designer or indexer?

Photo by Thought Catalog

While every editor, proofreader, book designer or indexer works a bit differently, in this article I try to give a general idea of the timeline and order in which you will work with each.

The progression of book development, at least as it reaches it’s final stages, often involves the following service providers in the following order:

  1. Editor - The editor may help you with substantive or structural editing (higher level editing) or line/copy editing. They may also help you to create things like appendices, bibliography, resources pages, endnotes, etc. or at least check the content you have created for clarity, style and accuracy.

  2. Proofreader #1 - Depending on how complex the editor’s changes were to your file, you may want to hire a proofreader to go over the text with a fine tooth comb. Even though some editors proofread, it’s best to get someone different, who has not yet seen your manuscript, to look at it at this stage. Fixing typos after full design and layout gets very tedious (for me) and expensive (for you).

  3. Book Designer - Once the manuscript is completely polished, it is put into one, clean Word file and sent to me, the designer. Depending on what I have been hired to do, at this point, I work on cover design, interior sample page design, and full interior layout. (Note: front cover design can start while the editor is working, if title/front cover text is finalized. But usually I do not start on any interior design samples until the manuscript is completely finalized.)

  4. Proofreader #2 - I always recommend that a new set of eyes go over the fully-laid-out book cover and book interior at this point. Proofreader #2 is watching for regular typos but also for any layout errors, like an incorrect running header or page number. (At this point you should also read the whole book one more time, too.) This last proofread is especially important if you are printing your book traditionally (not print on demand), because once you have 500, 1000, or 2000 copies of your book printed, you really don’t want to find any errors in them.

  5. Book Designer (Again) - At this point, I make any final changes from the proofreader or author and create a file the indexer can use to create the index.

  6. Book Indexer - If the book requires a paginated index, at this point (once you are 100% sure the page positions or oder won’t be changing) the indexer begins the magic of indexing and provides a static index document (usually a Word file) for the designer.

  7. Designer (Yet again) - Once the index is ready, I insert it in the back of the book. At this point I create the final, print-ready book files, and then adapt the print book to ebook if required.


How far ahead should you book each of these service providers? And then how long do they each take to do their part? This depends a lot on the complexity of your book and how busy your chosen professional is. But here’s an idea:

  • Editor: Book 2-3 months in advance, and plan at least 1 month for editing.

  • Proofreader: Book 1-2 months in advance, and plan at least 2 weeks for proofreading.

  • Book Designer: Book 2-4 months in advance, and plan at least 3 weeks for cover design, 4-7 weeks for sample interior layouts and full layouts (depends a lot on complexity: think black and white autobiography with 10 photos vs. full color cookbook with 200 images and 50 illustrations.) Add 1-2 weeks for ebook adaptation.

  • Indexer: Book 1-2 months in advance and plan at least two weeks for indexing

There are many moving parts to coordinate with a book project, and every professional who works in this industry knows that self-published books may move at a slower pace than the author originally expected. It’s not uncommon that a client asks me to shift them a bit later on my calendar, which is usually possible! I currently have a complex non-fiction book that has been at the final proofreader for over a month, which has shifted my schedule, too. But as you can see from the list above, it is wise to plan for at least 4 months for editing, proofreading, design and indexing, and to start finding professionals well before you need them. So from the time that you think your manuscript is as finished as you can get it, plan at least 4 more months before you expect to hit print.

If organization is not your strong suit, you might consider hiring an assistant to coordinate all the parts and pieces of a large book project, or at least using an app like Tyme to keep your timelines, service providers and information organized!


FAQ about Cookbook Design and Layout

Cookbooks are one of the most complex kinds of books. If you’re feeling a bit overwhelmed with your cookbook project, you are not alone! One cookbook creator said to me, “Thank goodness that ignorance is bliss. We didn’t know what we didn’t know, or who knows if we would have been brave enough to take on this cookbook project! I’m a little overwhelmed with pulling this all together…” I have compiled some of the questions my cookbook clients have asked me, to help answer some of your questions, too! If you have more questions, just fill out the free consultation form to get in touch.

Photo by Brett Jordan via Unsplash

I have a cookbook that I really love. Can you copy the style of that cookbook for my cookbook?

I always ask to see some of your favourite cookbooks and also some cookbooks from a similar genre (cookbooks that might sell next to yours) before I start designing. You may not have the words to describe the style that you like, but when you show me visuals, I can find the common theme flowing through all of the books you like and come up with a design that has the same feel without directly copying someone else’s cookbook!

What size should my cookbook be?

Please read my article here about what size to make your self-published book. This is something that must be decided before design and layout can begin, and may be influenced by what printer or style of printing (print on demand vs. offset) you are using. Learn more about getting pricing or info from a book printer here.

Are my photos good enough for a cookbook?

If you are working with a professional photographer, your images should be high enough quality for a cookbook. But if you are shooting your own images, do lots of researching and practicing to make sure you are producing images that are high quality. If you want me to check the resolution of an image for you, or give an opinion on the quality of the photos themselves, I can do that. Learn more about how to shoot photos for a cookbook at this link.

Some of my cookbook images need editing, can you recommend a good photo editor with experience in food photography editing?

I know an excellent photo editor and can put you in touch with her. She does both Photoshop retouching (like removing wrinkles) or general editing (giving all of the photos in the cookbook a similar look and feel).

Do I need to have all of my files (text and images) ready for you to be able to begin working on my cookbook?

Usually a cookbook project starts with the cover design. If you have everything you need for the front cover, and a draft of the interior text and images so that I get a feel for the cookbook, I can design the cover. I can also create sample layouts for the interior (such as a few sample pages for each main page style, like opening pages, recipe pages, photo pages, article pages) before everything else is ready. But after the cover design and interior sample layout are done, I wait until all the remaining material except the index (which cannot be created until the print layout is fully finalized and no page positions will be changing) is completely finalized.

For some clients, I divide the project into two stages. Stage One is the cover and interior layout sample stage. Then they approach publishers with those samples, and when they find a publisher (or if they decide to self-publish) they come back for Stage Two, which is the full interior layout and design, spine and back cover layout.

If I want to print my cookbook in both soft- and hardcover, can I use the same pdf files for both editions?

As long as the page size of your book is the same, the interior files are exactly the same. The cover needs to be adapted for the two different cover editions, because the hardcover cover files need to be a lot larger to wrap around the hard board of the book cover.

Do I need an ebook version of my cookbook file? If so, what kind of file do I need?

Many cookbooks are released as ebooks as well, but that is not always the case. Research your target market and other cookbooks in your genre to see if they release both paper and e-editions or just a printed cookbook.

Should my cookbook ebook be fixed format or reflowable format?

A fixed format ebook would look just like your printed book visually. The format is “fixed”. This can be OK if the readers view it on a tablet or bigger screen, but if a person looks at it on a small screen like a phone, the text will be very small because the whole page will scale down to the size of the phone.

A reflowabale format ebook will reflow the text size, page size, image size, etc. to fit the size of the screen or device, but in so doing it loses the original formatting and it a bit more plain (think of a simple website, all the information is there but there is not a lot of fancy formatting.) If you look at this cookbook on Amazon and check the “look inside” feature for the Kindle (ebook), and then check the “look inside” feature for the hardcover (print), you will see how the Kindle book (epub) is formatted more simply. This is a reflowbale ebook.

I think the reflowable format is the best option for a cookbook because people so often look at ebooks on small devices and for ebooks, usually the content is more important to the reader than the visuals. More ebook adaptation information can be found here.

What does it cost to adapt a print cookbook layout to ebook?

It is not possible to give an exact price without seeing the complexity of the cookbook formatting, the number of images, the amount of front and back matter, etc. A wide range would be something like USD$400 to USD$800 to create an epub file from a print layout file that I have created. If I made the print files, then I know that I can make them into ebook files. However, if you are providing files I did not create, I have to check first if they are files that I can work with.

Do the cookbook files that you create belong to me in the end?

Yes, you own the rights to your cookbook files, both the pdfs and the editable (Adobe InDesign) files if you want them. Please be sure to request the editable files at the end of the project if you want them.

How to Transfer or Email Big Files for Your Book

If you are developing an image-heavy book and need to transfer a large number of photo or graphic files to me, especially tiff or psd (Photoshop) files, you will likely find that attaching them to an email will not be sufficient. Or you can attach them to an email, but only one by one (if you have more than a handful of images, please don’t send them one by one!) Here are fives ways to potentially get a folder of big files to me, for me to provide an estimate or for me to begin your book design.

Use a free file transfer service

There are various free file transfer services (usually they become “un-free” if your files are too big) and my favourite just due to easy of use is WeTransfer. All you need is your files, my email address and your email address. You should not have to create a username and password to use WeTransfer. WeTransfer is good for a “one-and-done” transfer, if you will be sending all the files all at once.

Ask me for a Dropbox folder link

The transfer method I use the most is Dropbox. I can email you a link to a folder that only you and I will have access to. Once you have that link, it may be as easy as clicking that link and pulling the files from your computer into your web browser and letting them upload. Or, you may need to create a Dropbox account (using your email address) if you don’t have one, but this is a straightforward process that just takes a minute or two. We can use the same folder link again if you need to add more images, or if I need to send you a pdf proof that is too large to attach to an email.

Send them via Google Drive

If you have a gmail account or are more familiar with Google than with Dropbox, you can use Google Drive to share files. This can be done for free up to a certain file size.

Get your photographer to transfer the files

If you are working with a professional photographer, the photographer will know how to transfer big files digitally. Connect your photographer directly with me and they can send me a download link.

Send them via mail on a hard drive or pen drive

Although sending your files via hard drive or pen drive is slow, it is still sometimes the most reliable and cos-effective way to send enormous, heavy graphics for your book. This is of course more efficient if you live in the USA like I do, but even when I lived in Europe, I had an American client send me his files this way. If you would like to use this method, just ask me for my postal address. 🇺🇸


Self-publishing an image- or graphic-heavy book is a significant endeavour. If you are still at the research and conceptualisation stage of your book, or don’t have all the images ready yet, I recommend booking a brainstorming call to discuss how to create your content and collect your files/graphics efficiently. If your book has lots of tables, charts and graphics, here are some pointers for achieving a professional look and feel to your book. If you are still collecting images and want to make sure you find images that are print quality (as some images are too fuzzy-looking when printed), try searching on these websites.

Editing and Proofreading Information for Self-Publishers

Sometimes when I receive a self-published manuscript to review for design, it becomes clear to me that the manuscript is not really ready for design. It has not been properly edited or proofread, and is lacking the polish it should have before design and layout begins.

I try to alert my clients when I see these kinds of problems in the text, but sometimes they forge ahead anyway, sure that the text is OK—or not willing to add more money to the budget to give their text a professional polish.

However, when a manuscript is not properly proofread or edited, one of two things happens, and neither is good: either the book is published with a lot of text problems (embarrassing, unprofessional, leads to bad reviews), or the client finally gets the book edited or proofread after layout (requiring extensive, expensive changes to the layout).

I don’t like to see my clients in either situation, which is why I contacted Adina Edelman from Edelman Edits to help me untangle some of the questions first-time self-publishers or authors may have about editing and proofreading. I hope the insights she’s shared here will make your book a better read and a better sell!

Do I really need to hire an editor or proofreader? I've gone over the manuscript many times myself. 

Before you buy a used car off someone (if you do that kind of thing), do you inspect it yourself and say it’s fine, or do you take it to your mechanic for a thorough check? Obviously, you let a professional handle it. They know what to look for to ensure that this car you’re spending money on will last the journey. It’s better to pay money now than to realize later on that you messed yourself over.

Listen, you are the author of your book. No one can understand it quite like you do. And no one has spent more time on it than you. But that also means your head cannot look at your writing objectively. Putting it aside for a time certainly helps, but nothing can compare to having objective eyes look at it—eyes that have been trained to see what needs improvement and fixing. I’m not just talking about grammar and spelling. Editing is much more than that. There’s voice, structure, consistency, theme, showing vs. telling, and so much more.

The idea of paying for an editor or giving over your precious writing to someone can be difficult. But you don’t want to regret anything down the line. Your book deserves to be handled by a professional.

Do I need to hire both an editor and a proofreader? What's the difference between editing and proofreading?

This is a question many new authors have, and it’s an important one. A good editor is not cheap. Do you really have to hire an editor and a proofreader? Like, really?

Here’s what a proofreader does: quality control. A proofreader looks through the book after it’s already gone through rounds of editing. The manuscript at this point should be 95% clean—almost no mistakes. The proofreader catches the little errors that slipped through the previous rounds of editing, ensuring a quality book. Having a proofread after it’s been typeset is really helpful; the proofreader can see what the content looks like when everything’s been laid out and thereby catch mistakes that cropped up during typesetting.

So yes, it’s really important to have your book both edited and proofread. Sure, the proofread seems like an extra expense, but it’s really not. You’d be surprised by the blatant errors proofreaders catch. Again, your book deserves professional treatment.

Can one person both edit and proofread my book, or should I hire two or more different people? What are the pros and cons of each approach?

The ideal is to hire two different professionals, as the proofreader will be looking at your book with fresh eyes. They might catch things the editor, who’s been doing in-depth editing, might have missed. It’s always good to have more eyes before your book is published.

There’s also the fact that not every editor also proofreads. They really are different forms of the editing process. However, some writers don’t want to deal with finding another professional. It might be more expensive than sticking with one editor. It might just be more of a pain. They might be on a time crunch.

What I will say is that if you choose to use your editor to proofread your book as well, make sure there’s a good amount of time between the editing and proofreading. Perhaps you’ll have it typeset in between to create some space. But make sure there’s a good two to four weeks for the editor’s brain to reset.

Personally, I offer editing along with proofreading for the convenience of the author, but I use the above approach. I make sure there’s time in between. I also always suggest that the writer find a different proofreader, as that’s really the ideal. And what I’ll never do is developmental editing, line/copyediting, AND proofreading on the same manuscript. By the time I hit the proofread, my eyes would definitely overlook things.

What's the best way to find an editor or proofreader for my self-published book? How can I know that a particular editor or proofreader will do a good job? Do editors have specialties? 

It’s very easy to find an editor or proofreader. You can check the Editorial Freelancers Association or ACES: The Society for Editing to see their lists of professionals. You can do a simple search on LinkedIn.

The hard part is finding a good, professional editor for your book. Jane Doe might be an amazing nonfiction editor, but she wouldn’t be amazing for your sci-fi novel. Or you may be looking for someone with years of experience to help you know if your book is marketable. There are also different types of editing, and the one you need will determine whom you should hire. Editors have specialties, and you’ll likely want to hire one that works in the areas you need.

Overwhelmed yet?

Here’s a simple plan:

Do some searching. Make a list of five editors who work in your genre (whether its literary fiction, medical research, or romance) and message them. Explain what your book is about, the word count, what editing you think it needs, and what your timeframe is.

A professional editor (who has availability) will likely suggest a call or a sample edit.

The sample edit is SO important. This is how you see whether the editor will do a good job. The sample allows you to see their editing style, and it allows the editor to see your writing style. More importantly, it shows the editor what kind of editing your book needs, how much that would cost, and how long it might take. Do not hire an editor without seeing a sample edit. That’s asking for trouble.

The first step is to always reach out. If that particular editor says they can’t take on your book, perhaps they can suggest a colleague who’d be a better fit. It’s a matter of networking now.

At which stage in the book writing process should I first get in touch with an editor?

You’ve finished your manuscript. Hurray! Now is a great time to set it aside for a month or two (or three) and then come back to self-edit before you send it anywhere.

During that wait time is when you reach out to an editor. First off, many editors don’t have immediate availability. So waiting until your book is (in your opinion) totally ready for editing will only result in more waiting.

Second, in that sample edit phase, the editor may point out some major things that need work—things that would push off the editing process anyway until you make those big repairs. It may be that your book actually needs a book coach to smooth out the basics before it’s ready for editing.

Writers often have a mindset of “Let’s start the editing NOW,” but their books or their editors might not be ready for that. This is something you should be prepared for. Reaching out during that downtime is a great way to determine how much more work your book needs and when you might actually begin the editing process.

How long does it usually take for an editor or proofreader to go over a manuscript?

This will depend on the editor, the type of edit, the word count, and the writing itself. So . . . there’s no simple answer. :D

A proofread should take the least amount of time. (Because, as I said above, it should be 95% clean.) A 50,000-word proofread will usually take me about a week if the writing is interesting and engaging. (Yes, that makes a difference.)

A line edit/copyedit takes me the most time because of the in-depth nature of the edit. A 50,000-word copyedit will usually take me two-and-a-half or three weeks.

A developmental edit of the same length would take about two weeks.

But again—there are so many factors at play here, which is why getting a sample edit is so helpful. That gives the editor an idea of how long it will take to edit the whole book.

What does it cost to get a book edited or proofread? 

Every editor has her own process for this. Some price by word, some by project. I do the latter, as I feel that’s the most beneficial for both parties. But to give you an idea, a 50,000-word copyedit might cost $1,500. I would suggest looking at the EFA’s rates page so you understand the range that’s out there. That will help you know how much to save up for a professional edit.

Does an editor or proofreader usually get credited in a book? If so, where is the credit line?

This is up to the author. If you choose, you can credit the editor/proofreader in the acknowledgments. (We do a happy dance when you do this.)

Is there anything else you’d like to tell self-publishers about editing or proofreading?

Remember that an editor is there to help you. Any critique or suggestions are made for the book’s benefit; it is never a personal statement on the author. Remember that the book always remains yours. You are in control of every decision. Accept or reject an edit as you feel is best for your story. Just keep in mind that the editor wants this book to be great almost as much as you do, and they’ve been trained to make it so. The editor is your guide through this refining process. Let them help you make your book shine.


Adina Edelman is an editor based in Baltimore, Maryland, USA. She runs her own editing business for authors and small publishing companies. Her editing style comes down to two things: honesty and value. Learn more about her developmental editing, copyediting and proofreading services here.


Do you have more questions about editing, proofreading, book design or book interior layout? Feel free to send me a note and I’ll do my best to help you, or to connect you with someone who can help you!

Publishing a Book with Lots of Tables, Charts or Graphics

If you're working on a book that has a lot of tables, charts or graphics, it's best to talk to your book designer sooner rather than later to figure out the best way to create or supply those graphics. Here are some of the common problems I see when checking files from authors, especially when they are publishing (or self-publishing) for the first time.

Photo by Anthony Tran on Unsplash

Graphics that have been used illegally.

This should go without saying, but graphics that you did not create yourself should be used with permission. This sometimes means you need to find the original source of the image and buy it, other times you just need to give an attribution in a caption or on your copyright page. If a colleague or friend made the graphic, you can ask if they want to be credited. But please, don’t use photos, graphics, tables or charts that you did not create without permission and attribution, if required.

For example, one of my clients wanted this image that she found online in her book, but did not know the original source and did not want to risk using it without permission or attribution:

graphics for self published book.gif

I built her a similar graphic using the fonts and graphic style that we were using in the rest of her book:

how to prepare images for book.png

Graphics that are too low resolution for print.

Graphics that have been pulled from Google images or that have been passed around on the internet are often too low resolution for printing. You can usually tell if the image is low resolution by checking the file size (the smaller the file size, it is less likely it is that the quality is good). Another way to tell is to zoom in on the image on your screen and see if you quickly begin to see a rough, pixelated edge to the graphics. This is not a good sign!

Your book designer will ultimately need your graphics as separate files (not just placed into a Word file) and it can save your designer time and you money if you provide them as individual, clearly-labeled files that the designer can easily insert one by one into your book. (Any graphic that has been placed into Word has lost quality; your designer will want to work from the highest quality file you have!)

It is especially important that graphics that have text in them be crisp and easy to read. This client had this low resolution graphic:

Screenshot 2021-08-18 at 21.15.27.png

I kept the same content but made the text crisper and adjusted the greys to work well in print:

Screenshot 2021-08-18 at 21.15.45.png

Graphics that are not understandable in black and white.

This is important if your book interior is going to be black ink only (grayscale). If you have graphs or tables that can only be understood because of the colors on them (such as: the pink slices of your pie chart represent watermelon, the red sliced represent strawberries), you either need to rebuild them to be understandable in black and white (such as using a dot pattern vs. a checkered pattern to show the difference between two slices) or get your book designer to rebuild them for you!

For example, the distinctions between the different shades of purple on this graph were not understandable in black and white, so we had to add some patterns to the graph and the key:

Figure 2.png
Screenshot 2021-08-18 at 21.34.32.png
Screenshot 2021-08-18 at 21.31.15.png

Graphics that don’t match.

It is often the case that graphics for a book have been collected from a variety of sources and don't match in style or format, giving the book a messy, unprofessional feel. If you want your self-published book to compete with a publishing house’s book—or to catch a publisher’s eye in hopes of getting a book deal—you need to make sure the graphics have some kind of commonality to them: this might be as simple as making sure they appear at the same width and height with the same styling (such as a black border around them and an italicized caption under each one) or might be more complex, requiring redrawing them in design software to make them all have a similar feel.

Graphics that don’t fit the proportions of your book.

It is sometimes the case that a full-page graphic does not fit well to the proportions of the book. In this case it may need to be reworked to fit inside the margins of your book.

I took this complex, oblong graphic:

Screenshot 2021-08-18 at 21.17.46.png

And reworked it to fit the format and match the fonts and style of the book:

Screenshot 2021-08-18 at 21.18.08.png

Graphics that are not editable (but could be).

If you are creating tables, charts or graphics yourself, it is good to talk to your book designer about what format would be best (jpeg? pdf? tiff? ai?). For example, many people create graphics in Powerpoint or Canva and give them to the book designer as jpegs. However, giving them to the book designer as pdfs might be better, because often that means the designer can edit different parts of your graphics (especially text/fonts) more easily. This saves your book designer a lot of time if they don’t have retype text or redraw graphics, time he or she can better invest in styling the look and feel of the graphic to match the others.

For example, my client drew this graphic using Google’s suite of tools:

Graphic created in Google Draw

She gave me access to the Google file, which I was able to export as a PDF. I used her basic design, but was able to use design software to edit the style and fonts so that they would match her book’s look perfectly. And I added a few fun graphics suiting the theme for good measure!

cleaned up graphic for self published book.jpg

Talking through your needs with your designer ahead of time can save you a lot of time and money! Sometimes authors contact me months in advance of their book being ready, just to talk through the best way to collect or create their images. If tables, charts or graphics play an integral part in your book, consider booking a brainstorming session with me or at least email me your questions before you create all your graphics. This can potentially save you—and me—days of work! Here’s to your complex book, and making it as neat, beautiful, and readable as possible!

How to Use the Final Page of Your Book for Marketing

The final page of your book offers a great opportunity for a bit of marketing or self-promotion. This page can come after the about the author page, and faces the inside back cover. It can be a great place to ask for reviews, share links or hashtags, encourage readers to place another order (of a journal or similar product) or buy another book from the same author or publisher.

Below I have some simple text-based template samples to help you make the most of this prime piece of real estate. Copy and paste a sample from below and tweak it to suit your needs, replacing the text in brackets with your own details! I will update this page as I come across new ideas for how to use the final page of your book to further establish your brand or name.

Photo by Stas Knop via Pexels

Photo by Stas Knop via Pexels

Sample 1

Thank you for reading
[your book title here]!

Please share your impressions on social media using the hashtag,
[your hashtag here].

Please visit [your web address here]
which features [list the cool stuff on your website here].


Sample 2

Thank you for reading [your book title here]!

Please share your feedback on social media using our hashtags and handles:
[your hashtags and handles here].

For a downloadable [cool freebie here] and additional resources,
or to book [your name here] to speak at your event
please visit: [your web address here]

If you enjoyed this book, please consider writing a review with your honest impressions on Amazon, Goodreads, or the platform of your choosing. Your feedback is incredibly valuable for helping independent authors like us to reach a wider audience.

[Your logo here]


Sample 3 (Journal)

[Your logo here]
Order your next journal at [your website here]


Sample 4 (Other Books or Resources)

Check out [author’s name here / publishing house name here] ’s other books / resources!

[Book title]
[Cover image]
[Book summary and ISBN]


[Book title]
[Cover image]
[Book summary and ISBN]

[Your website or other contact information here]


Sample 5 (About your Company or Non-Profit)

[Company or Non-Profit logo here]

[Mission Statement here]

[Summary of your offerings, resources or products here]

For more resources and events, go to:

[Your website here]

What Does a Printer Need to Know Give Me a Book Printing Price?

I give my book clients PDF files that are ready to send to the printer of their choice. But if you’re a first-time author, approaching a printer to ask for a price for printing your book can be a bit intimidating. What do they need to know in order to give you a price? Printers sometimes talk in their own special language: what is bleed, or CMYK, or perfect biding?

I reached out to Amanda at Priority Printing Ltd. in Edmonton, Canada (the book printer where I worked many moons ago) to ask her to help me to make a list of everything a printer needs to know to provide you with a basic book quote. The information in this post was provided by Priority Printing Ltd., and they’d love if you’d reach out to them for a book printing price.

Here’s what you should tell your printer, to get an accurate book printing estimate:

  • Quantity - How many copies of the book do you need? Usually the printer would like to know the minimum and maximum quantities you would be interested in, and quote about 3 different quantity options. Once the printer has set up your book and is ready to print, it doesn’t cost a lot more to print a few more copies, so the price improves as the quantity increases.

  • Page count - How many pages does your book have? If you don’t know yet, give an estimate, and ask the printer to update the pricing once you have an exact page count.

  • Dimensions - What size are the pages of your book? Some common North American sizes are 5.5x8.5”, 6”x9”, or 8.5”x11”. However, one of the perks of printing your book with a traditional printer (as opposed to a print-on-demand printer) is that you can virtually choose any size you want.

  • Binding - How will your book be bound? The typical options are:

    • Perfect Binding (for softcover books, most common binding style for most self-publishers)

    • Hard Cover Binding

    • Saddle Stitch (“folded” spine with stitches or staples to keep the book together, only works for thin booklets)

    • Plastic or wire spiral binding

  • Interior details:

    • Will the inside of your book print in black ink only, or in full color? (The printer might also call full color “four color” or “CMYK”, referring to cyan, magenta, yellow and black.)

    • What kind of paper do you want for your book? Uncoated paper (“offset” or “opaque”) is a great option for books with black ink only interiors; coated paper (gloss, semi-gloss, or dull) is great for a book that has a full color interior.

    • Does your book have “bleed”? This means, does your book have text, graphics or images that go right up to the edge of the page? If it does, your book needs to have “bleed”, and the printer needs to know that.

  • Cover details:

    • Will your cover print in full color or black ink?

    • Does your book have foil, emboss, or any other finishing effects on the cover?

    • What laminate finish would you like for your cover? This is a coating that helps to protect the cover paper, making it more durable. There are three basic options: gloss, matte or soft touch.

If you are not sure how to answer some of these questions, just talk to your printer. This is another privilege of working with a local or traditional printer, you should be able to talk directly to a customer service representative, asking your questions and getting any explanations or samples that you need!


Feeling like you’ve bitten off more than you can chew with your book project? Sign up for my “Book Done” Newsletter to hear stories and tips from other writers who’ve been in your shoes and gotten their books done! Or, looking for a book designer? Let’s talk.

How and When Can Endorsements Be Added To My Self-Published Book?

Having endorsements on the cover or first interior pages of your book can be a powerful marketing tool. But one question clients sometimes ask me when they are preparing their self-published manuscripts for design is how and when to add endorsements to their book. They have almost everything else ready to give to me to start the design, but the endorsements haven’t come in yet.

Do I need the endorsements before I begin designing? Or is there another way? I don’t have to have the endorsements before I get started, but I do need to know if you will be getting some, so that we can reserve space for them. You will need to specify where: front cover, back cover, or first interior pages. You can deliver them to me shortly before I create the final print-ready files for press.

There are two main options for how and when to start collecting endorsements from your reviewers, which I will share below. No matter which method you choose, if you are planning to approach reviewers and collect endorsements, start early to make a list of your potential reviewers’ names and contact information (e-mail or mailing address). This will allow you to quickly send out your draft for their review when it is ready!

Adding Endorsements to Self-Published Book.jpg

Give your reviewers the final edited draft of your book (pdf format) to review while your book is being designed.

In this scenario, your reviewers can be reading the book at the same time as I am designing it. My layout and design process often takes about 4 weeks, which means your reviewers could work on endorsing the book while the book is being formatted. This is the fastest way to get endorsements, because reviewers can be reading your manuscript while the book is being designed and no time is lost.

Around the time I am finishing your full book interior layout, your endorsements will be ready, and you can send them to me for insertion.

But depending how design- or illustration-heavy your book is, you might not really want to show it to your reviewers until the design is complete. In that case, consider the next option.

Give your reviewers an “advance reader copy” or “proof copy” of the designed book before it is fully released. (Plan about one extra month into your timeline for this reviewing stage!)

In this case, your reviewers will receive either a PDF or printed “advance reader copy” (ARC - also called “advanced review copy” or “proof copy”) of your book after it is fully designed. Print-on-demand companies like IngramSpark or Amazon KDP make it easy to send reviewers printed sample copies of your book through their website if you will be self-publishing with them; the sample printed books are marked “not for resale” or “advance reader copy” so that it is clear that they are not the final book.

Or you can easily distribute PDFs of your book by email. Note: usually in print-ready book files, the book cover and book interior are separate and pages are shown one at a time. But for reviewing on-screen, it can be nice to have the cover and interior files merged into one and the pages shown in spreads (two at a time) to simulate reading a physical book. You can let me know if you want a “reviewer” copy of your pdf, which I will make in this more screen-friendly format just for your reviewers.

If you are not on a tight timeline, this method has some big advantages, especially if you send your reviewers a printed sample, because they get almost the final book experience (holding the book, seeing the final design) and it’s easier for them to not forget that they’re owing you a review, when the book is sitting on their desk or countertop (and not lost in a pile of e-mails).

Once all the endorsements are in, you provide them to me, and I add them to the book and give you print-ready files that are ready for your book launch!


If you’re thinking about when to add the endorsements to your book, you must be almost ready to have your book designed! Read my other articles and then took a free consultation with me and let me help you get your book done!

What Your Designer Needs to Know to Design Your Book Cover

What does your book designer need from you to design your book cover and then to prepare it for printing? The path to publishing can be confusing, and I hope this article will lay out for you everything you need to consider—or the information you need to gather—to hand over to your professional book designer. Preparing everything your book cover designer needs ahead of time will save you and your designer time, and perhaps save you money, too!

This front cover was designed by Usman Saleemi for Eline Allaart. I made final adjustments to the front cover and then designed the back cover and spine to match the front cover.

1. For the front cover

In order to design a relevant and impactful cover, I ask my clients to fill out a questionnaire that gives me all of the information I need. Some of the main information I ask for in the questionnaire is:

  • The finalized book title (and preferably the subtitle, too).

  • A description of your book’s target audience.

  • Names of other books that might be targeted to the same audience.

  • Examples of a few book covers that you like and/or don’t like.

  • Cover dimensions (width x height) - designing a cover before this information is available is problematic.

I also like to have a one-page book summary that I can read to learn the main themes of your book.

If you have a particular image or graphic that you want to include on the front cover, provide this in the highest quality/resolution possible.

2. For the back cover

The back cover of your book will only be designed after the front cover design is finalized. Which of the following elements do you want to include, and do you have them ready? Don’t forget to see what other authors in your genre include on their back covers and decide how similar you want your back cover content to be.

  • Title, subtitle (sometimes included on a back cover, sometimes not)

  • Book summary text and possible subheading(s)

  • Any other photos, graphics or symbols (or the designer will suggest what visuals would be best for the back cover)

  • Author bio and / or author photo

  • Endorsements

  • Advertising copy (such as “More than 10,000 copies sold!” or “Now in its third edition!”)

  • Credit (sometimes a cover design, cover image or translation credit is included on the back cover)

  • Publisher or company logo(s)

  • Website or contact information

3. For the barcode / ISBN area

  • Barcode file: The file I need to place your barcode on the back of your book is preferably an eps (vector) file of the barcode. However, pdf or jpeg format may work as well. If you are working with a publisher, the ISBN and barcode file will likely be provided for you. If you are self-publishing, you will need to buy and access the ISBN and barcode files yourself. (If you are creating your book through a print-on-demand printer like Amazon KDP, they may include a free ISBN and barcode and may even offer to place the barcode onto the cover after it arrives at the printer. If this is the case, I don’t need the barcode file but I do need to know where the barcode will be positioned and its size. The printer should be able to provide a template showing this.)

  • Price: If you want the price included on the back cover and and it is not already embedded in the ISBN graphic, please provide the price (or prices, if it will be sold in different countries/currencies).

4. For the spine

To build the spine of your book, I need to know two things:

  • What content should be included? For the spine, the standard is to include the title and author name. If you want to include a publishing house logo or anything “extra” you should send the logo along in eps format or in the highest quality/resolution possible.

  • How wide is the spine? Spine width depends on the number of sheets of paper in your book and what kind of paper is used (every brand or type of paper has a different thickness). Your printer can only give you the spine size once you know exactly how many pages are in your book. If you are using a print-on-demand printer like Amazon KDP or IngramSpark, you can calculate the spine size yourself on their websites. If you are using a traditional printer, you will likely need to contact your sales representative and ask him or her. Either way, your book’s spine cannot be created until you send this information to the designer.


Ready to get started on your book cover project? Learn more about my book design service and start thinking through what you need to provide to make the design process run smoothly!

What Do You Call a Person Who Creates the Inside of a Book?

A first-time author who had a free consultation with me told me that she was well into her book-writing process before it ever occurred to her that she would eventually need someone to help her with preparing the interior of her book. She simply thought: I write my book in Word, and then it goes to print. As she was googling about book cover design, she found my website and realized that “book interior layout” is also a thing.

I understand her confusion, though, because everyone notices book covers, but many good book interiors are almost not noticed. Actually, that is exactly what makes them good: they provide such a smooth read that the reader is not distracted or confused by the layout and is able to concentrate fully on the message.

Another client expressed to me how hard it was for him to find someone to put together the inside of a book. First of all, he didn’t know what to call that person, so he didn’t know what to search online. It was a lot easier for him to find a book cover designer online than to find someone whom he trusted to set up the text and custom illustrations for the interior of his book. We discussed how some of the terms people use to describe book interior layout can be confusing, like “interior design” (search that and you’ll come up with interior design for homes) or “book design” (search that and you’ll probably mostly come up with cover designers).

Perhaps book interior designers have no particular term that they all use for their work because there are many routes to becoming a book designer. There is no one credential or association for people who design books. Some learned the trade as apprentices in a printing company or through an apprenticeship program in media. Some are self taught through online learning and reading books. Others went to university for some kind of graphic design program and somewhere along their career route realized that they loved book design and publishing.

I tried to think of all the terms I have heard to describe the person who designs or lays out book interiors. Some of these are out-of-date or very specific. But here is a semi-comprehensive list!

Book Designer

This is the term that I usually use when I tell someone in person what I do. It’s pretty easy to understand at least. If you search this term, you should find people who indeed, design books. But because some designers specialize solely in book interior design or book cover design, a “book designer” does not always create the inside of a book!

Book Interior(s) Designer / Book Layout Designer

This term refers specifically to someone who works on the interior look of books! Sometimes a book designer will have a section of his or her website for “interiors” and a section for “covers”. “Book layout designer” is perhaps not the first phrase that would come to a lay person’s mind to google, but is a good descriptor that narrows down to exactly what you are looking for.

Typesetter

The term “typesetter” is a technical term that comes from the pre-digital era, but is still used. Bookmakers used to literally “set” physical pieces of lead “type” in order to create words, sentences, paragraphs—and books! This term is still used today, and usually if you find someone who calls themself a “typesetter”, they are someone who knows their trade well and has a good understanding of the powerful details Adobe InDesign offers to make large typesetting projects manageable.

Editorial Designer

While an “editorial designer” may work more specifically with the design of magazines or periodicals, they may also work with other multi-page design projects, like book interior design.

Graphic Designer

Graphic Designer is a catch-all term for people who work with graphics. Many graphic designers may design books during their career, but if a graphic designer is more of a generalist, they may not know the finer details of typesetting and book layout. I recently read a book that I could see had been formatted by a “graphic designer” but not a true “book designer”. The way the spacing and indentation was handled made it clear that the designer had not created a lot of books in his or her lifetime.

Paginator

I only heard this term recently, but it’s a more technical term for someone who helps with layout (probably more production/technical than creative). This person might paginate chapter books but might also work in a newspaper or publication kind of environment, probably not setting up the original page design but maintaining the style throughout a long-form publication like a phone book (do those exist anymore?) or manual.

(Book) Formatter

The term “book formatting” is still a commonly used term. “Formatting” sounds less creative than “designing”, and formatting might often be a task assigned to a more junior designer at a publishing house or graphic design studio, to take the more senior designer’s sample design concept and make it work through the formatting of the whole book.

Desktop Publisher

This was a term that was being used when I first got my feet wet in design and publishing in 2005! I was an intern at a non-profit publisher and they offered me the opportunity to learn book design and graphic design on-the-job. But the term they were using at the time was “desktop publishing”—a term used to describe the small size and relative affordability of designing on a desktop computer instead of through the expensive commercial phototypesetting equipment that was used before book design was done as it is today, on desktop computers (source).

What do you call the person who creates the Inside of a book? Well, a lot of things! But terms like “book” + “interior” / “designer” / “layout” / “typesetting” should get you headed in the right direction to find the ideal book interior designer for your manuscript. Check out my book interior layout service page and see if I might be a good fit!

Can I Design My Own Book Interior in Word?

Sometimes I get an email from an author who has done her very best to format her book in Word and is just wondering if I can check her Word file and make a few small design tweaks.

For example, a month or two ago new author Elizabeth sent me her book file, which she had already formatted to a 6x9 inch page size (the final size of her book) and said,

I’m hoping I don’t need much layout help. Obviously I need help with the Table of Contents and Appendix, at least. Anyway, let me know how much needs to be done…
It doesn’t have to be perfect, but I would appreciate if it looked professional.

“Can I design my own book interior in Word?” The answer depends on how professional you want your book to look. If it’s a collection of family anecdotes for distribution to fifteen family members, Word will probably do (and will probably make sense budget-wise). But if you are wanting your book to reflect your professional abilities and perhaps build your platform as an author, speaker, or communicator, a book formatted in Word will usually not look professional enough.

For this particular project, Elizabeth allowed me to take the whole book from Word into my professional book interior layout software, Adobe InDesign, and format it with the more powerful tools that InDesign provides. I created this post to show you some of the clear visual differences between an author-designed book layout from Word and a professionally-designed book layout created in InDesign.

(By the way, I never, ever format books in Word. Therefore I also don’t go into Word to tweak files my clients have designed in there. You might find a freelancer online who is a Word expert who will offer to do this for you, but a professional book designer will work with Adobe InDesign.)


Book interior layout has a lot of small details to it that seem unimportant (after all, we all have access to Word!) but that in the end make a book somehow look clunkier and less relaxing to read. Overall, I took Elizabeth’s book font size down, changed the font, and added more leading (space between the lines).

(Click on any image in this post to see a larger version.)

One of the main things that makes it hard to make a book look professionally formatted in Word is the lack of control over things like where the text starts on the page. You can hit “return” or “enter” a few times to try to make a new chapter open lower on the page, but it’s hard to be sure that all your new chapters are opening in the same position. In professionally typeset books, new chapters often open lower on the page. One of the big differences between the Word layout and the InDesign layout of this book was the position of the chapter titles on each opening page.

When formatting Elizabeth’s books I also added footers with the page number and the book title or chapter name. This is easy to do in InDesign.

Indents, which are used to indicate that a new paragraph is starting, are not needed on the first paragraph of a chapter because it is obvious that a new paragraph is beginning. A book designer recognizes small details like this and cleans up the look of your book when importing it from Word.

InDesign has more powerful controls for making the Table of Contents look just the way it should. As you can see, Elizabeth was having trouble with formatting some of the longer chapter titles and knowing how to include the page numbers. The results from InDesign look cleaner.

Word also does weird (and sometimes ugly) things like automatically make your hyperlinks blue and underlined. This is unnecessary and is a sure sign the book was formatted in Word.

A book designer’s expertise can especially work to your advantage for complex formatting like in Elizabeth’s appendix. Word can get a bit hard to control when you have multiple levels of bullet points, tabs, indents, etc.

Even while cleaning up the formatting of the Appendix, I realized that the way the content was organized was not completely clear, and after my suggestions, Elizabeth went back and reworked her Appendix so that it was more understandable. This is another benefit of working with a book designer, is having another set of eyes go over your formatting / content and checking if it is organized as clearly as possible.

I think it is clear from the images in this post, that there is a dramatic visual difference between an author-designed book layout from Word and a professionally-designed book layout in InDesign. When looking for a book designer, be assured that a professional book designer does not work in Word; look for someone who will work in the industry standard book layout software, Adobe InDesign, if you want a professional final product!


If you’ve gotten this far in this article, you’re probably self-publishing! Check out my articles page to learn more about self-publishing and what it’s like to work with a book designer.

How Can I Prepare an Out-Of-Print Book For Reprinting Digitally?

The author of successful interior design book series wrote to me with a quandary: she’d like to re-release several of her most successful books through Amazon KDP (Print-on-Demand / POD) but her books were printed around 1997, before the digital age. She has no digital files for the photos or book layouts. The printer destroyed the film they used to create the print layouts before offering that she could purchase it. But some of the books are still selling well, and she’d like to reprint them. She wrote asking for an affordable, realistic solution for getting her books recreated and back onto the market.

What follows is what I recommended for her book, in case it helps any others who are trying to bridge the gap between an analog or pre-digital book and today’s digital printing / print-on-demand market.

(Also, note to all printers: don’t throw away an author’s film before asking him or her first!)

Photo by wu yi on Unsplash

Photo by wu yi on Unsplash


The analog book layouts need to be rebuilt digitally and once this format is achieved, they should be good to go for a long time. The same digital format should work whether you print them on Amazon or run a full offset printing of the books somewhere else. It’s really important to make sure the price you get for re-laying out your books includes you receiving a copy of the working/editable InDesign files (not just the print-ready PDFs) at the end of the project, so you can have those files for any future edits or reprints. 

File Preparation

In order to set up the books for printing, I would need:

  • All the text (including cover, spine, copyright page - everything) in a flowing / editable text file format (Word). The formatting can be very simple (it would be helpful to have bold and italics already implemented, but headers, etc. don’t need to be formatted in any special way, since it is clear from the previous book what formatting is needed. 

    • If you don’t have an original digital copy of the text, OCR scanning should be able to capture most of it (scanning with character recognition turned on, ie: scanning the book pages) but it would have to be checked very carefully before being submitted for layout for any errors.  

  • All the images scanned from the originals in high resolution format. (For print, images need to be at least 300dpi at final size). If the images need color correction, retouching or to be cut to white, this should be done already before the book layout begins. I have a high quality photo editor that I can recommend if you need this. 

  • Any logo images or other graphics other than photos and text, in high quality format.

  • A pdf or some kind of scan of every page of every book, that shows a clear page edge on at least two sides so that we can match everything, including margins.

  • The fonts in digital format. I can probably find the names of the fonts if needed, but purchasing them would not be included in the layout costs.

Layout Process

  • I would ask to have one copy of each book (from the last, pre-digital printing) sent to me before the layout begins so that I can more easily check layout visually.

  • I would show you a sample of the first ten pages of the book and then proceed with full layout.

  • Cover and pages would be laid out to match the previous book exactly, unless you need any errors corrected or updates made.

  • Solid ink colors (like the colors of the titles, or solid color backgrounds) would be matched as closely as possible to the printed book, but then could be checked through ordering a sample of the POD book through Amazon KDP. (Color matching with POD is not an exact process. Each book is printed at a different place or at a different time and the color can vary.)

Layout rate

I would charge for this project on a per page rate, with the minimum order size being one full book. In order to give an official estimate, I would need to see the full scan of every page of the book. My price includes cover set-up, two hours of changes to the book after full layout, and final print-ready and editable files .


If you have a similar situation, with an out-of-print or almost out-of-print book that you want to get back into circulation, send me a message. Whether or not you work with me on the final layout, I’m happy to answer any questions you have about getting your book back into circulation.