Journal Design

Designing and Producing a Journal

Motivational speaker Debra Searle approached me in 2019 to help her design and lay out a journal. Debra is a positive force and adventurer known for her “choose your attitude” message. She has been journaling for years to help herself achieve her goals. She had created journaling pdfs to share with others, and wanted my help to:

  • design and lay out The “Choose Your Attitude” Journal as a product she could sell or include in a goody bag at events where she speaks

  • liaison with a printer in China for production of her “Choose Your Attitude” Journal, helping to make sure the printer understood what she wanted and produced it according to plan.

I was happy to help Debra’s beautiful journal vision come to life. In this post I will talk about the four main parts of the project, sharing a few insights to help others who may also be wanting to design and produce journals.

Photo copyright Shoal Projects Limited

Photo copyright Shoal Projects Limited

Design of the Journal 

Debra has two main audiences: 

  • corporate crowds (for example, when she speaks at an HBBC event), and 

  • females around Debra’s age range (who may follow her on social media or watch her “Choose Your Attitude” show). 

She wanted to produce two journals that were the same inside but had different covers. The general look and feel of the journal needed to suit both audiences, and suit her current branding…which involves a lot of teal!

After I understood her audience and her goals for the journals, the first step was to create cover designs and sample layouts for the interior. She provided Word files with the text and simple layouts showing what she wanted. I designed a few simple covers for each journal, as well as a sample of about 10 pages of the interior. I chose a clean, open san serif for most of the book, and added some interest with a handwritten font called “High Tide” (also a nod to Debra’s background, rowing solo across the Atlantic).  Debra’s team gave me ideas like what you see on the left (below) in their draft, and I created an interior that matched their vision but also matched the overall look of the journals.

Screenshot+2020-03-02+at+20.47.15.jpg
Screenshot 2020-03-02 at 20.50.41.png

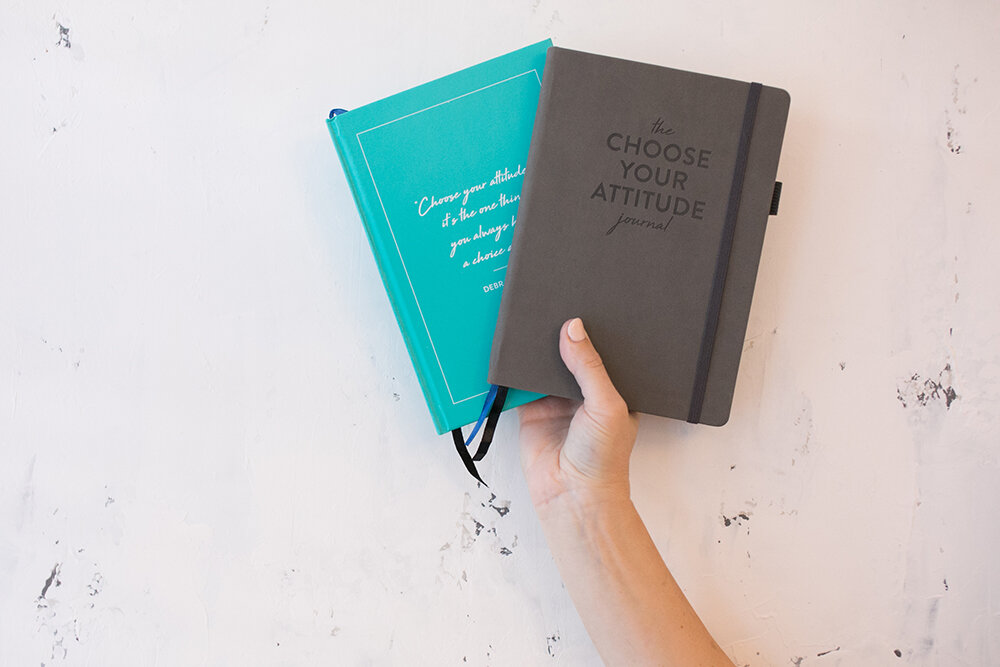
For the journal that needed to have a broader appeal, Debra chose a grey color and I designed a straightforward cover without too much “flounce”. For the more feminine journal we used teal and the handwritten font on the front. In the end, this is how the journal covers looked:

Photo copyright Shoal Projects Limited

Photo copyright Shoal Projects Limited

The design aspect of this project also involved designing icons to match the key themes on the journaling pages, and designing a belly band that would wrap around the journals. This was the main design on the belly bands, which were made to suit both journals.

bellyband journal design.jpg

Journal Design Tip: Designing an interior and belly band that matched both covers saved a lot of money at production time.


Full Journal Layout

Once we had established a look for the journals, I created the full interior in the same matching style. It included, in order:

  • Title page

  • Copyright page

  • About the Author

  • Introduction

  • Quick Start Guide - a two-page visual guide to how to use the journal pages

  • How To Guide - a more detailed explanation of how to use the jouranal pages

  • Goal Setting section

  • Journaling pages - The heart of the book, the same journaling page repeated many times

  • A logo and “ad” in the back sharing where the reader could get another copy of the journal

Journal Layout Tip: Be sure to test and re-test your journal contents before your get the journal laid out professionally. Even though Debra an her team were very organized and had done a lot of planning and testing, we still ended up having at least ten rounds of proofs before the journal interior was perfect and ready to print. This kind of back-and-forth on a project like this is not unusual. We were all pleased with the final product that we sent for printing.

Photo copyright Shoal Projects Limited

Photo copyright Shoal Projects Limited


colour comparison.jpg

Journal Production and Printing (in China)

Debra also hired me to liaison with the overseas printer whom I have worked with before. I exchanged over 40 emails with the printer, discussing the details of producing the journal. These emails related to:

  • Pricing - Some back and forth as the project specs changed a few times

  • Samples - Before placing the full order, we asked for two “dummy” journals to be made with a rough version of the cover design and blank sheets inside (the actual final paper). One cover had a grey PU (leather-like) cover (no ink), and one had a hardcover with teal ink. These dummies gave us a feel for the size, weight and look of the final product. We also asked for physical samples of the different PU materials, so that Debra could feel the different materials and see the color swatches in person. With the printer I use, requesting samples like these can cost around $100 to $200 to produce and airmail to my client in about a week, but is worth every cent to be sure that the final product is what we are expecting them to be!

  • Production Details - As I wrote in my article How to Communicate Clearly with your Overseas Printer, it’s really important to be clear and direct in communication with the printer. Because we wanted two journals that were so similar but also different, I knew it could be a confusing project. I created some visuals to help make sure all the production details were clear. For example, they both journals had ribbons bookmarks, pockets in the back, etc. But the grey one had rounded corners and rounded spine, and the teal one had a hard cover with square edges and a squared spine. In the end, both journals had all the detailed finishing work done correctly, with the exception that they had been individually packaged in plastic bags - something we had not wanted!

Journal production details like a back pocket and pen loop required extra attention to detail both in our order and in the production at the factory.Photo copyright Shoal Projects Limited

Journal production details like a back pocket and pen loop required extra attention to detail both in our order and in the production at the factory.

Photo copyright Shoal Projects Limited

Journal Production and Printing Tip 1: Always pay the extra $100-$200 to get proofs or samples sent to you when printing in China. Ask to have samples of the actual final paper or material (ie: PU, ribbon, back pocket, post) as well as a printed proof of the final product, if possible.

Journal Production and Printing Tip 2: If you’re printing a product (journal, book, etc.) overseas, you are likely doing so to get a much more affordable product. Expect that about 10% of the final products will not be sellable; be pleasantly surprised if more of them are! 😉


Journal Shipping (from China)

When shipping a book abroad, there is a lot to be considered. Overseas printers can ship to the client’s door (more expensive) or nearest port (less expensive, but you have to get it through customs, etc. yourself). They can ship by air (much more expensive) or by sea.

Debra used a shipping broker who picked up the journals from the production facility in China and ensured that the journals arrived at her warehouse in England. The warehouse also took care of some shipping / receiving / distribution duties with the final products.

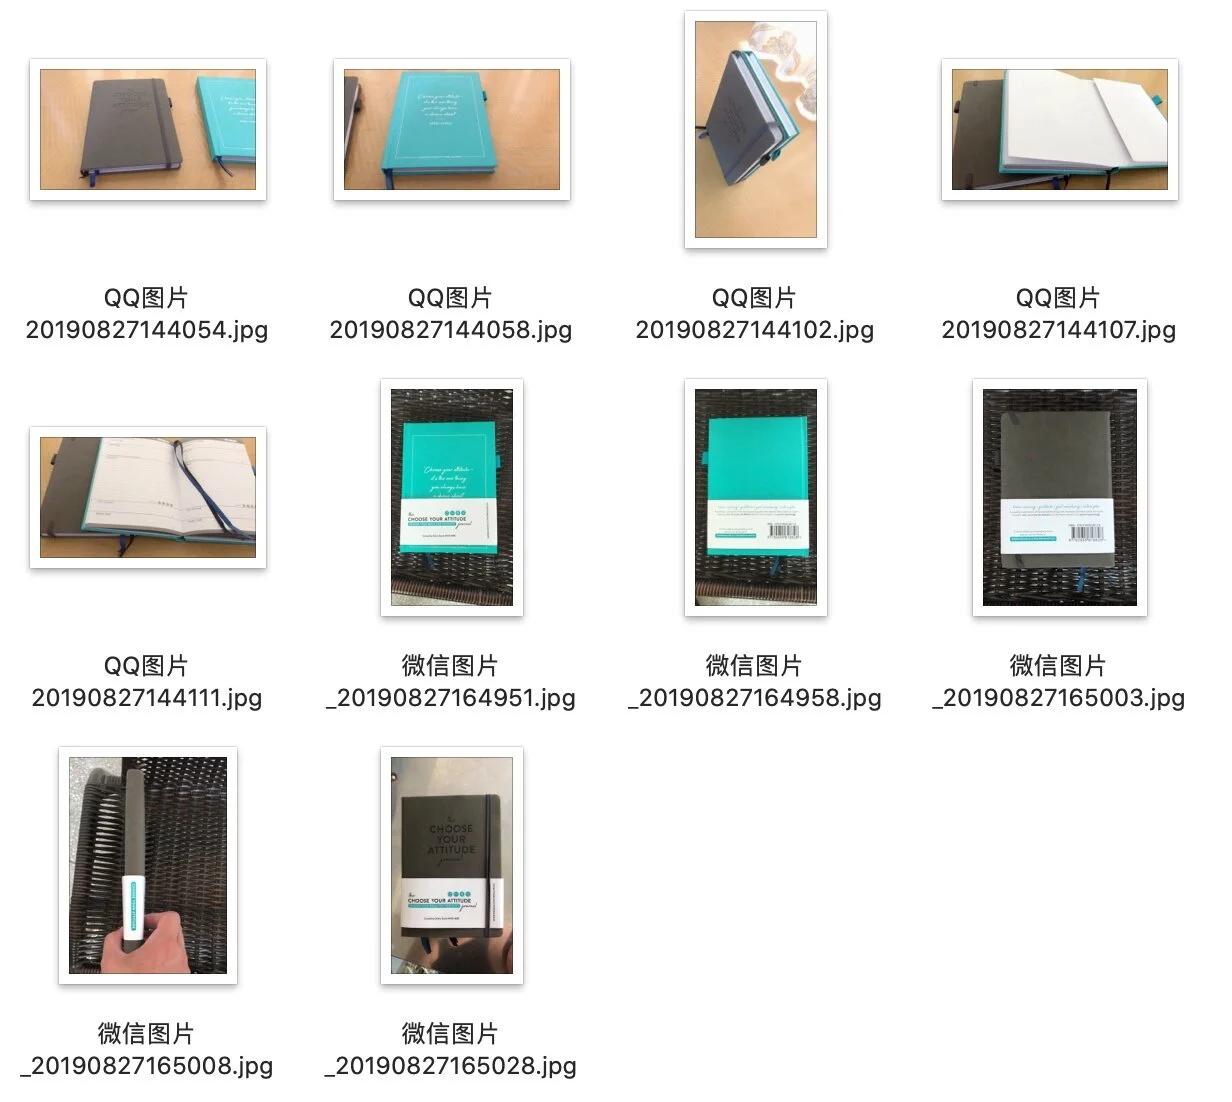
Journal Shipping Tip 1: Before transferring the last 50% payment to the printer in China, we asked to see photos of the final products. This is always a good idea when working with a production house so far away.  We received various photos of the journals that showed that they had indeed been produced — below are the photos we received before Debra sent the final payment.

printing+in+china+ask+for+a+reference

Journal Shipping Tip 2: We learned with this project that soft cover rounded-corner journals shipped much better than hardcover square-corner journals. The squared corners got more beat up in transport.

Journal Shipping Tip 3: It’s pretty complicated dealing with shipping from abroad. It’s usually better to print locally for small quantities or simple products, to save dealing with international shipments.


Photo copyright Shoal Projects Limited

Photo copyright Shoal Projects Limited

I hope this article about designing and producing a journal has been helpful, whether you’re planning to print locally or abroad! Shout out to Debra for the beautiful pictures of her final product!

If you’re considering producing a journal, read this case study by my client Felix, who used his podcasting platform to develop and sell a motivational journal. Or sign up for my Book Done newsletter to get more stories from people who’ve gotten their book projects done!

NEW OFFER: Book a one-hour brainstorming session with me to get a head start on your journal planning and production! I’ll save you a lot of trouble by sharing what I’ve learned through trial and error with my journal design clients, sharing which printer we have used most successfully, and whatever else you want to know!
Planning Content and Preparing Files for a Journal

After writing a post to help those looking into Designing and Producing a Journal, I wrote a follow-up article about how to Produce a Journal in a Small Quantity. I got a response to those posts from an American creator who is planning a journal and needed to know how to prepare his ideas and files for me to format for printing. This post will share with you what I shared with him, so that it’s easy to work with a professional book designer to get your journal into print.

Your book designer needs two or three files from you to begin to design and lay out your journal, and this is what they should contain.

File 1: Main content of the journal - just one copy of each page

Journals are unlike most other books in that they have a lot of repeating pages. In your file, you may have repeated the pages multiple times to see how they look when repeated. But before sending the journal to your designer for design and layout, you should just include one copy of each unique page or each piece of content. For example, maybe you want to have 50 pages with grid lines, or 20 notes pages in the back. Your designer just needs to see one of each kind of page, otherwise it can be unclear if there are differences between different pages.

File 2: Journal outline

Next, prepare a text file with an outline listing all the planned page numbers or page ranges, and what should appear on each page. This is a very simple example, but this gives you the idea:

  • Title page (page 1)

  • Copyright page (page 2)

  • Intro letter (page 3)

  • Background Story (pages 4-5)

  • How to use this Journal (page 6-7)

  • Habit tracking page (page 8)

  • Monthly goals page (pages 9)

  • Daily pages (pages 10-40)

  • REPEAT pages 8-40 five more times (41-200)

  • Summary goals pages (page 201-202)

  • Order page (page 203)

  • Closing page (page 204)

Of course, every journal is different, and your content might be more complex. But an outline like this is invaluable, both in your planning and for your book designer to know which pages should repeat, when and how!

Remember that if your book is printing digitally, the final page count should be a multiple of four, and if it’s printing on a traditional offset press, it should (probably) be a multiple of sixteen — double check with your printer if you’re not sure how your journal will be printed.

File 3: Other filler material

Although many pages in a journal may be similar, they may have different quotations or decorations or something to differentiate each repeated page a tiny bit. If you want, for example, a different quotation on each of the daily pages (in the example above, that would be 30 x 6 = 180 quotations) it’s best to just list these 180 quotations in a separate simple text file in the order in which they should appear.


What else to tell your journal designer

Your book designer also needs to know about your style and/or your brand, to give visual direction to your journal project. For pages that are more complex visually, sharing a picture of a rough sketch you’ve made or a screenshot of a similar page gives your designer a starting point to understand what you’re wanting to achieve! If there are any other journals that you like or want your journal to sell next to, screenshots or links to similar journals are useful for your designer to see the kind of final product you’re picturing. You can share this visual direction in a document file with graphics in it, or through a folder with jpegs in it.


I hope this article has aided you in your journal design journey! I’d be happy to work on more journal cover designs and interior layouts. If you’re my type, let’s talk about your journal and get it into your audience’s hands! Or go ahead and book a one-hour brainstorming session with me to get a head start on your journal planning and production! I’ll save you a lot of trouble by sharing what I’ve learned through trial and error with my journal design clients, sharing which printer we have used most successfully, and whatever else you want to know!

Producing a Journal in a Small Quantity

After my last post about designing and producing a journal in China, I got an e-mail from Alex, who lives in NYC and wants to design and produce a journal locally. She isn’t sure that the quantity she needs is high enough or the demand is great enough that she place a large order or print overseas. She’d like to just make a few journals first and see how it goes. Maybe you can relate. In this follow-up post, I share some of the answers I gave her about producing a small quantity of journals. I hope they help some other entrepreneurial journal-creators, too!

Photo by Hannah Olinger on Unsplash

Pros to producing a journal in a small quantity

You can keep your costs low.

Of course, the main reason you might want to produce just a few journals first is to see if there is indeed a market for them before shelling out a lot of money for a pile of journals that will collect dust in your garage.

You can easily try out different styles or looks.

Not sure if your audience likes yellow or green better, or script or block print? A short run allows you to have the liberty to produce just a few of each style of journal, if you wish, and see how they sell.


Cons to producing a journal in a small quantity

The per journal cost is high.

Set-up costs for printing are high, but once a print shop starts printing and binding, it doesn’t take much longer to make a few more journals — which is why the price usually starts to come down for greater quantities. Your profit margin will be significantly smaller. You will probably pay two to four times as much for each journal as you would pay when printing in a large quantity and/or overseas.

Finishing options will be limited.

Some features that make a journal feel high touch may be unavailable for low quantities (like deboss, emboss, foil, leather or PU / faux leather material, etc.) because the set-up is complicated (read: expensive) enough that it doesn’t make sense to do when you are only printing a small run of journals (ie: 25, 50, 100).


Finding a journal printer or producer locally

As far as finding a local supplier or printer for custom journals, what you need depends on what kind of journal materials, printing and binding that you want. For example, do you want:

  • regular softcover, regular hardcover, PU (faux leather) cover, real leather cover…?

  • black and white interior or full color interior?

  • glued binding, stitched (sewn) binding, spiral binding…?

Or maybe you want to decide these details based on what your local printers can do for you. Try googling phrases like:

  • “full service book printer”

  • “short run book printer”

  • “short run journal printer”.

You can add the name of your city or state / province to your search and see what you find. Hopefully you can get an idea from the printer or journal producer’s website if they are low or high end. However, there are a lot of printers with out-of-date websites who can do perfectly good work, so be careful about judging a book by its cover! More important than their branding or marketing is a printer who understands what you’re asking about, or answers emails or calls quickly and thoroughly. Sometimes I ask for references if I’m having a hard time getting a feel for the printer’s experience/background.

A few good questions to ask a local journal printer are:

“Have you produced journals before?”

It’s always easier to work with someone who has done this exact kind of work before.

“Can I see samples of previous journals you have created? Is it possible for you to create a real mock-up of my final journal product after I give you my digital files and instructions?”

Giving you a real mockup is usually hard to do, at least for an affordable price! But the printer should be able to give you samples of previous books or journals to have or to look at, and swatches of materials or paper or colors. Printers will usually give you samples like this before you commit to working with them.

“Will you produce the entire journal in-house, or will you outsource part of the process?”

Some smaller print shops will tell you they can make journals, but they might be outsourcing to a bigger printer, which means they probably can’t give you as good a price as a company that is doing it all in-house. For example, if you live in a small town with a small print shop, they might tell you they can make journals but actually be getting the journals from a bigger city or from an online provider. There’s nothing wrong with this, but it’s fair for them to tell you their process.

“This is what I am envisioning, but if you can suggest ways to make small adjustments that will either give me a BETTER or MORE AFFORDABLE final product, could you do so?”

Sometimes a few tips from an experienced print representative could save you hundreds of dollars or give your product a more professional finish.


Finding a journal printer or producer online

If you’re finding the price of printing a small quantity of journals locally prohibitive, or simply not finding a local supplier, you might widen your search and just look for any online custom journal source within your country, or look for “print-on-demand” printers (like Blurb or IngramSpark) and maybe even build your journal around their preset sizes and styles to keep the price reasonable. For example, Blurb offers this “notebook journal” product which can be ordered in any quantity. Just a note that lots of online printers say that they offer “custom journal printing”, but by that they only mean that the covers are printed with a custom design, but insides are blank or lined. If this is the case, you might be able to contact them and ask what it would cost to have a custom interior.


Making a journal as a product seemed so easy in your head, right? Let me know if you need any help with design, pre-press checks of your journal files, or finding a printer! Or book a one-hour brainstorming session with me to get a head start on your journal planning and production!