Why Don't the Spines On My Print On Demand (POD) Books Line Up?

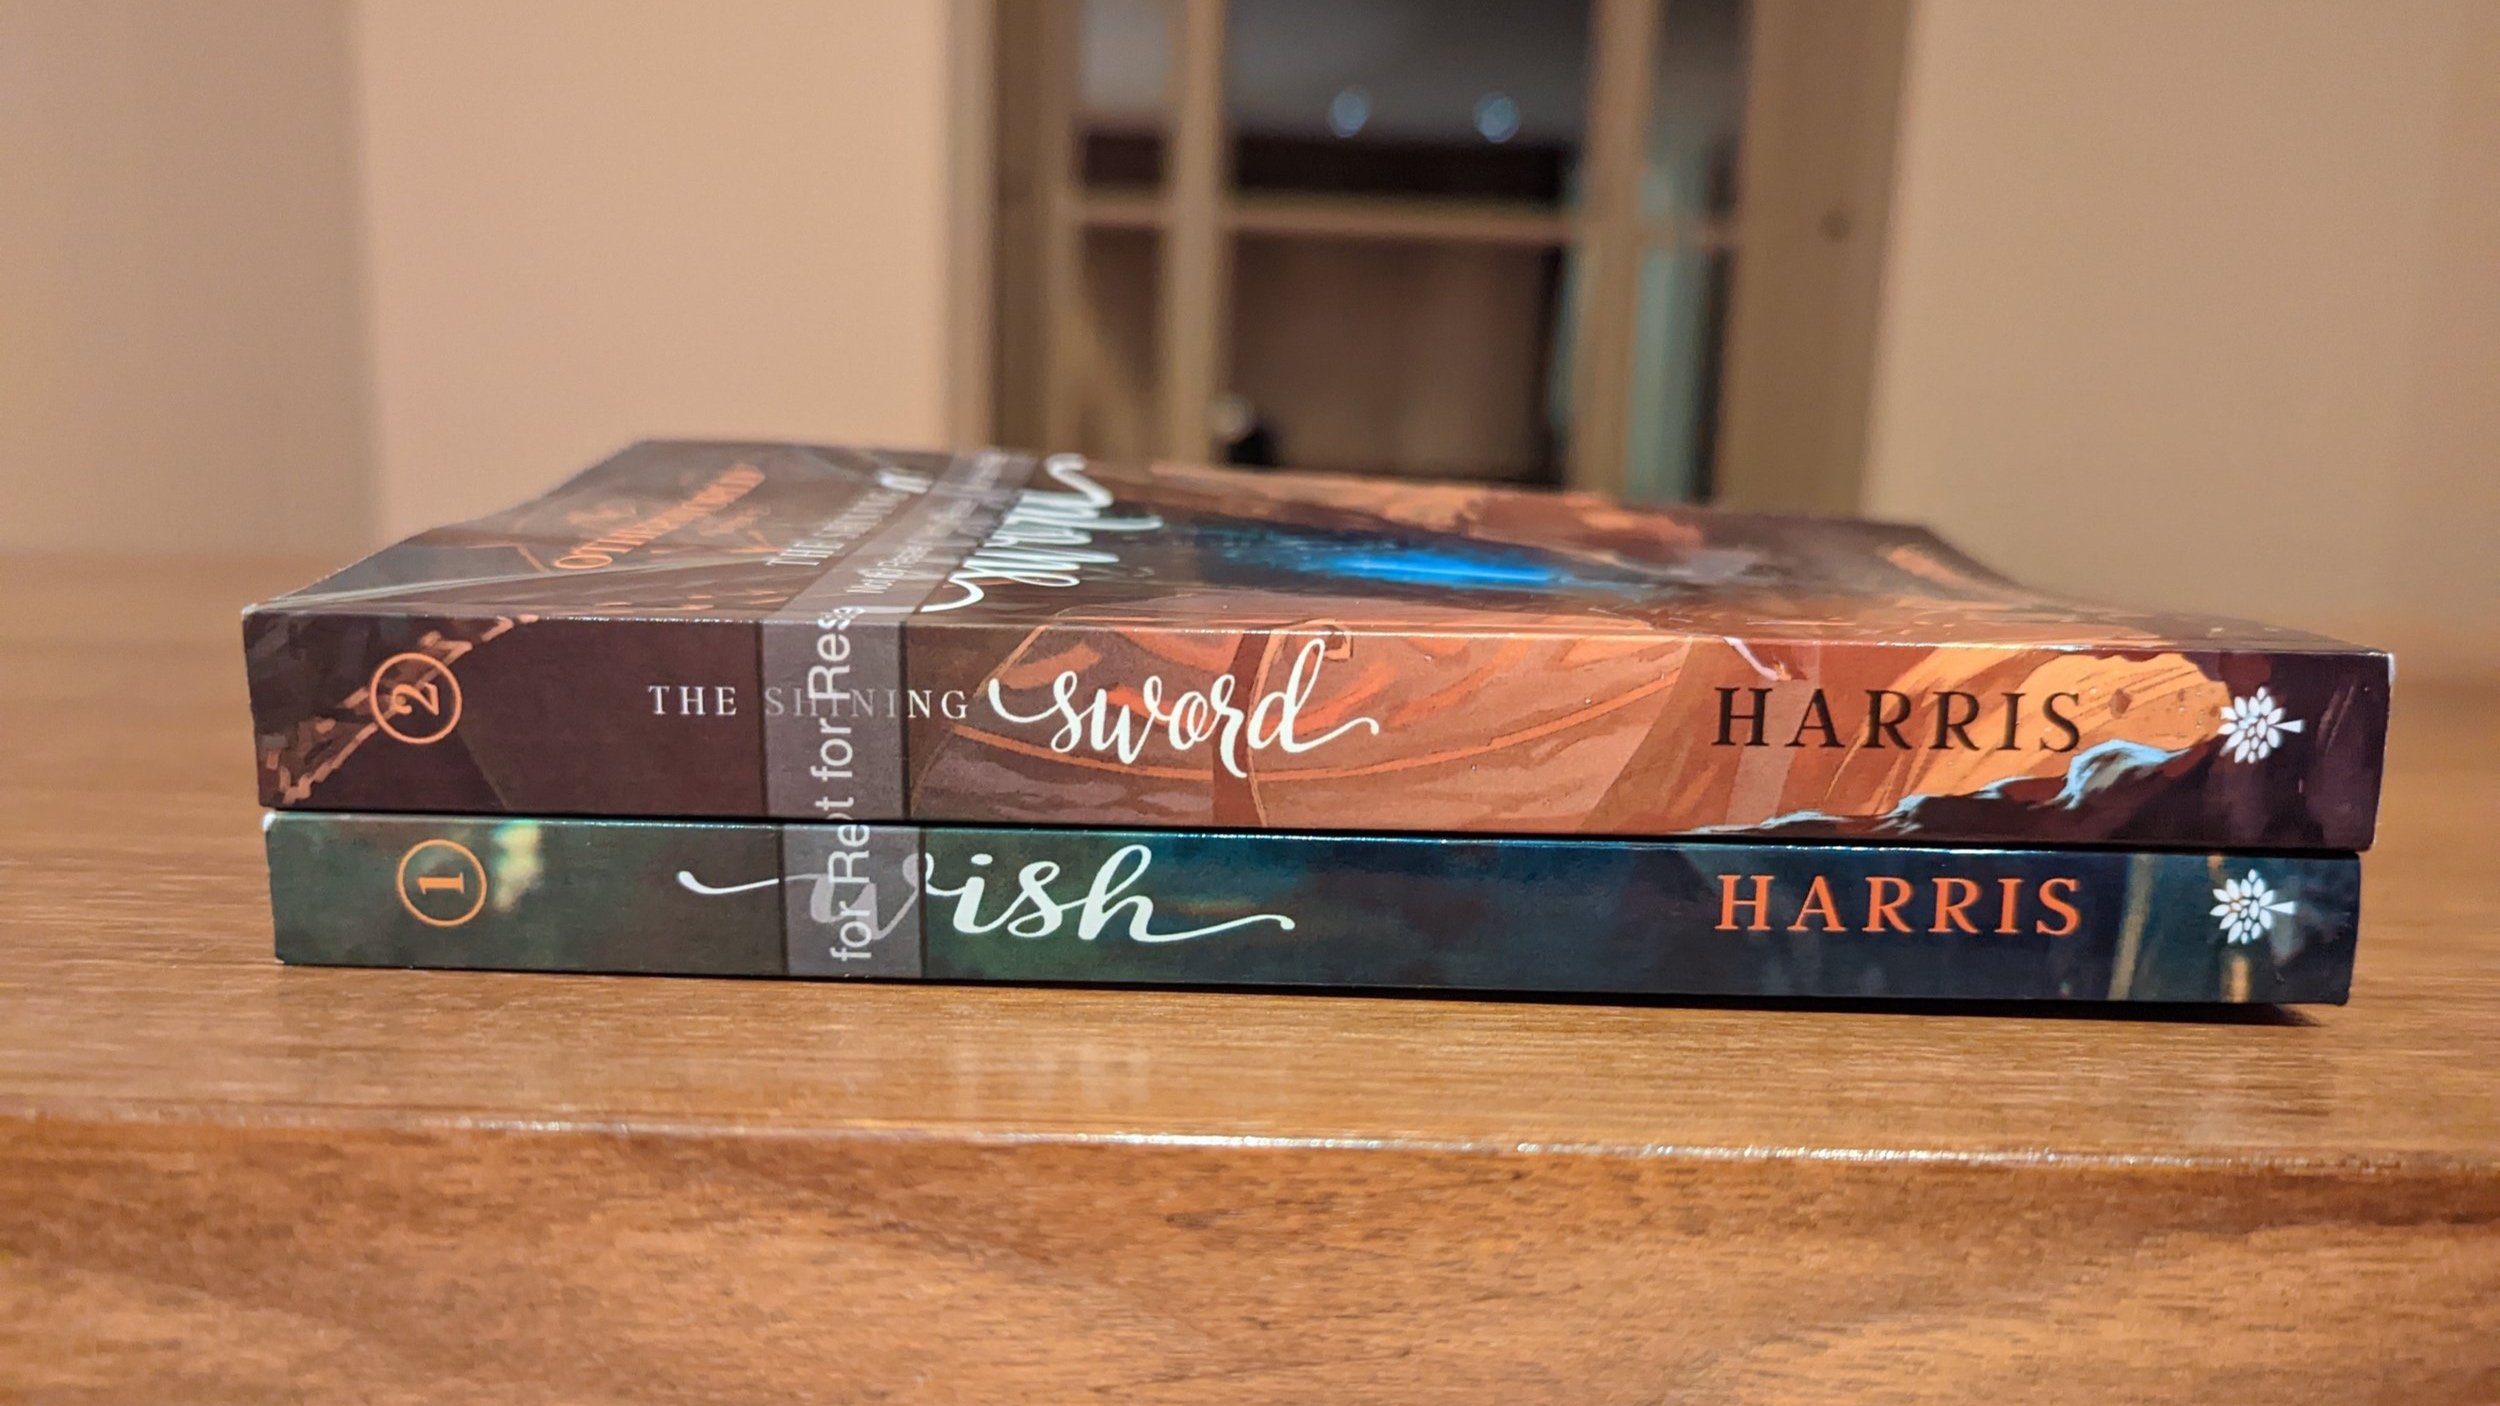
A children’s literature author recently sent me the picture of her books printed with Amazon KDP below with this message: “I noticed that the numbers and the symbols on the covers don't match up on the spines if you stack them. It would be nice to align them so that the spines match.”

Two youth fiction novels printed by Amazon KDP. These are sample prints and still have the “NOT FOR RESALE” text around the cover.

I agree with her completely that it would be nice to make the spines match perfectly! But I showed her my cover files, to demonstrate to her that in the files we gave to Amazon KDP, the numbers and logos on the spines do line up. (Originally she had given me the cover of her first book, and asked me to make the cover for book 2 match as perfectly as possible. Everything on the spines is aligned as closely as it can be in the digital version of the files.)

So why do the spines not match up in the print, if they match up in the file? Basically, the trimming and binding at Amazon KDP (and any print on demand printer) is not as accurate and not as high quality as it would be with a traditional book printer. As each book is printed “on demand” (one by one when each book is ordered), the variance comes in somewhere in the printing, trimming and gluing process. A tiny shift anywhere in this process can mean that a spine is not quite centered vertically or horizontally. I assume that the operator (if there is one—the whole POD process might be done digitally) doesn’t have the time to pay attention to finer production details like this.

Unfortunately, this varying quality happens a lot with print on demand printing. If your book really needs to match perfectly, you probably need to print it traditionally and not print on demand! But print on demand has so many other pros, that this small con might not discourage you from using it anyway! Just make sure you know the strengths and weaknesses of print on demand before your commit to one or the other route for book printing and production!


Planning to print with Amazon KDP or IngramSpark or another print on demand printer? Learn more about the process on my articles page!

Case Study - Financial Book Interior Design and Typesetting

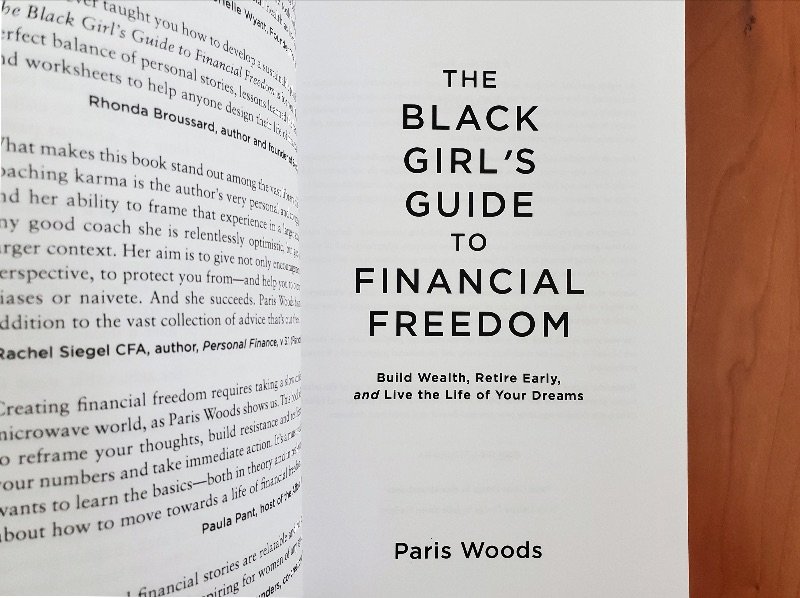
Every #bookdone story is unique, but Paris' story is ideal: it was only about a year from the time she started writing her manuscript to the time when she released her book. Paris knows how to get stuff done! Read on to learn about her self-publishing experience with Amazon KDP and IngramSpark. She released her first book The Black Girl's Guide to Financial Freedom just about one year ago. I was privileged to work with Paris on interior design and layout (typesetting) for this non-fiction financial book.

Paris Woods helps women of color make, manage and multiply their money. She is on a mission to help women of color build wealth while living a life they love. In The Black Girl's Guide to Financial Freedom, Paris Woods takes the guesswork out of wealth-building and presents a plan that anyone can follow. Through real-life stories coupled with clear and actionable advice, Paris' readers learn to:

  • Build generational wealth.

  • Avoid common financial traps.

  • Earn their degree debt-free.

  • Achieve financial independence and retire early.

  • Design a dream life that they can start living today.

Paris' Book Done Timeline

✍️ Writing started: Late 2020 / early 2021
🎨 Files ready for editing, design and layout: July 2021
✔️ Book done (released): October 2021

Paris' Book Done Take-Aways

Here are my questions for Paris about self publishing and reaching book done. 
 

When did you first have the idea for your book?

In 2020, I participated in a program for early stage Black philanthropists in education, and one of the assignments was to create a 20-year vision. While working through that process, I envisioned expanding my personal interest in financial independence to impact a much broader set of people. I envisioned having written a high-impact book as part of my strategy to help positively impact the world. After finishing the visioning process, I knew I had to get started on bringing this book to fruition. 

What was the biggest surprise during your book project?

It was interesting to learn about the role of different professionals during the process. For example, Julie's articles page was really helpful in teaching me about the process of interior layout design. I also got to learn about the role of copyediting; sequencing of cover design, interior design and proofreading, etc. There's definitely a step-by-step process you have to follow to engage the right professionals at the right time to keep things moving smoothly.


Which part of your book project took longer than you expected, and why?

Working with multiple professionals and sequencing the various turnaround times definitely was more time-consuming than I anticipated. I was eager to get this book and its contents into people's hands as soon as possible, but I really had to trust the process and the time it takes to produce a quality product. I even had some people advise me to wait to release it until specific times during the year, but I honestly couldn't wait to put it out into the world once it was done.


Which part of your book project was the most fun or rewarding? Which was the most challenging? 

I really enjoyed working with designers and visualizing what the final product would look like. Getting the writing done and the final drafts perfect were probably the hardest—because I'm such a perfectionist! So having it done, and just getting to enjoy the rest of the process was pretty awesome.

When a book comes to me with the cover already designed, I always try to tie the design of the interior to the already-established cover design. For this book, it meant using some of the same fonts in the interior. I also used dollar signs as bullets throughout the book, since a dollar sign was used on the cover as the woman’s eye.
— Julie

I know you self-published and printed on demand. Which POD printer did you use, and why?

I chose to list my book through Amazon and through IngramSpark, which distributes to a range of retailers, including bookstore and libraries. While Amazon is likely the easiest way to reach the most people as a self-published author, I also wanted independent bookstores and/or libraries to be able to access the book if desired.


When you write another book, what will you do the same way? What will you do differently?

I think in the future it would be interesting to go the traditional publisher route, so that I can experience what that process is like. I would also consider writing a book that is simply for specialized informational purposes—as opposed to hoping to reach bestseller status and wider reach—which would simplify some of the steps I went through in launching this version.

 
What service providers or partners did you have in creating and producing your book?

Key service providers I used included a copyeditor, cover designer, interior layout designer, and proofreader.
 

What is your best advice for marketing a book? And how did you get so many Amazon reviews?

My marketing was mostly word of mouth (via my launch team) and I also ran ads (Amazon ads are a must)!  As far as the reviews, I asked my launch team to write reviews when the book was launched. I also included a page at the end of the book encouraging readers to leave a review.

Is there anything else you want to tell me about your book project?

I have dreamed of becoming an author for many years. Once I finally got clear on the subject matter, and took the time to do the research, I learned that the process is much more doable than I would have thought! Now, I encourage anyone who dreams of writing a book to do it. It's completely possible and there are so many resources to help you do it well.

Check out Paris' YouTube channel for a great example of how you can create videos related to your book content and find your audience. —Julie


Paris' Book Done Technical Details:

Your printer needs these kinds of details to give you a quote for printing a similar book.

Page count: 197
Dimensions (page size): 5.5 x 8.5 inches
Binding: Paperback

Interior details
Ink colors: Black ink only
Interior paper: White (55 lb / 90 gsm)
Bleed: No

Cover details
Ink colors: Full color
Laminate: Glossy

Connect with Paris through her website or on Instagram.


Could this be your #bookdone year?

Two years ago, Paris was perhaps where you are, with an idea bouncing around in her head or a manuscript draft, and within a year, her book was published. I hope Paris' encouragement to not give up your dream of being a published author resonates with you. The only way to reach #bookdone is to get started. Make sure to check out this article: How to Use the Final Page of Your Book for Marketing (Paris did this successfully!) and sign up for my newsletter to get more case studies like this one in your inbox!


How to Make the URLs in Your Book Look Good and Work Well

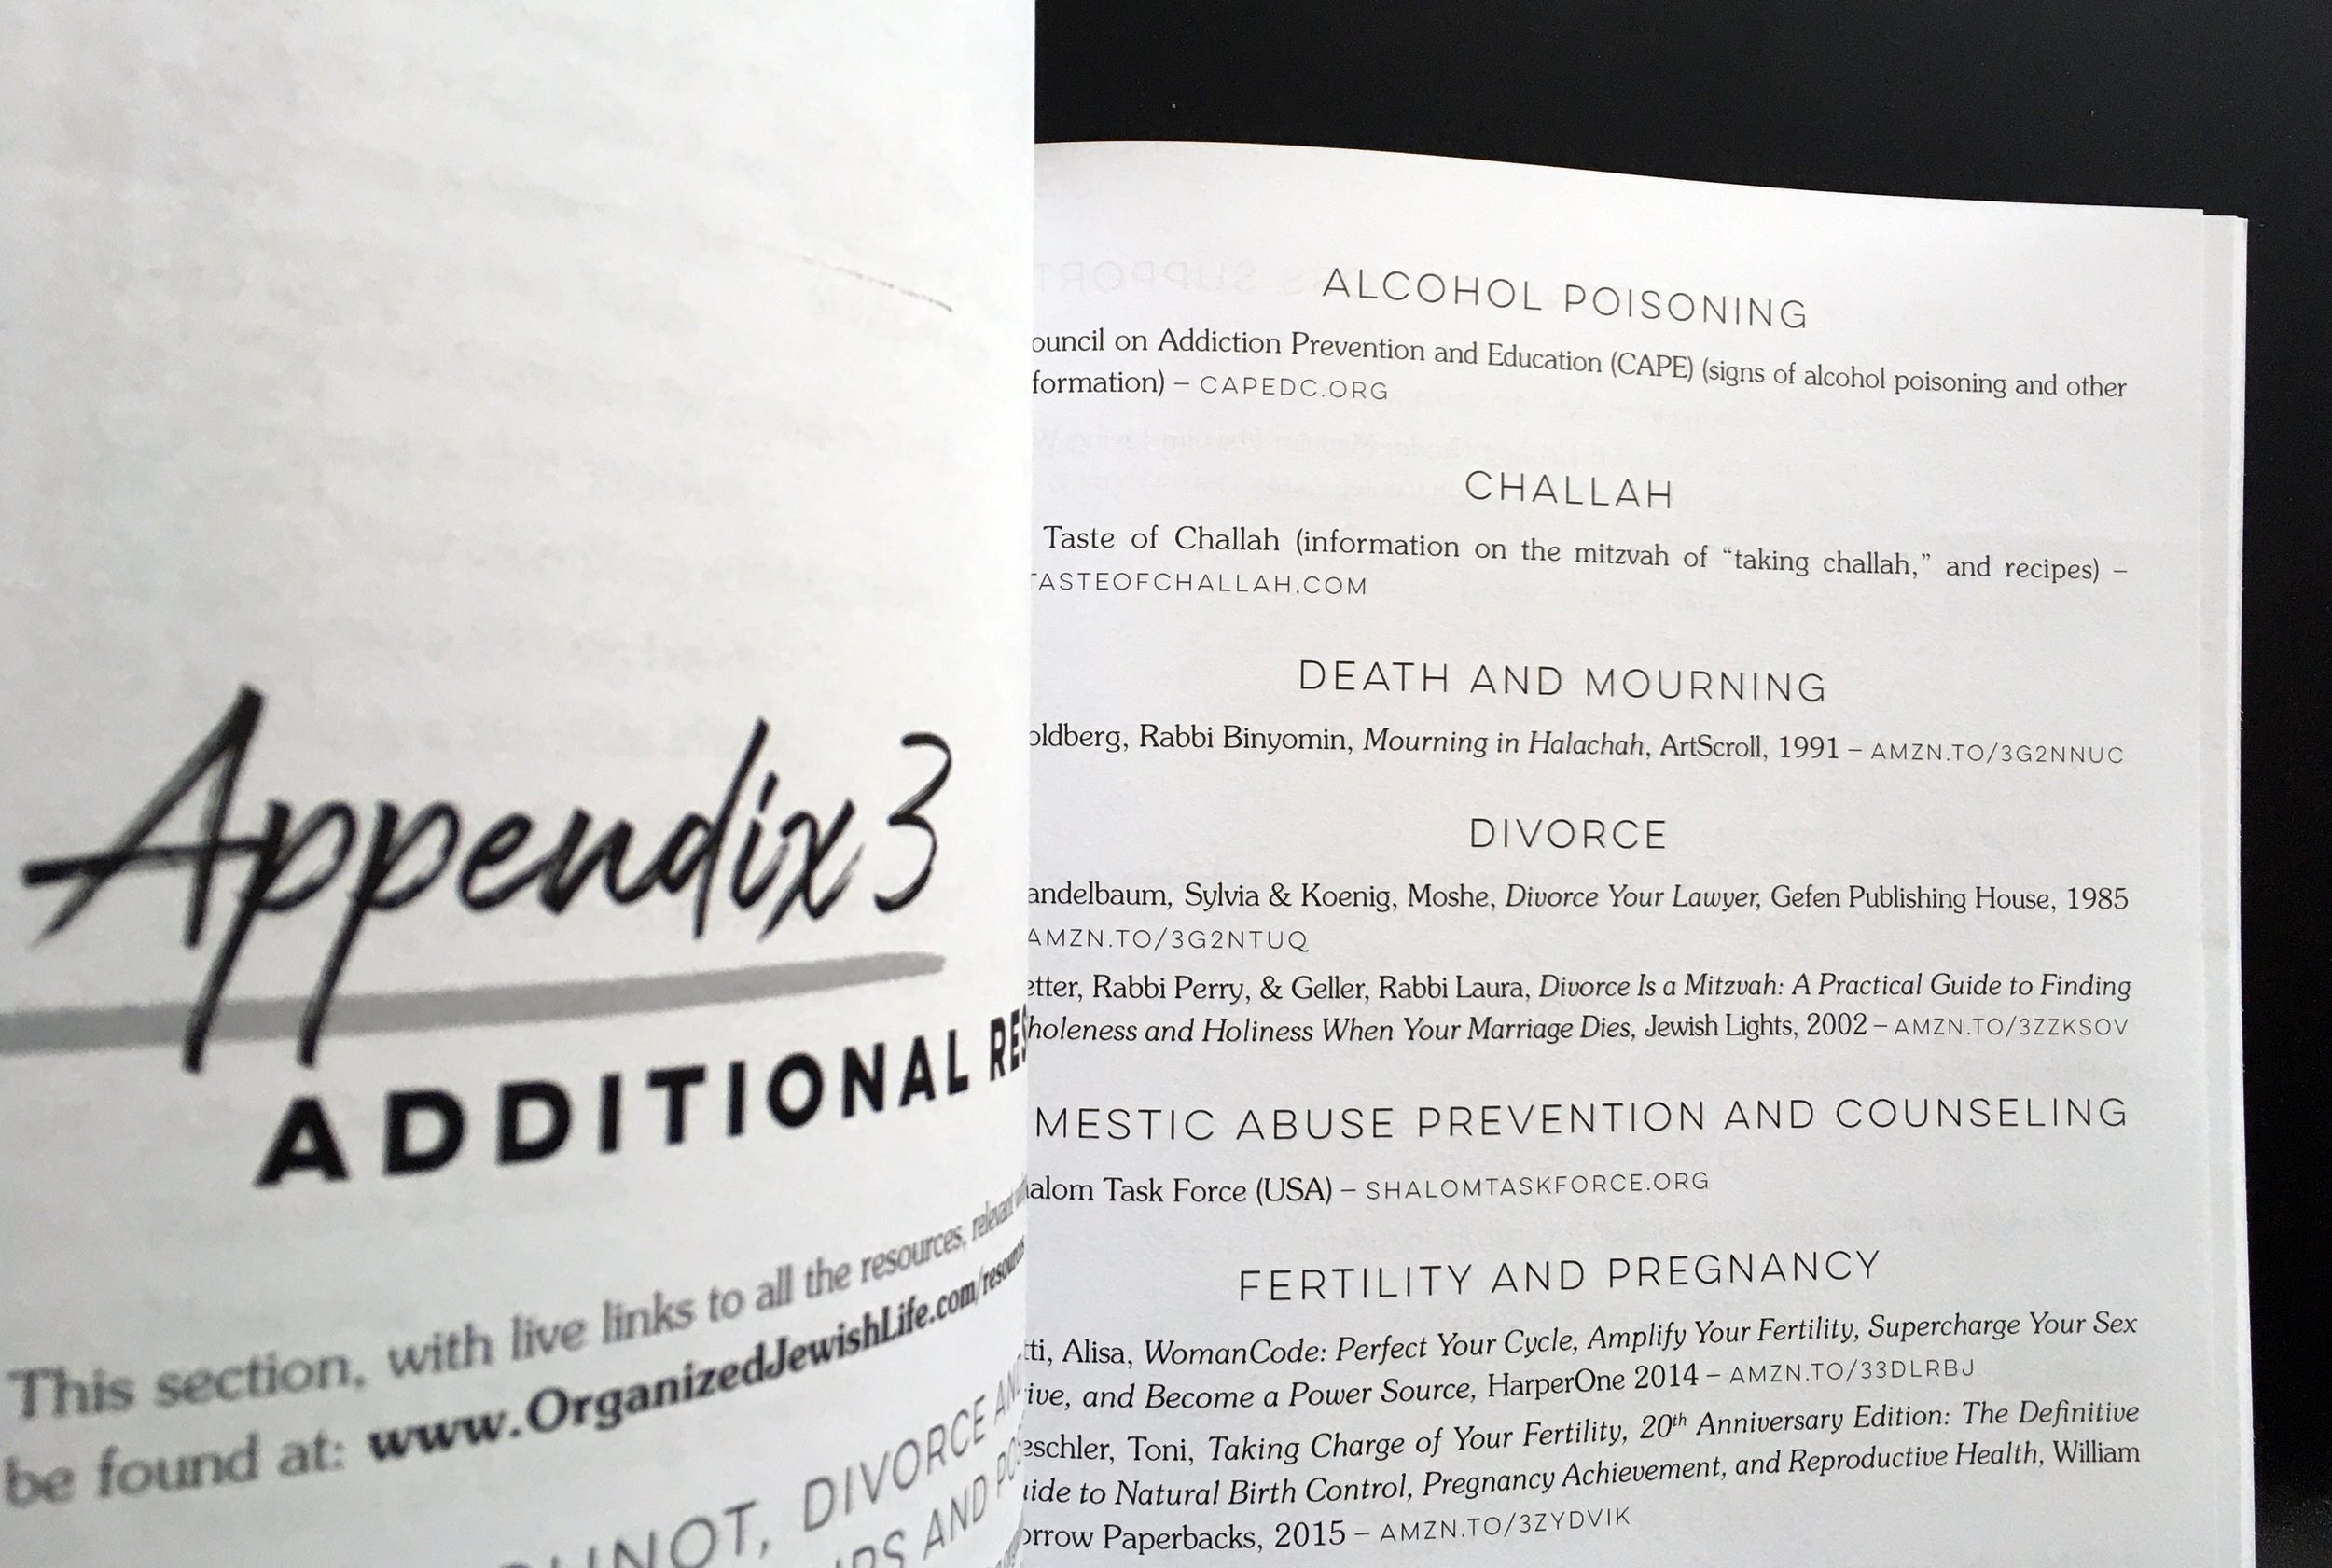
It is common (in particular for non-fiction books) to have a lot of URLs, whether in the endnotes, footnotes or resource pages. Here are a few things that can be done to clean up your resource list or endnotes so that the text in your printed book looks as neat and easy-to-read as possible! These are ideas that I’ve come up with or seen other authors and designers use over my 15+ years in book design.

Take off the https:// or even the www if you don’t actually need it.

Some (not every) URL will work just fine with www but without the https://.

If you can write:
www.mybook.com
or
mybook.com

instead of:
https://www.mybook.com
why wouldn’t you?

Note: usually for something more formal (where a certain kind of formatting is expected, like endnotes) you should keep the www. to make sure it’s clear that you are referring to a website. But for a marketing message or copyright page text that is directing readers to your website, dropping the www. might make for a quicker read for your audience.

Take the final slash or hash off of the end of any URLs.

Instead of
www.mybook.com/slash/
make your URL read simply:
www.mybook.com/slash
It’s neater, cleaner and easier to read quickly.

Some URLs also end in an unnecessary “#”, which can also usually be removed, just double check that the URL still goes to the page you’re expecting it to go to.

Replace obnoxiously long URLs with shorter ones that direct to the same place.

Sometimes if you followed a link on LinkedIn or social media, you may have been given a super-long URL, like:
www.mybook.com/ifoundthislinkonFacebook/00010001/longlink
Through a quick google search, you may find that there is a much shorter link to the same article, like:
www.mybook.com/longlink

Another option can be to use a service like Tiny URL to make a shorter URL for a web link. Long and complicated links that have hard-to-type number sequences are hard for a reader to follow (except in the ebook!)


Please note that this kind of clean-up should be done during the editing and proofreading process, before your book is designed and formatted. Often an editor will help you to create and format your endnotes correctly and consistently, if you have not done this already before submitting your manuscript to the editor.

When I receive a list of cleaned up URLs for design and formatting, here are some things that I do, to make the list present and work well. (When you work with me, watch to make sure I have done these things for your book, too!)

Make sure URLs are not hyphenated.

I always turn off hyphenation for Endnotes, resource lists, or similar, so that a link doesn’t end up with an extra hyphen that does not work. URLs already have a lot of hyphens in them, and it can be very hard to catch a hyphen that should not be there!

Depending on the look of the book, sometimes I even insert a soft return to force a URL to start on the next line, if I see that it is going to break over two lines. Sometimes it looks better to have two shorter lines of text than to have a long URL broken awkwardly over the end of a line.

Make sure body text with lots of links of different lengths is not left justified or full justified.

Generally body text that has lots of links in it should not be justified, because justifying lines of text that are not hyphenated and have long “words” like URLs can make the spacing look awkward.

Make URLs a different color or different font, or start them on their own line, to keep them distinct and easy to scan.

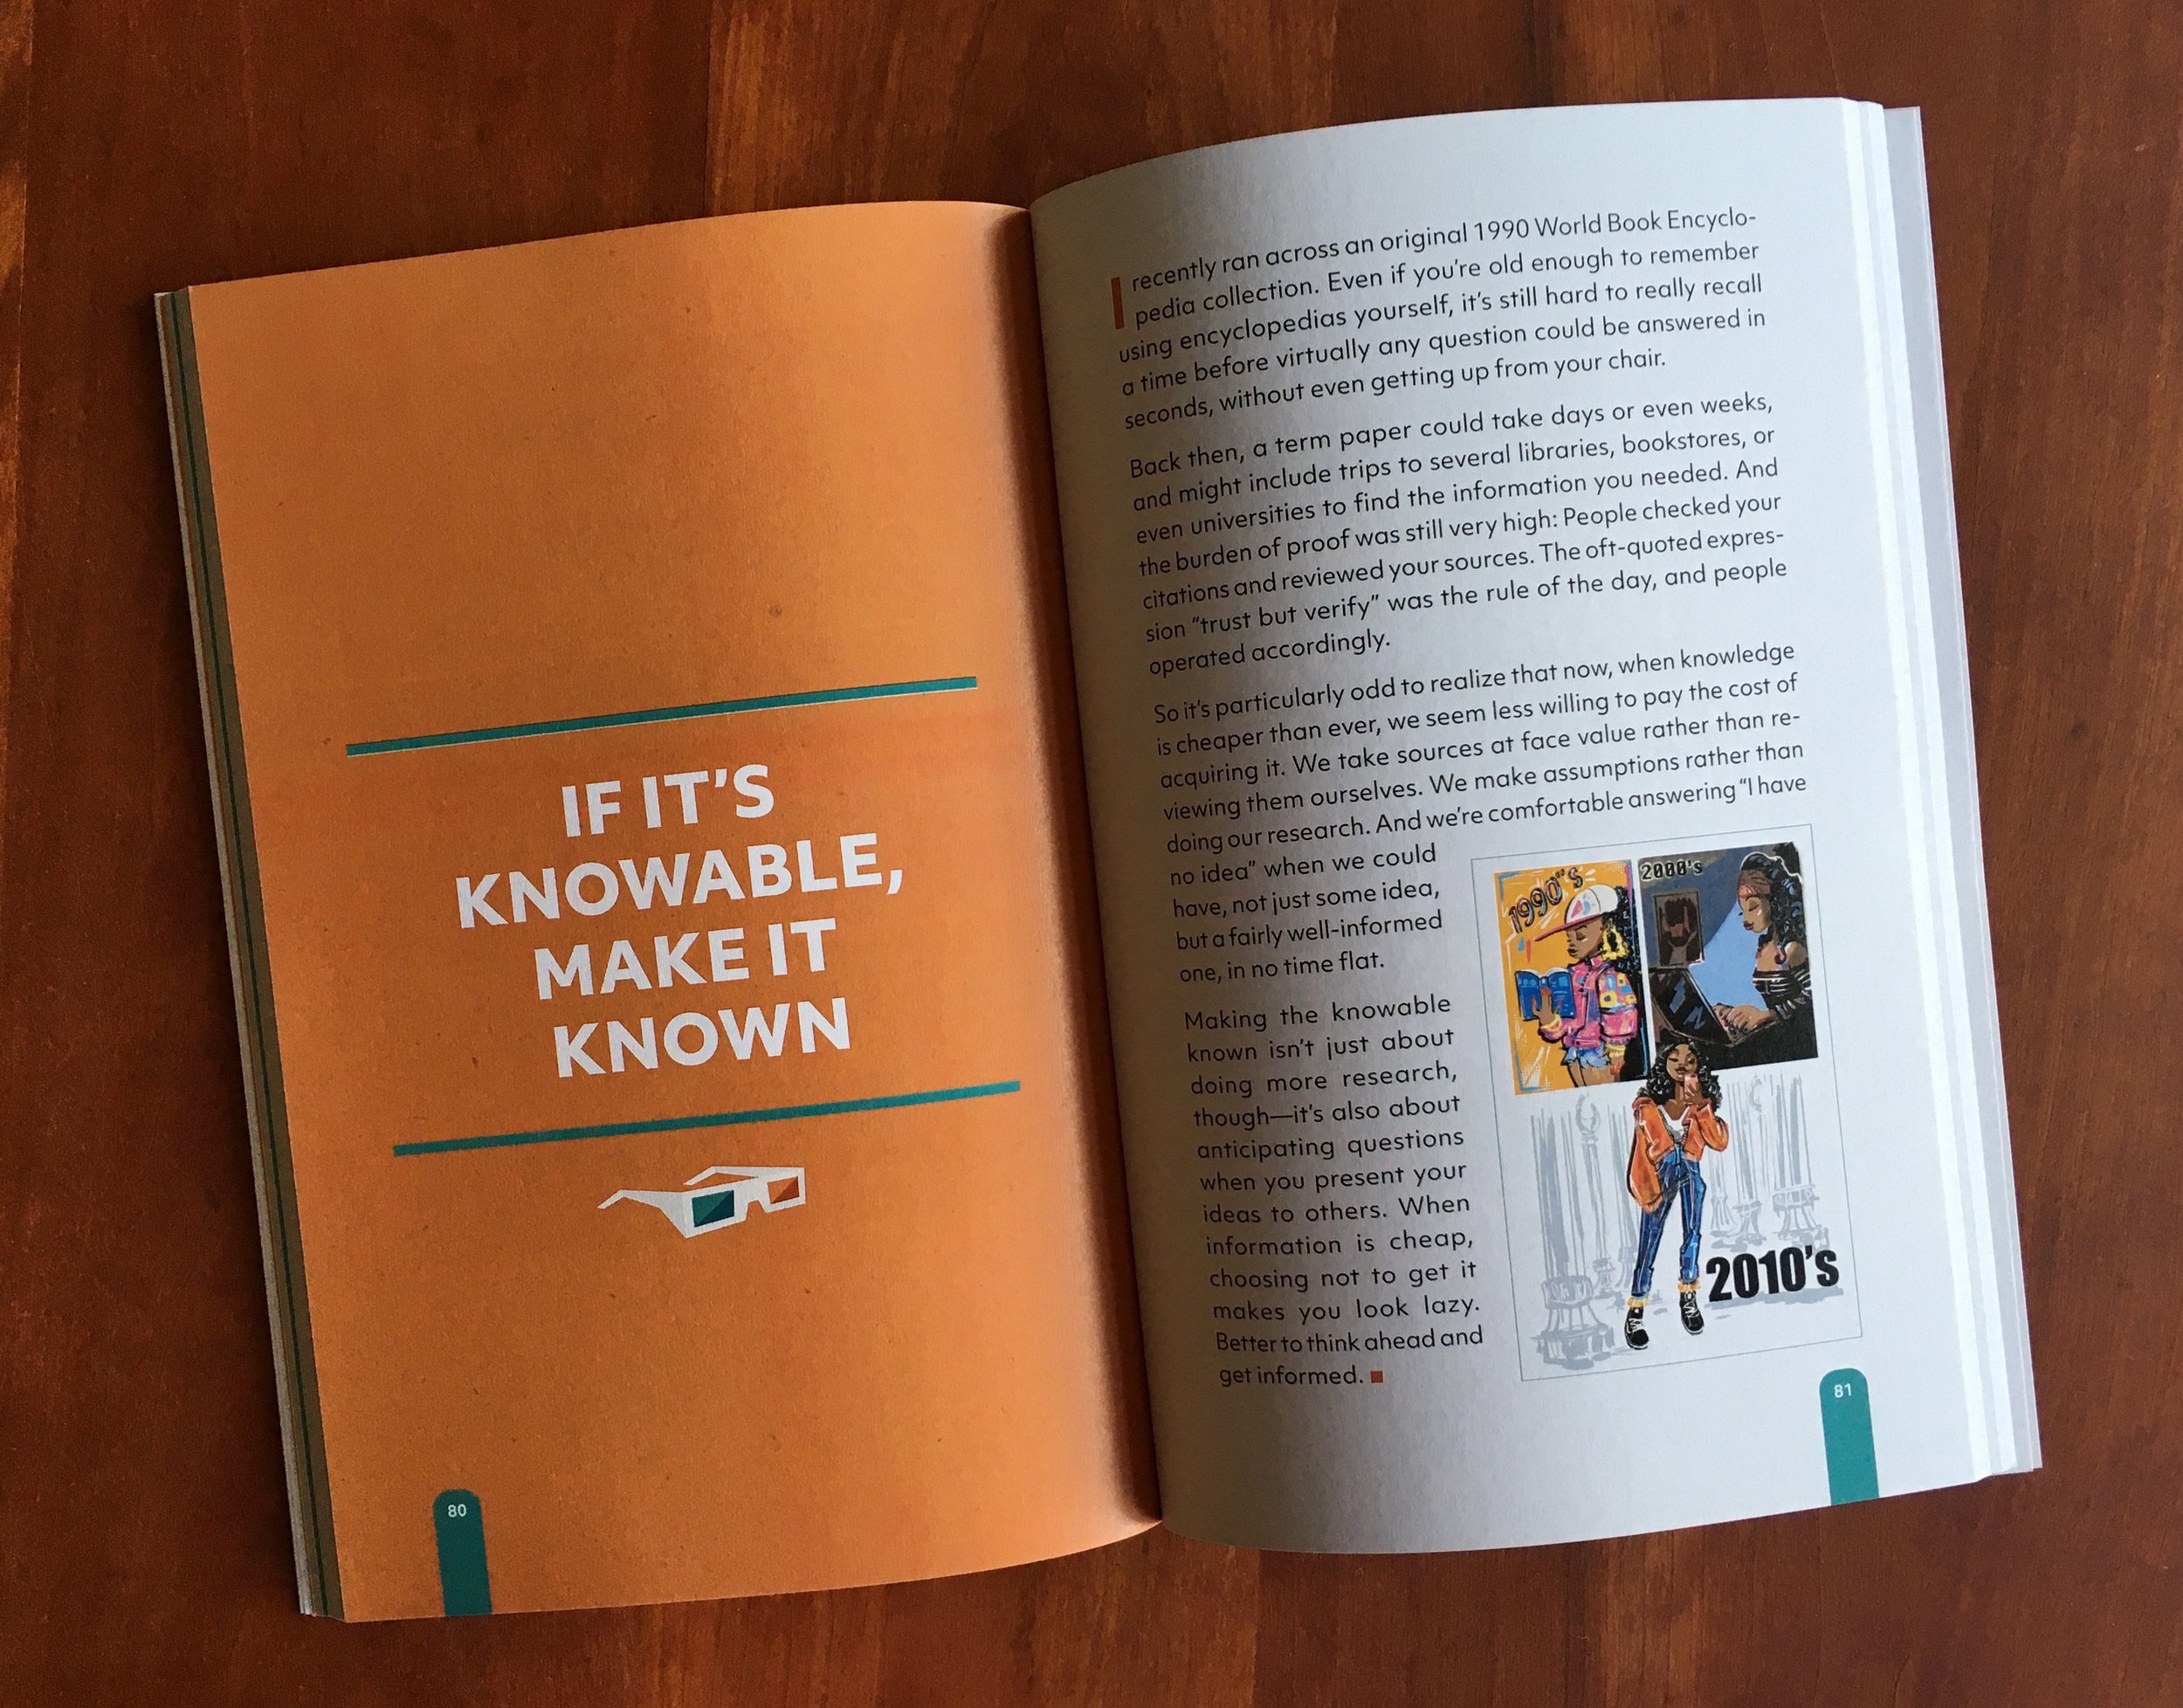
The book below has a fun tone and is full color, so I made the URLs brown to break up the solid resources pages in the back of the book. Please don’t make your links blue and underlined—the goal is not to make your text look like it was formatted in Microsoft Word!


Put a disclaimer about links in your book before press time.

It’s possible for you to proofread all of the links in your book one week and to find out even a week later that one of them no longer works. So this last tip is more related to the functionality of the links, than to how they look. I encourage authors of books with lots of URLs to put a note near the front of back of the book that says something like this:

”The internet is always changing and you may find that some of the links in this book no longer work. Visit mybook.com/links to be updated as to any changes to the links in this book that have come to our attention since the last printing, or contact me at [email protected] to let me know about any problems you have had accessing any of the references in this book.


Putting a book out into the world is an exciting achievement! And even more so, putting out a well-researched book with a helpful resource list! I hope this list helps your endnotes, footnotes or resource list be everything it can be. Use my book project questionnaire or book a live consultation to pursue working on a book with me.

Case Study - Non-Fiction Hard Cover Book Interior Layout

Do you have a manuscript that has been sitting around for a long time?

This case study is about journalist Ashley Rindsberg's book The Gray Lady Winked. His book was almost 20 years in the making; finally published in 2021. His book's time had come: it "sold like crazy" in the first month and is listed as #33 in Media and Communications Industry books on Amazon.

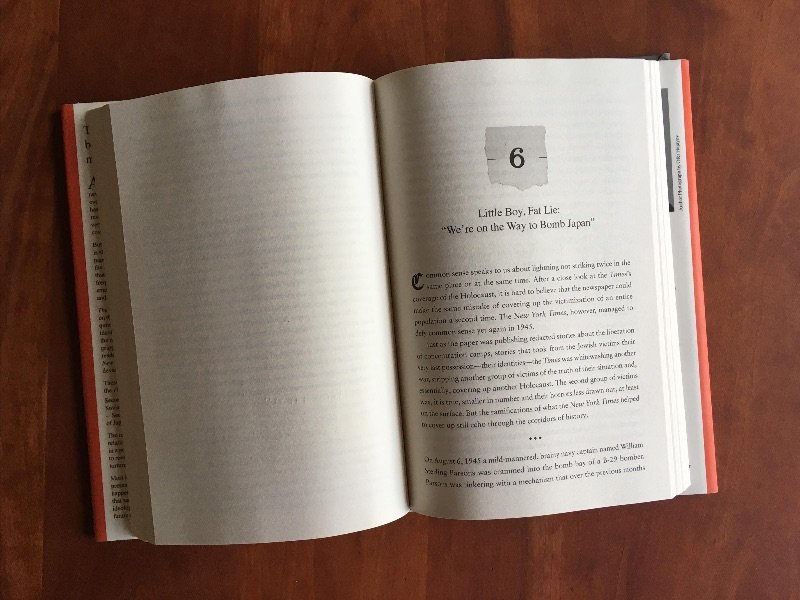
I worked with Ashley on his interior design and layout (typesetting) for this non-fiction book. Read on to learn more about his journey to #bookdone, and learn why his book will never be a New York Times bestseller (he's OK with that). 😉

More about The Gray Lady Winked

As flagship of the American news media, the New York Times is the world’s most powerful news outlet. With thousands of reporters covering events from all corners of the globe, the Times has the power to influence wars, foment revolution, shape economies and change the very nature of our culture. The Gray Lady Winked pulls back the curtain on this illustrious institution to reveal a quintessentially human organization where ideology, ego, power and politics compete with the more humble need to present the facts. The Gray Lady Winked offers readers an eye-opening, often shocking, look at the New York Times’s greatest journalistic failures, which changed the course of history.

More about Ashley Rindsberg

Ashley Rindsberg is an investigative journalist, non-fiction author, novelist and screenwriter whose work focuses on the search for truth by individuals marginalized by the dictates of power. 

Rindsberg’s book on how the New York Times' misreporting influences history, The Gray Lady Winked, is now at the very center of the global conversation on media, journalism, fake news, and free speech. 

Rindsberg is a go-to source for media and political commentary, appearing in news outlets around the world, including Sky News Australia, Israel HaYomOpIndiaNeue Zürcher ZeitungFirstPostTaipei Times. He has been honored by the Indian Prime Minister for his coverage of anti-Hindu media bias.

As a journalist, Rindsberg breaks major stories, uncovering pandemic-related ties between Harvard University and China in the Spectator, and reporting on the media effort to debunk lab leak for Tablet Magazine. Rindsberg has also covered the New York Times’ unethical labor practices for Unherd, called for congressional hearings in National Review and contributed media commentary to the New York Post.


Ashley’s Book Done Timeline

✍️ Writing started: Early 2000's 
🎨 Files ready for editing, design and layout: Late winter 2021
✔️ Book done (released): May 3, 2021


Ashley’s Book Done Take-Aways

Here are my questions for Ashley about self publishing and reaching book done. 
 

After setting your book manuscript aside for many years, what made you decide to pick it back up and get it into print? 

There was clearly a zeitgeist emerging about media and trust in journalism, both topics at the heart of my book. After all the pro and cons lists and mental spreadsheets, I woke up one morning with a visceral feeling that the time for this book was now. I just couldn't ignore that feeling. It was the activation energy that got the whole process moving.
 

Which service providers or partners did you have in creating and producing your book?

Editor
Proofreader
Cover designer
Book interior layout designer (That's me! —Julie)  

The boundaries sometimes blurred between the editor and the proofreader, as they were both very thorough and quite academically-minded, so sometimes their proofreading became fact-checking. It was an exhaustive and important part of the process. 
 

Which part of your book project took longer than expected, and why?

It all took longer than expected! 😊

Which part of your book project was the most fun or most rewarding?

Cover design was great. I really enjoyed the process and the product. My cover designer, Jaime Keenan, did a great job of echoing the theme of the book in the cover design—that there is more to the news story than what we see in newsprint.

When you write another book, what will you do differently?

Next time I will prep better for launching my book. I will have all of my formatslined up (hardcover, softcover, ebook, and audiobook), and have my website done ahead of time. I learned that I need a lot more lead time to put all these pieces in place before release.

Have you had any new opportunities come up because of your book?

I've had incredible opportunities open, including becoming very connected to the Indian community, which has taken up my book with enthusiasm. I recently did an event with the prestigious Nehru Center in London. I've also been reached by a number of influencers from the crypto space, with whom the book resonates strongly. This has further my understanding of blockchain, the community behind it, and where it's all taking us. I've also learned how to condense complex ideas into compact, digestible messages for media.

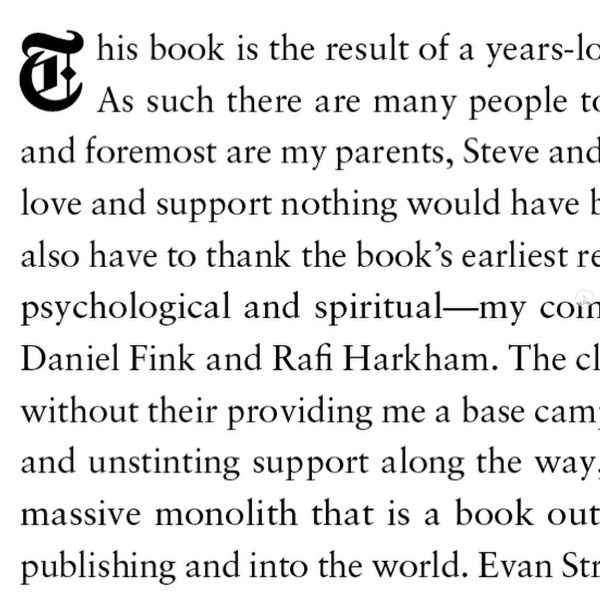
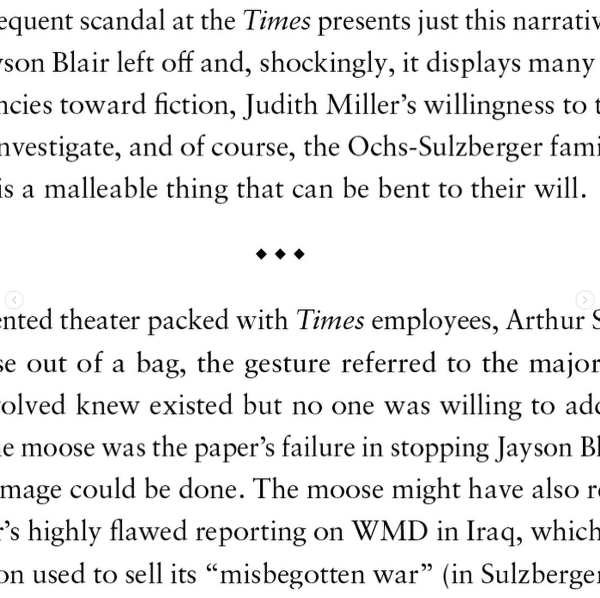
For this book, the cover designer had used a font similar to the NYT logo. I used the same font for the drop caps in the interior, and worked tiny black diamonds into the design (like in the “T” in “NYT”.) Every book interior is custom and little details like this make books memorable and unique! I do my best to match the style of the interior of the book to the cover of the book.
— Julie

What is your best advice for book marketing?

Try everything! Don't give up.
 

You told me that your book project sold like crazy during the first month. Why do you think this happened? 

The book sold well in the first month because I did a lot of advance outreach, including to dozens (if not hundreds) of influencers. I also worked my personal network for pre-orders. Most importantly, that got people I know involved in my mission. The result was that the first major media hit I had came from a family member who randomly emailed a major national radio personality, who invited me on the show. All this created a positive feedback cycle for my Amazon ranking, and Amazon blew a bit more wind into the sails on account of that.
 

Did you build your own websites or get someone else to build them?

I commissioned someone on Fiverr to build the book's website, and had a much more bespoke designer do the design for my personal site, which I then had a developer build.
 

You have a separate website for your book and for yourself, can you explain how you decided the book needed a website of its own?

I have separate sites for the book and myself because my work as a writer is quite varied, and I didn't want people who were there for The Gray Lady Winked to be distracted by my work in fiction and essays. I also wanted potential Gray Lady readers to feel they were in the "realm" of the book, with a site that had an aesthetic and feel that matched the book.

Ashley's Book Done Technical Details

Your printer needs these kinds of details to give you a quote for printing a similar book.

Page count: 286
Dimensions (page size): 6 x 9 inches
Binding: Hardcover and softcover

Interior details
Ink colors: Black ink only
Bleed: No


Connect with Ashley through his website or on Twitter.


What are you waiting for?

I hope that reading about Ashley's success in publishing his book has given you some new ideas to help you reach #bookdone. If there is any theme that is constant in my work with authors and content creators, is that it always takes longer than expected to pull together your first book. Giving yourself (and those helping you) the time needed to create a quality final product is well worth it. Congratulations on this success, Ashley!

Here are some recent topics from the articles section of my website:

Do you have more specific questions? Send me a message, book a live consultation, or fill out my book project questionnaire. ✔️

Can I Print My Book in Both Soft and Hard Cover with Amazon KDP?

Just a few months ago, Amazon KDP launched their hardcover print-on-demand (POD) book printing service. Previously most self-publishers who were wanting hardcover books used IngramSpark for print on demand printing, because Amazon KDP did not offer any POD hardcover services. But times have changed!

So, can you print your book in both soft and hard cover through Amazon KDP?

Yes, if you are using one of the sizes which they offer in hardcover.

As of this month, Amazon KDP offers sixteen book sizes in softcover, but only these five in hardcover:

  • 5.5" x 8.5" (13.97 x 21.59 cm)

  • 6" x 9" (15.24 x 22.86 cm)

  • 6.14" x 9.21" (15.6 x 23.39 cm)

  • 7" x 10" (17.78 x 25.4 cm)

  • 8.25" x 11" (20.96 x 27.94 cm)

They will probably begin to offer more if their POD hardcover service is successful, but for now, if your book is not one of those five sizes, you cannot print it in hardcover with Amazon KDP. Check here to see all the sizes IngramSpark offers in POD with hardcover.

Yes, if your book’s page count is between 75 and 550 pages.

This means that for a 32-page kids’ book, for example, you can’t print in hardcover. If your page count is between 75 - 550 pages, you’re golden!

Yes, but you need two different cover files.

The interior file for your hard and soft cover books can be the same one, but you will need two different front cover files, because a hardcover book cover is a different size and needs extra image around all edges to wrap around the board.

If you already know at the beginning of your project that your book will most likely be released in both softcover and hardcover formats, this is something you should tell me at the beginning of the project, so that the image I create for your cover has enough margin to wrap around all the sides of the book.

If you already have one cover file but need it adapted to suit the other style of cover, contact me so that I can see if I can adapt the files you have. It is best if we can work from the original, editable cover files (like InDesign or Photoshop files) created by your cover designer, but depending on the visuals of the design and the type of file your designer gave you, we may also be able to work from a print-ready pdf.

What to Send to Your Book Designer Before Full Design and Layout

You and I have been working together and your sample book layout is complete. You’ve been pulling together the final files to send to me. Here’s a simple checklist of what I need before I can get started on your full book interior design and layout:

Photo by Unsplash

Your final book manuscript

You’ve sweat over it, you’ve proofread it, you’ve gotten it professionally edited and proofread. And now your final book manuscript should be supplied for design:

  • In Word (doc or docx) format with any comments or changes from the editor or proofreader accepted or applied. If there are any comments or highlights in the file, they should relate to design and layout and not be questions for the editor, etc.

  • In PDF format (exactly the same as Word file, but different file format.)

Please make sure that your manuscript has been professionally edited and proofread. I will tell you if I see major text problems or typos in your manuscript while I am designing, but I do not check your file word by word. Changes after full layout are charged at my hourly rate and should be limited to fixing minor typos, not removing or rewriting entire sections of your book! Read more about editing and proofreading here and please don’t skip this vital step! It doesn’t make you or me happy if your book needs 15+ hours of changes after layout because you have to rewrite it after it has been designed!

Images or graphics

Any and all images or graphics for your book should be provided:

  • In high quality (usually a big file size means higher quality, but not always! I will check your images and let you know if the quality is high enough for printing.)

  • In a folder (ie: not just placed into your Word file.)

  • Clearly labeled (your file names or folder structure should make it clear which image or graphic should be used where.)

If you are not familiar with transferring files digitally, check here for ideas for how to transfer heavy files.

If you need some of your graphics to be redrawn or edited, the quality of the files themselves is less important, but the draft graphics need to be legible enough that they can be retyped or redrawn as needed. Read more here about how having graphics in your book redrawn to match one another can make your book more understandable and more professional.

Instructions or notes

Any instructions that aren’t part of the manuscript or images but need to accompany them should be provided by email or in a separate document. This may be something like a list explaining where things go, or any visions you have for order or layout that are not clear from looking at the manuscript.

Any updated information that affects design and layout

Make sure to tell me any details that have changed since you initially filled out my book project questionnaire. Because there is sometimes a long break between the time when you fill out my questionnaire, and when your book is ready for full layout, some details might have changed. Please take a look at the questionnaire again and see if anything might have changed since you filled it out. In particular it is important for me to know if there has been a change or update to the:

  • page size

  • printer (print on demand or traditional, etc.)

  • final product (hardcover, softcover, etc.)

  • desired look or style.

Recently a client of mine told me after full layout that her image-heavy book was going to be printed with Amazon KDP. If I had known this, I could have helped her to realize that Amazon KDP only prints books in particular sizes and her book’s chosen size, 9x10”, is not one of them. Her whole book had to be reformatted to 8x10” instead of 9x10”, which added a significant charge to her bill and delayed her publishing date.


Not quite ready for full design and layout, but have another book-related question? No matter where you’re at in your book writing or self-publishing process, you can book a live consultation and get some direction!


How to Submit Changes to your Book (PDF File) After Layout

Taking the time to learn how to efficiently send changes to your book file is worth a lot, especially if you have extensive changes after layout.

I include a few hours of changes in every book project’s pricing, but sometimes clients have almost doubled the cost of their books because they have sent such extensive changes that it has taken me over 20 hours to make them.

There are two methods for sending your changes. Sending a simple text list of changes works well if you have just a handful of changes, but for extensive changes, be sure to use the Adobe Acrobat commenting tools method.

List of changes (Text)

If you are sending fewer than about 30 changes for a short book or 60 changes for a long book, sending them as a list (in a text file or pasted in an email) can work well. The list should look something like this:

  • On page 4, paragraph 2, change the phrase “my sad” to "my bad”.

  • On page 18, line 5, change “I made a mistook” to “I made a mistake”.

If using this method, just be sure that:

  • You use quotation marks around the exact phrase that is to be deleted and the exact phrase that is to go in its place.

  • There are not two instances of the same word or phrase on the same line or in the same paragraph (ie: if you say “replace ‘the’ with ‘a’”, I won’t know which “the” you are referring to.)

  • You refer to the page number on pdf page itself (and not the Adobe Acrobat page number, which is sometimes different than the number that actually appears visually on your pdf’s page).


Image by Sunny Haccan via Unsplash

Commenting Tools in Adobe Acrobat

To use this method, you need the Adobe Acrobat Reader software. If you don’t have it, you can download it for free here but to use the text editing tools feature, you need to have Adobe Acrobat Pro. You may be able to get a free one-week trial and make your edits during that week, or pay for a one-month pro subscription (currently $25/month). When you correctly enter your changes using the Adobe Acrobat markup tools, it makes it much easier for you to indicate which changes to make where, and much easier for me to enter your changes in my Adobe InDesign software.

Once you have Adobe Acrobat installed on your computer, watch this simple video to learn how to use the basic Adobe Acrobat commenting/mark-up tools. Watch it two or three times if you need to; it’s very short. The commenting tools in Adobe Acrobat allow you to mark exactly which text should be added, removed or replaced. These comments import into the software I use to design your book (Adobe InDesign) and while I still have to check each change one by one, the process is much faster than if I had to find each change on the page. Basically these tools allow you to indicated exactly where to add, remove or replace text in the file, and the sticky note tool can be used for design comments that aren't textual changes (like “style header using Heading 1 style” or “start this paragraph on the next page”).

If using this method, just be sure that:

  • You send me a sample of your edits using this method, ie: a pdf with maybe 20 changes in it, for me to make sure you are entering them them correctly. I have had clients who have skipped this test sample, and have thought they were using the markup tools correctly, but were using them incorrectly, and actually made more work for themselves and for me.

  • You use the latest single page version (not spreads version, where you see two pages at a time) of your pdf proof, if you received both single page and spread pdfs. I am not sure why, but it works better with my software when the edits are made in the single page pdf.


No matter which method you are using for submitting changes to your book (PDF file) after layout, please help us both to work efficiently by noting that:

  • You may want a certain change made throughout the whole document, like change “O’clock” to “o’clock” or “1000” to “$1,000”, if it is something I can easily search because every instance is written the same way, you only need to mark it once in your list or in the pdf, but make a note for me that I should change it globally. Not marking these kinds of changes every time they occur saves both you and me time.

  • If there are major changes (ie: more than 5-10 things in a paragraph, or just a lot of rewriting) please just send a Word file with that particular paragraph rewritten rather than making the edits in Adobe Acrobat. Put a sticky note in the pdf saying that I should refer to the Word file for the new text for that paragraph. If there is no special formatting (like bold or italics) in the paragraph, it can also just be copied and pasted into a sticky note in the PDF.


Your book may not require a lot of changes after layout, and if so, congratulations! You are living the dream! But first-time authors often realize that what they thought was a polished manuscript submitted for design and layout was not so polished. I have experienced the full gamut, from 300+ page books with just 10 changes after full layout to books that have been almost rewritten after layout (not recommended!) causing major delays and cost increases. Of course, experience is the best teacher, and this does not usually happen again on the second book. I wish you all the best in your #bookdone journey!

Case Study - Memoir Design and Layout for Young Adults

This case study features a book I worked on with businessman, speaker and now author Aaron Montgomery called Suspend Your Disbelief. Aaron shares how he was surprised how many contributors were involved in his book project and how, after he finished his manuscript, it still took another six months until his book was out in the world. But all the hard work and patience was worth it; Aaron's book is now available as a print book, ebook and audiobook!

I worked with Aaron on both cover and interior layout of this full-colour, easy-to-read memoir with accompanying cartoons targeted at young adults.

Aaron says: “I wrote this book to give back to the next generation.
I wanted to share the life lessons I learned that no one shared with me."


Aaron’s Book Done Timeline

🐣 Idea hatched: After a speaking engagement, when several attendees said “you should write a book!”
✍️ Writing started: Christmas 2019
🎨 Files ready for editing, design and layout: July 2020
✔️ Book done (released): December 2020

Aaron’s Book Done Take-Aways

Here are my questions for Aaron about self publishing and reaching book done. 

Tell me about how you came up with your book's title, “Suspend Your Disbelief”.

It took some deliberation, but ultimately I went with my gut and used an expression that had a special meaning to me. So far I've been convinced that it was the right decision, or at least I'm more comfortable with my choice than I would have been if I chose something more market-y or cliche.

Tell me a bit more about the cover concept and design you chose.

Julie and I worked together on the cover concept. “Suspend your disbelief” is a theater term and the 3D glasses evoked that sense for me, but on that deeper level 3D glasses enable you to suspend your disbelief more easily. They allow you to literally see things differently, and that's the point of the book. Look at your life experiences not as discrete events, but as lessons. Learn whatever you can so that your next choice is better than the last one.

What was your biggest surprise during your book project?

How many contributors would be involved. It was an amazing experience and it taught me a lot about project management, trade offs, and collaboration. In addition to working with Julie on interior layout and cover design, I had a copy editor, a proofreader, half a dozen artists, 20 members of a test audience, a social media manager, a marketer, a printer, a web designer, a fulfillment company, etc. 

Knowing what I know now, perhaps some people could have worn multiple hats or I could have outsourced the process to a firm that serves self-published authors. For my first outing, though, I preferred being more hands on.

You got some custom cartoons made for your book. Could you tell me more about that process?

When I was a kid I loved reading comic strips. The Sunday paper, The New Yorker, Reader's Digest...any I could get my hands on. I wanted to evoke that same sense in the book, but I also wanted to add something that I didn't see much as a kid—diverse representation. I partnered with some talented and prolific artists—who had worked with Marvel, Disney, the top newspaper syndicators and distributors, and the like—to bring that vision to reality. They really delivered and they all had different styles, so even the cartoons themselves represent a kind of diversity, too.

Eline shared her story on Instagram: @postripneg

Which part of your book project took longer than you expected, and why? 

I thought writing would be the 90% and publishing would be the remaining 10%. But it was probably right at 50/50 by the time I was done and that was a big surprise. The book was "finished" from a writing standpoint about six months before I was able to release it.

I noticed that you released your print book before the ebook and audiobook. Was this planned or simply a matter of which you got ready first?

Despite the fact that I actually read mostly on tablet readers and audiobooks, I'd always primarily envisioned a print book for my debut project. I knew I would eventually release it in other formats, but the physical copies made the project "real" for me, so I started there.

Which part of your book project was the most fun or rewarding? Which was the most challenging?

The testing was the most fun for me. Sending it out and getting external feedback was so important to me because it helped me shape the tone, message, and marketing. 

Writing was the most challenging. Even though it is a relatively short book, deciding what to include or remove and making the stories “pop” was challenging. Being sure I hit the important points was hard because I never really felt done. I more or less just got to a point where I decided I was done!

When you write another book, what will you do the same way? What will you do differently?

I'd probably try to partner with a publisher next time, but if it didn't come together in a way that made sense, I'd absolutely go the self publishing route again. My reason for going the publisher route is that I'd hope it would give memore time to work on the content vs. all the other logistics that come with shipping a book.

What is your best advice for book marketing?

Don't be passive. If your tendency is to be humble or passive, hire a "hype person" who can market your book for you!

Have you had any new opportunities come up because of your book?

I have. It's been a very pleasant—though unintended—consequence of writing a book. I really didn't write about the topics that I teach or speak on, but I think the book gives people an introduction to how I think and communicate, so in that wayit's created lots of new opportunities and deepened the relationships I already had.

Is there anything else you want to tell me about your book project?

It was a lifelong dream. A bucket list item. And since I pride myself on actually doing the things I say I'm going to do, I'm very proud of it. I shipped over 1,000 copies in the first two months and the feedback has been incredibly encouraging. I always wanted to be an author, and here I am!

Aaron’s Book Done Technical Details

Your printer needs these kinds of details to give you a quote for printing a similar book.

Quantity ordered: 2,500
Page count: 130
Dimensions (page size): 5.5 x 8.2 inches
Binding: Paperback

Interior details
Ink colors: Full color
Paper: #60 uncoated
Bleed: Yes

Cover details
Cover stock: 100# paper with matte finish
Ink colors: Full color

Connect with Aaron on LinkedIn or Instagram


What’s next for your book?

I hope that reading about Aaron's experience has been helpful on your own journey to #bookdone. The articles section of my website has lots of helpful information for getting your book or journal done. If you have more questions, get a live consultation or go ahead and send me what I need to give you an estimate and timeline to #bookdone! ✔️

Book Planning and Timeline Information for Self-Publishers

I often receive questions from authors about planning which service providers they need for their book, and how to figure out their book timeline. The more complex their book, the more service providers are involved, and the trickier figuring out a realistic timeline becomes, especially if you’re self-publishing for the first time or creating a complex non-fiction book that has a variety of appendices or resource lists, passages in a foreign language, or lots of endnotes / footnotes / captions. I get questions like:

  • Does the proofreader look at the manuscript before or after design and layout?

  • When does the indexer work on the file?

  • How far ahead do I need to find and book an editor, proofreader, designer or indexer?

Photo by Thought Catalog

While every editor, proofreader, book designer or indexer works a bit differently, in this article I try to give a general idea of the timeline and order in which you will work with each.

The progression of book development, at least as it reaches it’s final stages, often involves the following service providers in the following order:

  1. Editor - The editor may help you with substantive or structural editing (higher level editing) or line/copy editing. They may also help you to create things like appendices, bibliography, resources pages, endnotes, etc. or at least check the content you have created for clarity, style and accuracy.

  2. Proofreader #1 - Depending on how complex the editor’s changes were to your file, you may want to hire a proofreader to go over the text with a fine tooth comb. Even though some editors proofread, it’s best to get someone different, who has not yet seen your manuscript, to look at it at this stage. Fixing typos after full design and layout gets very tedious (for me) and expensive (for you).

  3. Book Designer - Once the manuscript is completely polished, it is put into one, clean Word file and sent to me, the designer. Depending on what I have been hired to do, at this point, I work on cover design, interior sample page design, and full interior layout. (Note: front cover design can start while the editor is working, if title/front cover text is finalized. But usually I do not start on any interior design samples until the manuscript is completely finalized.)

  4. Proofreader #2 - I always recommend that a new set of eyes go over the fully-laid-out book cover and book interior at this point. Proofreader #2 is watching for regular typos but also for any layout errors, like an incorrect running header or page number. (At this point you should also read the whole book one more time, too.) This last proofread is especially important if you are printing your book traditionally (not print on demand), because once you have 500, 1000, or 2000 copies of your book printed, you really don’t want to find any errors in them.

  5. Book Designer (Again) - At this point, I make any final changes from the proofreader or author and create a file the indexer can use to create the index.

  6. Book Indexer - If the book requires a paginated index, at this point (once you are 100% sure the page positions or oder won’t be changing) the indexer begins the magic of indexing and provides a static index document (usually a Word file) for the designer.

  7. Designer (Yet again) - Once the index is ready, I insert it in the back of the book. At this point I create the final, print-ready book files, and then adapt the print book to ebook if required.


How far ahead should you book each of these service providers? And then how long do they each take to do their part? This depends a lot on the complexity of your book and how busy your chosen professional is. But here’s an idea:

  • Editor: Book 2-3 months in advance, and plan at least 1 month for editing.

  • Proofreader: Book 1-2 months in advance, and plan at least 2 weeks for proofreading.

  • Book Designer: Book 2-4 months in advance, and plan at least 3 weeks for cover design, 4-7 weeks for sample interior layouts and full layouts (depends a lot on complexity: think black and white autobiography with 10 photos vs. full color cookbook with 200 images and 50 illustrations.) Add 1-2 weeks for ebook adaptation.

  • Indexer: Book 1-2 months in advance and plan at least two weeks for indexing

There are many moving parts to coordinate with a book project, and every professional who works in this industry knows that self-published books may move at a slower pace than the author originally expected. It’s not uncommon that a client asks me to shift them a bit later on my calendar, which is usually possible! I currently have a complex non-fiction book that has been at the final proofreader for over a month, which has shifted my schedule, too. But as you can see from the list above, it is wise to plan for at least 4 months for editing, proofreading, design and indexing, and to start finding professionals well before you need them. So from the time that you think your manuscript is as finished as you can get it, plan at least 4 more months before you expect to hit print.

If organization is not your strong suit, you might consider hiring an assistant to coordinate all the parts and pieces of a large book project, or at least using an app like Tyme to keep your timelines, service providers and information organized!


FAQ about Cookbook Design and Layout

Cookbooks are one of the most complex kinds of books. If you’re feeling a bit overwhelmed with your cookbook project, you are not alone! One cookbook creator said to me, “Thank goodness that ignorance is bliss. We didn’t know what we didn’t know, or who knows if we would have been brave enough to take on this cookbook project! I’m a little overwhelmed with pulling this all together…” I have compiled some of the questions my cookbook clients have asked me, to help answer some of your questions, too! If you have more questions, just fill out my contact form or book project questionnaire to get in touch.

Photo by Brett Jordan via Unsplash

I have a cookbook that I really love. Can you copy the style of that cookbook for my cookbook?

I always ask to see some of your favourite cookbooks and also some cookbooks from a similar genre (cookbooks that might sell next to yours) before I start designing. You may not have the words to describe the style that you like, but when you show me visuals, I can find the common theme flowing through all of the books you like and come up with a design that has the same feel without directly copying someone else’s cookbook!

What size should my cookbook be?

Please read my article here about what size to make your self-published book. This is something that must be decided before design and layout can begin, and may be influenced by what printer or style of printing (print on demand vs. offset) you are using. Learn more about getting pricing or info from a book printer here.

Are my photos good enough for a cookbook?

If you are working with a professional photographer, your images should be high enough quality for a cookbook. But if you are shooting your own images, do lots of researching and practicing to make sure you are producing images that are high quality. If you want me to check the resolution of an image for you, or give an opinion on the quality of the photos themselves, I can do that. Learn more about how to shoot photos for a cookbook at this link.

Some of my cookbook images need editing, can you recommend a good photo editor with experience in food photography editing?

I know an excellent photo editor and can put you in touch with her. She does both Photoshop retouching (like removing wrinkles) or general editing (giving all of the photos in the cookbook a similar look and feel).

Do I need to have all of my files (text and images) ready for you to be able to begin working on my cookbook?

Usually a cookbook project starts with the cover design. If you have everything you need for the front cover, and a draft of the interior text and images so that I get a feel for the cookbook, I can design the cover. I can also create sample layouts for the interior (such as a few sample pages for each main page style, like opening pages, recipe pages, photo pages, article pages) before everything else is ready. But after the cover design and interior sample layout are done, I wait until all the remaining material except the index (which cannot be created until the print layout is fully finalized and no page positions will be changing) is completely finalized.

For some clients, I divide the project into two stages. Stage One is the cover and interior layout sample stage. Then they approach publishers with those samples, and when they find a publisher (or if they decide to self-publish) they come back for Stage Two, which is the full interior layout and design, spine and back cover layout.

If I want to print my cookbook in both soft- and hardcover, can I use the same pdf files for both editions?

As long as the page size of your book is the same, the interior files are exactly the same. The cover needs to be adapted for the two different cover editions, because the hardcover cover files need to be a lot larger to wrap around the hard board of the book cover.

Do I need an ebook version of my cookbook file? If so, what kind of file do I need?

Many cookbooks are released as ebooks as well, but that is not always the case. Research your target market and other cookbooks in your genre to see if they release both paper and e-editions or just a printed cookbook.

Should my cookbook ebook be fixed format or reflowable format?

A fixed format ebook would look just like your printed book visually. The format is “fixed”. This can be OK if the readers view it on a tablet or bigger screen, but if a person looks at it on a small screen like a phone, the text will be very small because the whole page will scale down to the size of the phone.

A reflowabale format ebook will reflow the text size, page size, image size, etc. to fit the size of the screen or device, but in so doing it loses the original formatting and it a bit more plain (think of a simple website, all the information is there but there is not a lot of fancy formatting.) If you look at this cookbook on Amazon and check the “look inside” feature for the Kindle (ebook), and then check the “look inside” feature for the hardcover (print), you will see how the Kindle book (epub) is formatted more simply. This is a reflowbale ebook.

I think the reflowable format is the best option for a cookbook because people so often look at ebooks on small devices and for ebooks, usually the content is more important to the reader than the visuals. More ebook adaptation information can be found here.

What does it cost to adapt a print cookbook layout to ebook?

It is not possible to give an exact price without seeing the complexity of the cookbook formatting, the number of images, the amount of front and back matter, whether you want the index to be linked to each cookbook entry, etc. A wide range would be something like USD$600 to USD$1,500 to create an epub file from a print layout file that I have created. If I made the print files, then I know that I can make them into ebook files. However, if you are providing files I did not create, I have to check first if they are files that I can work with.

Do the cookbook files that you create belong to me in the end?

Yes, you own the rights to your cookbook files, both the pdfs and the editable (Adobe InDesign) files if you want them. Please be sure to request the editable files at the end of the project if you want them.

How To Check Your Reflowable Ebook File

You did it! We did it! Your print file is ready to go and you may have already sent it off for a test print. Now there’s just one last file to check and/or upload—your reflowable ebook file.

At this point, you have two options:

  1. Simply upload your .epub or .mobi file to the website(s) that will distribute it for you. (Often this is Amazon KDP or IngramSpark if you are self publishing.)

  2. Open your ebook in an e-reader (an app on your computer, phone, or web browser) and review it before uploading it.

If you are going to review your ebook, how are you supposed to do that, and what are you supposed to watch for? Reviewing your ebook involves a certain level of tech savviness and an understanding of how reflowable ebooks work.

Your book has been adapted to ebook. It’s not been converted at the push of a button with some magical software. I partner with a developer, Luca Funari, to make your ebook file and to make sure it is coded in a way that will work on any and all e-readers. Visually, we try to keep some of the same “look” of your ebook to maintain your brand. But the way the body font looks, the way it flows on the screen, the way the text wraps around graphics—these kinds of things are different in an ebook.

If you are expecting that your ebook will look just like your print book, you will be confused and disappointed. This side-by-side comparison of a print book and an ebook may help you to understand how different an ebook is visually from a print book. And the information below should help you view your ebook accurately, if you want to check it over.

Review the content, but not the formatting

When you look over your ebook file, you are checking to be sure that all the basic content is there and correct. The chapter header should proceed the chapter body. The caption should be below or above an image, if there was a caption below or above it in the printed book. However, visual aspects of your book like fonts, where one page ends and another begins, are lost in an ebook. In fact, the ebook reader can dictate which font they want to read the book in, whether they want to read it on a light or dark background, what size the font should be, etc.

Review your ebook in the latest version of e-reader software

Warning: The previewer / viewer provided by Amazon KDP after you upload your file does not give you a reliable preview of your book. It shows you a mockup of the Kindle device but the settings from the actual device are not really reproduced accurately.

If you are reviewing a book for Kindle on your computer, you will need to do this using the latest version of the Kindle Previewer (preferably on a PC/Windows operating system, to have the most accurate results).

Another good option is to review the book on your phone using the official Kindle app, or on a Kindle device, as long as the phone or Kindle is running the latest version of the Kindle software.

If you are reviewing an epub file that is not for Amazon/Kindle, be sure to also use the latest version of the software you are using, no matter your device. But be aware that it may look a bit different on each device.

Review your ebook in several different e-readers or apps

If your ebook (epub file) is going to be distributed several different ways (ie: not just through one distributor), try to look at the file on several different devices. This may also help you to understand that your ebook will look slightly different on every device.


Whew, that was technical, right? If you loved the look of your printed book, or don’t usually read ebooks, it may concern you out to see your book in the simpler format of ebook. But know this: people who read ebooks are not reading them for beauty, they are reading them for their functionality, ease of distribution or lower price point. They’re used to seeing ebooks, even if you are not, and have never seen your print book! Their expectations are low in terms of visuals in an ebook; they’re there for the content.

After reading this article and reviewing your ebook, if you think there is a “bug” in your ebook, let me know. Sending me a screenshot or photo, as well as letting me know which app or software you viewed it on, can be helpful!


For more information about ebook adaptation, see the Ebook Adaptation section on my Articles page.

How to Transfer or Email Big Files for Your Book

If you are developing an image-heavy book and need to transfer a large number of photo or graphic files to me, especially tiff or psd (Photoshop) files, you will likely find that attaching them to an email will not be sufficient. Or you can attach them to an email, but only one by one (if you have more than a handful of images, please don’t send them one by one!) Here are fives ways to potentially get a folder of big files to me, for me to provide an estimate or for me to begin your book design.

Use a free file transfer service

There are various free file transfer services (usually they become “un-free” if your files are too big) and my favourite just due to easy of use is WeTransfer. All you need is your files, my email address and your email address. You should not have to create a username and password to use WeTransfer. WeTransfer is good for a “one-and-done” transfer, if you will be sending all the files all at once.

Ask me for a Dropbox folder link

The transfer method I use the most is Dropbox. I can email you a link to a folder that only you and I will have access to. Once you have that link, it may be as easy as clicking that link and pulling the files from your computer into your web browser and letting them upload. Or, you may need to create a Dropbox account (using your email address) if you don’t have one, but this is a straightforward process that just takes a minute or two. We can use the same folder link again if you need to add more images, or if I need to send you a pdf proof that is too large to attach to an email.

Send them via Google Drive

If you have a gmail account or are more familiar with Google than with Dropbox, you can use Google Drive to share files. This can be done for free up to a certain file size.

Get your photographer to transfer the files

If you are working with a professional photographer, the photographer will know how to transfer big files digitally. Connect your photographer directly with me and they can send me a download link.

Send them via mail on a hard drive or pen drive

Although sending your files via hard drive or pen drive is slow, it is still sometimes the most reliable and cos-effective way to send enormous, heavy graphics for your book. This is of course more efficient if you live in the USA like I do, but even when I lived in Europe, I had an American client send me his files this way. If you would like to use this method, just ask me for my postal address. 🇺🇸


Self-publishing an image- or graphic-heavy book is a significant endeavour. If you are still at the research and conceptualisation stage of your book, or don’t have all the images ready yet, I recommend booking a brainstorming call to discuss how to create your content and collect your files/graphics efficiently. If your book has lots of tables, charts and graphics, here are some pointers for achieving a professional look and feel to your book. If you are still collecting images and want to make sure you find images that are print quality (as some images are too fuzzy-looking when printed), try searching on these websites.

Case Study - Memoir Book Design and Interior Layout

The case studies on my website are based on the Book Done Newsletter, where I share my author clients’ Book Done insights! In this case study, I talk to  Eline Allaart about her book “Positively Triple Negative: Fighting my Tumor with a Dose of Humor”, self-published in 2020.

I designed the interior of this 226-page memoir and adapted it for ebook. I also jumped in at the last moment to make some adjustments to the front cover and design the back cover and spine before press time!


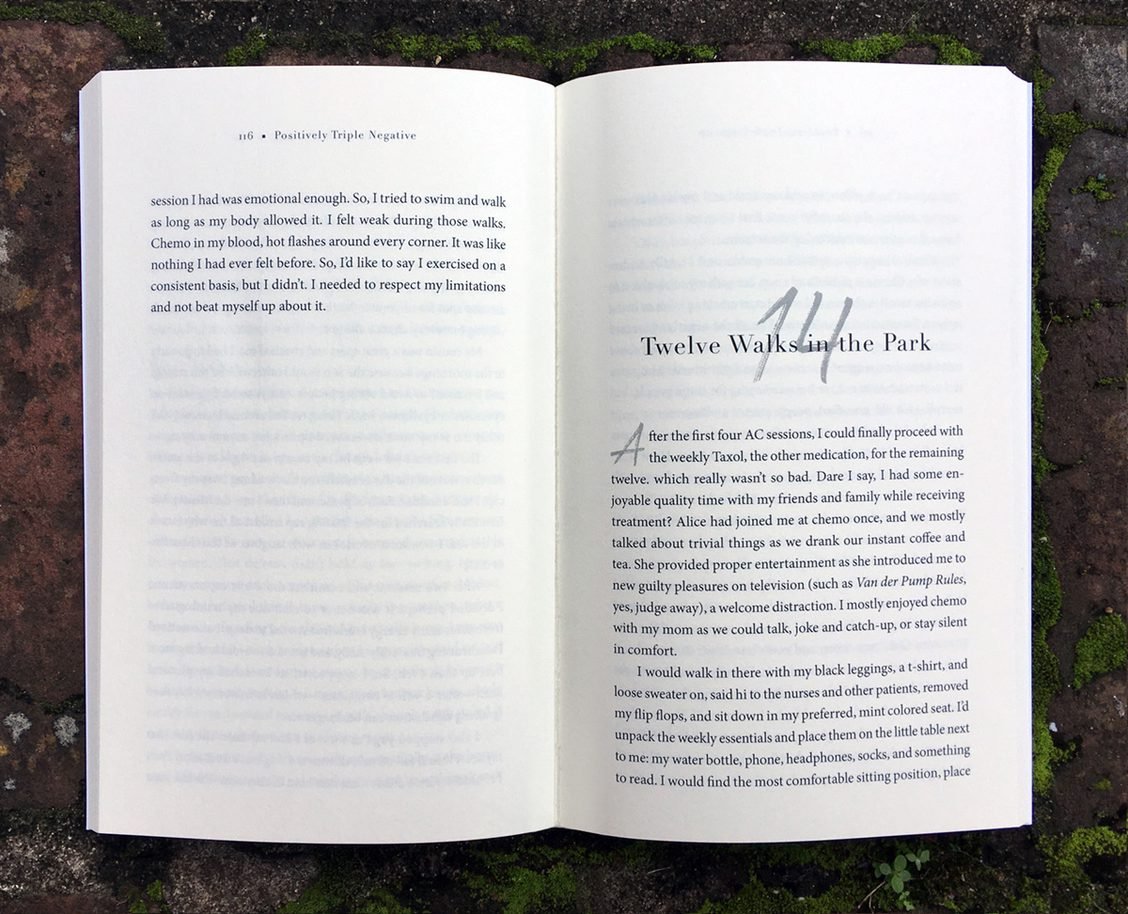
Positively Triple Negative by Eline Allart is a memoir that documents her cancer journey. Eline shares her experiences, putting a positive lens on her journey.


Eline’s Book Done Timeline

🐣 Idea hatched: During treatment for breast cancer
✍️ Writing started: Summer 2019
🎨 Files ready for editing, design and layout: September 2020
✔️ Book done (released): October 2020

Eline’s Book Done Take-Aways

Here are my questions for Eline about self-publishing her memoir.

When did you first have the idea for your book?

I always wanted to write a book, but thought it would be fiction. However, when I was battling breast cancer, I felt this intense need to write about my experience. I wanted to turn something negative into a positive, help people, process my own trauma and tackle the perception and taboo of cancer head on. I had all this material, so why not?

How did you come up with your book title?

The idea of the title came to me fairly early on. My type of breast cancer is called Triple Negative. As I love a play on words and a good paradox, I added “Positively” in front of it, which highlights both my mindset and the fact that I tested positive. In addition, it also refers to how my experience was; negative with a lot of positives. The subheading, however, took me the longest. I could not crack it and tried everything. Many subheadings I thought of already existed and I wasn't able to communicate what the tone of the book was and also explain that it was about cancer. That is until I came up with; “fighting my tumor with a dose of humor”.

Which part of your book project was the most fun or rewarding? Which was the most challenging?

Having to figure it out all on my own was overwhelming, yet also rewarding. Since my memoir was about my cancer story, it was important to me that I had full creative control. I am definitely proud of myself for having followed through on writing and releasing my memoir, because it is a huge task.

Editing was definitely the most challenging. I had to take care of everything and assemble the right team (editor, proofreader, designer, etc.) and as a newbie in the industry, that was a gamble. My editor and I were a great fit, and she really encouraged me to go back to the past and write about it with more emotion, depth and raw honesty. It wasn't always easy, but the book needed it and so did I. I really felt like I could close the book on cancer (knock on wood), when others opened mine. I processed it, healed from that experience and created a little legacy in the meantime.

Eline shared her story on Instagram: @postripneg

Which part of your book project took longer than you expected, and why?

I think the editing process took longer than I expected. My book changed so much compared to my first manuscript. If you want a good book, you have to put your pride aside and listen to your editor, but also fight for what you believe in. It's your story and you get to decide how you tell it, yet a second opinion from a professional should be considered with an open mind. 

What was the biggest surprise during your book project??

When self publishing, there's so much to think about in addition to the actual writing. Marketing (which never stops by the way), printing, isbn codes, book design, book editing, etc. It costs money, time and a whole lot of Googling. I would advise new writers to take it step by step and not get overwhelmed with the full to do list as it can be demotivating.

In addition, I was quite worried about disappointing peopleabout how they were portrayed in my memoir. I didn't want to hurt anyone's feelings or step on any toes. I renamed everyone (except family members) to protect their privacy and avoid them feeling judged. I was still fully prepared that some people would be offended, but I have only heard positive feedback!

Tell me a bit more about the cover design you chose.

Because my book is a memoir, I wanted my photo on the front cover, so that people could put a face to the name, to the story.

Claudia Sanches was kind enough to take my cover photo. I wanted a picture that embodied positivity. In the original picture, the wall behind me was blue and I wanted a rose background to subtly hint at breast cancer, so a good friend of mine edited the background color. Julie then finalized the design for both front and back covers.

What service providers or partners did you have in creating and producing your book?

Self-publishing a book is truly a team effort! 

Editor: Laura Kaiser at Word Haven Editorial
Cover photography: Claudia Sanches
Cover design: Usman Saleemi
Book Interior Design: Julie Karen Hodgins
Cover production: Julie Karen Hodgins
Proofreading: Elizabeth Nunes, plus friends & family

Julie is very skilled, fast and good. I loved what she did with the book, adding little touches of design that really made the book look more creative, professional and fun. I highly recommend her.

Eline’s Book Done Tips

  • Finding an editor that understands you and appreciates your story, makes a world of difference.

  • Be true to yourself and your story.

  • Focus on marketing, especially before publishing. To stand out on your own, amidst thousands of other books is hard.

  • Do the events, the launch party, and host the talks. People buy books a lot quicker in person than online.

  • Working with influencers on social media definitely helps a lot in terms of getting exposure and increasing sales.

  • Enjoy the journey. Publishing your story is something fun, special and creative. You shouldn't let the stress or tiny typos cloud the experience.

Eline’s Book Done Technical Details

Quantity ordered: no minimum quantity (print on demand)
Page count: 226
Dimensions (page size): 5 x 8 inches
Binding: Paperback

Interior details
Ink colors: 
Black ink
Paper: 90g Creme bond
Bleed: Yes

Cover details
Cover stock: 
100# white paper with glossy finish
Ink colors: Full color

Eline published her book via Amazon KDP, which is ideal for a passion project like a memoir. Amazon KDP prints your book on demand and takes care of all the logistics, such as orders, shipping and customer support.


A memoir for you in 2022?

I love learning and helping you share your story. Will 2022 be the year when you get your memoir done?  Book a live brainstorming session via zoom or get your questions answered by email. Let’s get your book done! ✔️

Editing and Proofreading Information for Self-Publishers

Sometimes when I receive a self-published manuscript to review for design, it becomes clear to me that the manuscript is not really ready for design. It has not been properly edited or proofread, and is lacking the polish it should have before design and layout begins.

I try to alert my clients when I see these kinds of problems in the text, but sometimes they forge ahead anyway, sure that the text is OK—or not willing to add more money to the budget to give their text a professional polish.

However, when a manuscript is not properly proofread or edited, one of two things happens, and neither is good: either the book is published with a lot of text problems (embarrassing, unprofessional, leads to bad reviews), or the client finally gets the book edited or proofread after layout (requiring extensive, expensive changes to the layout).

I don’t like to see my clients in either situation, which is why I contacted Adina Edelman from Edelman Edits to help me untangle some of the questions first-time self-publishers or authors may have about editing and proofreading. I hope the insights she’s shared here will make your book a better read and a better sell!

Do I really need to hire an editor or proofreader? I've gone over the manuscript many times myself. 

Before you buy a used car off someone (if you do that kind of thing), do you inspect it yourself and say it’s fine, or do you take it to your mechanic for a thorough check? Obviously, you let a professional handle it. They know what to look for to ensure that this car you’re spending money on will last the journey. It’s better to pay money now than to realize later on that you messed yourself over.

Listen, you are the author of your book. No one can understand it quite like you do. And no one has spent more time on it than you. But that also means your head cannot look at your writing objectively. Putting it aside for a time certainly helps, but nothing can compare to having objective eyes look at it—eyes that have been trained to see what needs improvement and fixing. I’m not just talking about grammar and spelling. Editing is much more than that. There’s voice, structure, consistency, theme, showing vs. telling, and so much more.

The idea of paying for an editor or giving over your precious writing to someone can be difficult. But you don’t want to regret anything down the line. Your book deserves to be handled by a professional.

Do I need to hire both an editor and a proofreader? What's the difference between editing and proofreading?

This is a question many new authors have, and it’s an important one. A good editor is not cheap. Do you really have to hire an editor and a proofreader? Like, really?

Here’s what a proofreader does: quality control. A proofreader looks through the book after it’s already gone through rounds of editing. The manuscript at this point should be 95% clean—almost no mistakes. The proofreader catches the little errors that slipped through the previous rounds of editing, ensuring a quality book. Having a proofread after it’s been typeset is really helpful; the proofreader can see what the content looks like when everything’s been laid out and thereby catch mistakes that cropped up during typesetting.

So yes, it’s really important to have your book both edited and proofread. Sure, the proofread seems like an extra expense, but it’s really not. You’d be surprised by the blatant errors proofreaders catch. Again, your book deserves professional treatment.

Can one person both edit and proofread my book, or should I hire two or more different people? What are the pros and cons of each approach?

The ideal is to hire two different professionals, as the proofreader will be looking at your book with fresh eyes. They might catch things the editor, who’s been doing in-depth editing, might have missed. It’s always good to have more eyes before your book is published.

There’s also the fact that not every editor also proofreads. They really are different forms of the editing process. However, some writers don’t want to deal with finding another professional. It might be more expensive than sticking with one editor. It might just be more of a pain. They might be on a time crunch.

What I will say is that if you choose to use your editor to proofread your book as well, make sure there’s a good amount of time between the editing and proofreading. Perhaps you’ll have it typeset in between to create some space. But make sure there’s a good two to four weeks for the editor’s brain to reset.

Personally, I offer editing along with proofreading for the convenience of the author, but I use the above approach. I make sure there’s time in between. I also always suggest that the writer find a different proofreader, as that’s really the ideal. And what I’ll never do is developmental editing, line/copyediting, AND proofreading on the same manuscript. By the time I hit the proofread, my eyes would definitely overlook things.

What's the best way to find an editor or proofreader for my self-published book? How can I know that a particular editor or proofreader will do a good job? Do editors have specialties? 

It’s very easy to find an editor or proofreader. You can check the Editorial Freelancers Association or ACES: The Society for Editing to see their lists of professionals. You can do a simple search on LinkedIn.

The hard part is finding a good, professional editor for your book. Jane Doe might be an amazing nonfiction editor, but she wouldn’t be amazing for your sci-fi novel. Or you may be looking for someone with years of experience to help you know if your book is marketable. There are also different types of editing, and the one you need will determine whom you should hire. Editors have specialties, and you’ll likely want to hire one that works in the areas you need.

Overwhelmed yet?

Here’s a simple plan:

Do some searching. Make a list of five editors who work in your genre (whether its literary fiction, medical research, or romance) and message them. Explain what your book is about, the word count, what editing you think it needs, and what your timeframe is.

A professional editor (who has availability) will likely suggest a call or a sample edit.

The sample edit is SO important. This is how you see whether the editor will do a good job. The sample allows you to see their editing style, and it allows the editor to see your writing style. More importantly, it shows the editor what kind of editing your book needs, how much that would cost, and how long it might take. Do not hire an editor without seeing a sample edit. That’s asking for trouble.

The first step is to always reach out. If that particular editor says they can’t take on your book, perhaps they can suggest a colleague who’d be a better fit. It’s a matter of networking now.

At which stage in the book writing process should I first get in touch with an editor?

You’ve finished your manuscript. Hurray! Now is a great time to set it aside for a month or two (or three) and then come back to self-edit before you send it anywhere.

During that wait time is when you reach out to an editor. First off, many editors don’t have immediate availability. So waiting until your book is (in your opinion) totally ready for editing will only result in more waiting.

Second, in that sample edit phase, the editor may point out some major things that need work—things that would push off the editing process anyway until you make those big repairs. It may be that your book actually needs a book coach to smooth out the basics before it’s ready for editing.

Writers often have a mindset of “Let’s start the editing NOW,” but their books or their editors might not be ready for that. This is something you should be prepared for. Reaching out during that downtime is a great way to determine how much more work your book needs and when you might actually begin the editing process.

How long does it usually take for an editor or proofreader to go over a manuscript?

This will depend on the editor, the type of edit, the word count, and the writing itself. So . . . there’s no simple answer. :D

A proofread should take the least amount of time. (Because, as I said above, it should be 95% clean.) A 50,000-word proofread will usually take me about a week if the writing is interesting and engaging. (Yes, that makes a difference.)

A line edit/copyedit takes me the most time because of the in-depth nature of the edit. A 50,000-word copyedit will usually take me two-and-a-half or three weeks.

A developmental edit of the same length would take about two weeks.

But again—there are so many factors at play here, which is why getting a sample edit is so helpful. That gives the editor an idea of how long it will take to edit the whole book.

What does it cost to get a book edited or proofread? 

Every editor has her own process for this. Some price by word, some by project. I do the latter, as I feel that’s the most beneficial for both parties. But to give you an idea, a 50,000-word copyedit might cost $1,500. I would suggest looking at the EFA’s rates page so you understand the range that’s out there. That will help you know how much to save up for a professional edit.

Does an editor or proofreader usually get credited in a book? If so, where is the credit line?

This is up to the author. If you choose, you can credit the editor/proofreader in the acknowledgments. (We do a happy dance when you do this.)

Is there anything else you’d like to tell self-publishers about editing or proofreading?

Remember that an editor is there to help you. Any critique or suggestions are made for the book’s benefit; it is never a personal statement on the author. Remember that the book always remains yours. You are in control of every decision. Accept or reject an edit as you feel is best for your story. Just keep in mind that the editor wants this book to be great almost as much as you do, and they’ve been trained to make it so. The editor is your guide through this refining process. Let them help you make your book shine.

Adina Edelman is an editor based in Baltimore, Maryland, USA. She runs her own editing business for authors and small publishing companies. Her editing style comes down to two things: honesty and value. Learn more about her developmental editing, copyediting and proofreading services here.


Do you have more questions about editing, proofreading, book design or book interior layout? Feel free to send me a note and I’ll do my best to help you, or to connect you with someone who can help you!

Marketing Ideas for Journal Creators

I love meeting passionate content creators, speakers, writers, and professionals who want to launch a journal and need guidance to get from idea or manuscript to a journal-their-clients-can-hold! We usually meet over zoom to discuss cover colors and materials, design and layout process, printing costs...and more! Although journal design is my wheelhouse, we usually end up talking about journal marketing because, what good is a journal if you can’t get it out to your market? I have come across some interesting journal marketing ideas and want to share some of them with you in this article.

Photo copyright Shoal Projects Limited

Photo copyright Shoal Projects Limited

Start establishing your brand or online presence well before you want to release a journal.

I meet a lot of would-be journal creators who love journaling and have an interesting journal idea, but have no audience to whom they can sell their journal. The first step in launching a successful journal doesn’t have much with the actual journal itself. It has to do with the background work of building an online presence (brand, website, social media accounts) and finding the people who are interested in what you’re creating (and finding ways to keep in touch with them, like through an email newsletter, Facebook group, or similar). The cost for creating a professionally designed and printed journal, if you print in Asia, starts at around $5,000 for the first 500 copies. Before you lay out that kind of money, you need to make sure you are creating something people will buy and use.

Give away a free download in exchange for an email address.

I have seen a few different journal creators do this: offer a printable worksheet from your journal in exchange for joining your email list. Or offer people the chance to test your journal pages and give feedback before you get the whole journal designed.

Share your journal creation process.

Create content about your journal creation process: a photo of the person who inspired your journal project; a picture of you writing in the woods; a video of you talking about how you brainstormed ideas for the journal; pictures of sample ribbons, paper and faux leather material you received from the printer; or a video of you unboxing the journals. Anything, everything can be social media content especially with a project so visual as a journal!

Consider making your first journal product a bit generic.

Journal creators can’t really use print-on-demand and just print one journal at a time, so you have the heavy front-end costs of printing hundreds of journals and seeing how they will sell. Avoid anything that might make your first journal feel dated quickly, so that you can create a timeless journal that can be used for many years.

What makes your journal feel out of date?

  • A logo or website that gets changed. If your brand has not been established for long, you may end up with a name change or logo change before you run out of journals. It might be better to create a website just for the journal but not for the overall brand you are building. For example, my journal design client Felix registered an LLC under the same name as his journal, “Live Your Potential”.

  • Dates: A dated journal has to be sold within a very short window of time: who hasn’t seen daytimers on sale for 50% off just a month or two into the new year?

  • An ultra-trendy look or content: If you’re capitalising on a social media trend or popular video game or maybe even a color that is already trendy, by the time your journal arrives on the ship from China, that trend might be long gone. For this reason, it’s probably wise to stick to a more classic look and feel for a journal so that it can be sold long term.

Brand your journal with a belly band, bookmark or bag.

A belly band, bookmark, bag, or other “wrapper” that you can put on your journal can be custom designed for a particular event or time. For example, the belly band on a 365 day journal can make it seem branded for 2022, even though the product itself could be used any year. A bag can be stamped with event information or a bookmark can contain phone numbers of local sponsors. Speaking of which…

Photo copyright Shoal Projects Limited

Photo copyright Shoal Projects Limited

Create partnerships or seek sponsors within your niche.

Brainstorm a list of individuals or organizations who offer complementary services and might be interested to partner with you in promoting your journal. For example, the creator of a journal for adoptive parents can partner with non-profits or government agencies helping adoptive and foster parents. A Christian journal might be given out in event bags at a large Christian event in your area, if you sell the journals to them a reduced rate. A kids’ goals journal could be promoted by a local school or by an online kids’ entrepreneurship company. Approach potential partners asking if you can do anything from a giveaway that they share on their social media pages and website to a sponsorship where they pay for some of your printing costs in exchange for including their logo or contact information on your journal or marketing materials.

Make a journal launch team.

Individuals and agencies who are interested in your journal can help you launch it. Plan the time into your journal launch timeline to give your launch team an advance copy and ask them to promote it during the weeks before the full release. Who doesn’t want a free journal in exchange for a post or two about it?

Hire professionals to help you.

Too many journals fail to fly because they look or sound unpolished. If your journal has a lot of text, you need a professional editor to help you. If your journal has any text at all, you should hire a professional proofreader. If you are not a journal designer or have never ordered a book before, I offer journal design and print ordering services, and will talk to the printer for you if you run into any snags. There are people out there who will help you with marketing and distribution of your journal if you want that. There’s no sense saving $400 in proofreading costs but having a journal that’s full of typos and gets negative reviews, kapish?


If you landed here first, you may be interested in my other journal articles:

Or, schedule a one-hour brainstorming session with me to get ready to take your journal from an idea in your head or a manuscript on your computer to a journal you—and your target market—can hold!

Case Study - Marketing Book Interior Design and Layout

Each case study on my website features an author or publisher who has worked with me to reach #bookdone. Each author has great insights. Matt Chiera, a digital marketing expert and business owner who self-published Digital Marketers Sound Off is no different! Matt came to me in 2018 for book interior design and layout, as well as ebook adaptation. Matt’s book has been selling for nearly three years now, and as you’ll see below, gaining him many business opportunities!

Recently you said, “Self-publishing my book, Digital Marketers Sound Off was unquestionably one of the best career decisions that I’ve made.” I’m sure that’s what every business owner writing a book wants to hear. Why do you say that?

It’s true! Self-publishing my book helped me to position myself as a subject-matter expert at a time when my digital marketing consulting business, Ice Nine Online, was growing quickly. I wanted to instantly create credibility with prospective clients and partners. My book exceeded my expectations—it led to many referrals, introductions, pitches, and unquestionably helped me to close new business.

Your book is a collection of interviews with digital marketing gurus. Sounds like an efficient way to create a book, as your contributors helped you write your content. Can you explain briefly what your process was to create the book? How long did it take from start to finish?

The whole process took about 14 months. 

My first step was to outline the competencies within digital marketing that I know people want to learn about (SEO, Email Marketing, etc.)

Next, I wrote simple introductions about the various competencies. Those intros were located just prior to the contributor interviews so that the reader has a basic understanding and context for the interview content.

Then I found contributors. I made a spreadsheet of everyone I know who does really strong work within those disciplines, and for the gaps where I didn’t have someone in my network, I reached out to marketers (mostly through LinkedIn), explained what I was trying to do, and ended up getting about 200 interviews. I kept the best 101 for the book.

Then I wrote my intros, back cover, and other non-contributor sections.

I hired several professionals: a copy editor, a book cover designer, and a stellar interior designer (you) . They did their work and then I edited and proofread a few more times.

When everything was perfect, I published my book through Amazon KDP (print on demand and ebook).

I designed the style of all the pages to match the look of the front cover.

I designed the style of all the pages to match the look of the front cover.

How did you market your book?

I did quite a bit to market it...I’m a digital marketer after all! I made a plan for marketing the book and started executing as I was conducting the interviews and putting the book together.

📣 Pre-Release Marketing Strategies:

  • I released little teasers and updates on social media, requested feedback on the cover design, interior, etc. Some of those posts generated good buzz. 

  • I created a website for the book and used SEO to promote it. 

  • I published blog posts about the book and the self-publishing process. 

  • I partnered with a charity, One Tree Planted, and donated $1 of each book’s sales and promoted that partnership as well.

📣 Post-Release Marketing Strategies:

  • I advertised on Amazon, Google, Bing, and Facebook Ads.

  • I created a YouTube video trailer for the book that got ~50,000 views. 

  • I put a link to the book in my email signature and actually got a surprising number of book sales that way!

  • I reached out to libraries and bookstores and got the book in retail locations (and once they were there, promoted on social media). 

  • I reached out to book review websites and requested they review the book, which was a great source of affiliate sales and backlinks.

  • Because my book features tons of super-smart digital marketers, a natural tool was to leverage them! I put together book updates that they could share with their networks, and then helped them promote their own entries in my book to their networks.

How do you use your book in promoting your business?

I basically use my book as a business card. I take copies to hand out at introductory meetings with prospective clients or partners, or send copies by mail ahead of time if I’m meeting people virtually. 

Also, when people Google me or are doing research about Ice Nine Online, they often stumble upon the book. It helps tremendously as a credibility booster.

83ccd8cd-cf99-e460-2365-96706447f909.jpg

When you write your next book, what are you going to do the same way and what are you going to do differently?

I’ll probably take a similar approach with my next book—which will be essentially a second edition—but I’ll likely do more in-depth polling to determine the content (questions, marketing competencies). 

Because I see that a lot of my first book’s sales came from people who were not yet digital marketers (but who were looking to break into the industry and start their own freelance business or get a job in marketing), I’ll likely do more to tailor the next edition to that audience. 

More info on the second edition of Digital Marketers Sound Off coming soon!

To close, could you give an example of a business opportunity that you gained because of your book?

I gained one of my digital marketing consultancy’s largest and most profitable clients from the book, literally because their CMO saw the book on a coffee table at an office space in Chicago and then contacted me for consulting work.


Matt Chiera is obviously an expert in his field, and self-publishing a book to showcase his knowledge was an idea that is still paying off for him and his business. I hope you’ve learned from his ideas and process, which he so generously shared here! Congratulations, Matt, I wish you even more success with your next book!

If you have a book you want to launch with Amazon KDP, or really just any book that you’re trying to get done and out to your clients, give me a shout! Establish yourself as an expert, use your book as your business card, and keep the clients you need coming to you!

Case Study - Complex Business Book Interior Layout

space industry book design.png

Space is Open for Business by space investor and entrepreneur Robert Jacobson was self-published in 2020. This book provides a comprehensive overview of the space industry, allowing everyone to understand the role space plays in our lives and how it will continue to transform the world. It includes over 100 industry experts and leaders’ insights.

I designed the interior of this 354-page book with 28 chapters plus appendices and 44 pages of references to match the cover. This book was released as softcover, hardcover, ebook and audiobook—guys, this book means business! 😅 And this case study is full of helpful information, especially if you have a large-scale book you are launching using Amazon KDP and/or Ingram Spark! 🚀 (Hint from Robert: don’t try to do it by yourself!)

business book interior design.png

Robert’s Book Done Timeline

🐣 Idea hatched: Spring 2016
✍️ Writing started: Summer 2016
🎨 Files ready for editing, design and layout: Spring 2020
✔️ Book done (released): Fall 2020

table of contents design.png

Self published book design.png

Robert’s Book Done Take-Aways

Here are my questions for Robert about self-publishing his business book.

How did you come up with the idea for your book?

A friend challenged me to use my decades-long experience in space entrepreneurship and business to write a book on the ever-evolving space industry. Neither he nor I realized that it would take four years to come together!

Your book has a lot of interviews in it. How did you collect and organize all that information? 

The interviews were conducted during the research and writing phase of my book project. I used an app on my phone to record the interviews, and hired someone to transcribe them. (Next time I would make a list of key words for the transcriptionist. “SpaceX” was often transcribed as “sex”!) We stored all the text in Google Drive, and my editor and I pulled and edited the interview text for use in the book. The full interviews were then turned into bonus material, and shared on my website.

Screenshot 2021-09-14 at 14.40.49.png
Screenshot 2021-09-14 at 14.40.55.png

Robert’s book is full of custom illustrations and complex charts and graphics. The charts and graphics were pulled from various sources and then redrawn or reconfigured to match the fonts and style of the book.

Whom did you bring on board for book design and indexing?

For the initial cover design research, I hired several different designers through an online freelance marketplace to see what they would create. The results were unprofessional (not surprising, given their pricing.)

My wife discovered Richard Ljones through an online search using several different phrases and keywords such as “award-winning book cover designers”. He started by designing a variety of cover drafts, which my wife printed out in color and put onto books I had in my house. We took photos of the “3D” books with the draft covers, sent them to friends and colleagues, and got some feedback that helped us choose our favorite design direction. Special thanks to my wife for helping with art direction, and Richard Ljones for his fantastic cover design. Takeaway: authors should not skimp on their book cover design.

For the interior design and layout, I worked with you, of course! When I landed on your website, it was clear to me that you could do exactly what I needed. I liked that I could see samples of your book layout work, and that your website was not overly complicated.

I also worked with a professional indexer, Joanne Sprott from Potomac Indexing. Hiring a professional indexer for such a complex book was well worth the money.

I definitely recommend hiring as good a team as you can afford, and then trusting your expert team’s wisdom!

Screenshot 2021-09-14 at 14.41.02.png

You self-published and used print-on-demand services. How was your experience working with IngramSpark and Amazon KDP?

I used Ingram Spark (for hardcover) and Amazon (for softcover). 

The quality of Ingram Spark’s soft and hardcover books is pretty good. Their interface online is also pretty good to work with, but unfortunately their customer service is awful. Their website is not up-to-date, emails would not get answered, and both me and my book marketing team were virtually unable to get ahold of anyone over the phone either. The fastest response I ever got from IngramSpark was on Twitter when I posted a complaint. I learned that they answer questions on their Twitter DM, so I started asking no more than two or three questions at a time on there. 

Amazon KDP’s customer service is a bit better, and can often be reached via chat messages on their website, but sometimes you can’t get ahold of the person who can answer your question. Amazon customer service is hard to get ahold of by phone. The quality of Amazon KDP softcover books varies. One reader told me that his copy started coming apart after one or two months. Amazon replaced it at no cost.

All in all, I’m still glad I used print-on-demand services for my books; I have no interest in holding inventory of my books!

How do people order your book, and what is your system for fulfilling the orders?

I sell my book directly through my websiteSpace is Open for Businessis available as ebook, audiobook, paperback (softcover) and hardcover.

The ebook and audiobook are distributed as a download. For hardcover book orders I used Shipstation for 11 months to handle communications and logistics. Recently, I switched to Shopify due to new requirements. 

For softcover books ordered through my website, I place those orders on Amazon myself, and have Amazon fulfil them. It’s worth noting that I purchase author copies via Amazon, which are at a price not available to the public.

What are the benefits of printing through Ingram Spark vs. Amazon KDP?

Amazon KDP does not offer a hardcover book option for print-on-demand, but Ingram Spark does. Ingram Spark also makes your book available to other retailers. Some independent bookstores might also distribute your book because they are connected through Ingram Spark’s network.


convert print book to ebook.png

See more pictures comparing Robert’s print book and ebook here.

What about your book project took longer than you expected?

Everything took longer than I expected! But in particular, ordering printed proofs of my book was something I wish I had planned into my timeline. I ordered printed samples from both printers before officially launching my book. Allow 2-3 weeks for your samples from Ingram Spark to arrive by mail in the USA; Amazon KDP samples are a bit faster.

What are your book marketing tips?

  • Start the branding and promotion of your book over a year in advance. Start posting sample material or posts related to your subject matter online, just to get people noticing your name and your book idea. Don’t overthink it; just post about things you’re working on or researching!

  • Plan a few months to build your Amazon KDP book page. This allows time to work out any problems and pick out the right metadata, keywords, etc. 

  • Consider using Aer.io (part of the Ingram Spark family) to make your own online bookstore. 

  • Offer to answer questions about your book or your subject matter live online; I did this on Reddit and YouTube. 

  • Make a book trailer for YouTube.

  • Hire a social media manager, virtual assistant or project manager to coordinate the moving parts of your book project and marketing if needed.

Robert and his team launched an impressive, professional book! If your manuscript is complex like his (with a large number of sections, styles, graphics, tables, etc.) it’s good to contact me several months before your book is ready for layout, to discuss the best way to create and organize the files, as well as to schedule a start date to begin the design once your manuscript is fully edited and proofread! Find out if you are ready to work with a book designer or sign up here to get more case studies like this one in your inbox!

Publishing a Book with Lots of Tables, Charts or Graphics

If you're working on a book that has a lot of tables, charts or graphics, it's best to talk to your book designer sooner rather than later to figure out the best way to create or supply those graphics. Here are some of the common problems I see when checking files from authors, especially when they are publishing (or self-publishing) for the first time.

Photo by Anthony Tran on Unsplash

Graphics that have been used illegally.

This should go without saying, but graphics that you did not create yourself should be used with permission. This sometimes means you need to find the original source of the image and buy it, other times you just need to give an attribution in a caption or on your copyright page. If a colleague or friend made the graphic, you can ask if they want to be credited. But please, don’t use photos, graphics, tables or charts that you did not create without permission and attribution, if required.

For example, one of my clients wanted this image that she found online in her book, but did not know the original source and did not want to risk using it without permission or attribution:

graphics for self published book.gif

I built her a similar graphic using the fonts and graphic style that we were using in the rest of her book:

how to prepare images for book.png

Graphics that are too low resolution for print.

Graphics that have been pulled from Google images or that have been passed around on the internet are often too low resolution for printing. You can usually tell if the image is low resolution by checking the file size (the smaller the file size, it is less likely it is that the quality is good). Another way to tell is to zoom in on the image on your screen and see if you quickly begin to see a rough, pixelated edge to the graphics. This is not a good sign!

Your book designer will ultimately need your graphics as separate files (not just placed into a Word file) and it can save your designer time and you money if you provide them as individual, clearly-labeled files that the designer can easily insert one by one into your book. (Any graphic that has been placed into Word has lost quality; your designer will want to work from the highest quality file you have!)

It is especially important that graphics that have text in them be crisp and easy to read. This client had this low resolution graphic:

Screenshot 2021-08-18 at 21.15.27.png

I kept the same content but made the text crisper and adjusted the greys to work well in print:

Screenshot 2021-08-18 at 21.15.45.png

Graphics that are not understandable in black and white.

This is important if your book interior is going to be black ink only (grayscale). If you have graphs or tables that can only be understood because of the colors on them (such as: the pink slices of your pie chart represent watermelon, the red sliced represent strawberries), you either need to rebuild them to be understandable in black and white (such as using a dot pattern vs. a checkered pattern to show the difference between two slices) or get your book designer to rebuild them for you!

For example, the distinctions between the different shades of purple on this graph were not understandable in black and white, so we had to add some patterns to the graph and the key:

Figure 2.png
Screenshot 2021-08-18 at 21.34.32.png
Screenshot 2021-08-18 at 21.31.15.png

Graphics that don’t match.

It is often the case that graphics for a book have been collected from a variety of sources and don't match in style or format, giving the book a messy, unprofessional feel. If you want your self-published book to compete with a publishing house’s book—or to catch a publisher’s eye in hopes of getting a book deal—you need to make sure the graphics have some kind of commonality to them: this might be as simple as making sure they appear at the same width and height with the same styling (such as a black border around them and an italicized caption under each one) or might be more complex, requiring redrawing them in design software to make them all have a similar feel.

Graphics that don’t fit the proportions of your book.

It is sometimes the case that a full-page graphic does not fit well to the proportions of the book. In this case it may need to be reworked to fit inside the margins of your book.

I took this complex, oblong graphic:

Screenshot 2021-08-18 at 21.17.46.png

And reworked it to fit the format and match the fonts and style of the book:

Screenshot 2021-08-18 at 21.18.08.png

Graphics that are not editable (but could be).

If you are creating tables, charts or graphics yourself, it is good to talk to your book designer about what format would be best (jpeg? pdf? tiff? ai?). For example, many people create graphics in Powerpoint or Canva and give them to the book designer as jpegs. However, giving them to the book designer as pdfs might be better, because often that means the designer can edit different parts of your graphics (especially text/fonts) more easily. This saves your book designer a lot of time if they don’t have retype text or redraw graphics, time he or she can better invest in styling the look and feel of the graphic to match the others.

For example, my client drew this graphic using Google’s suite of tools:

Graphic created in Google Draw

She gave me access to the Google file, which I was able to export as a PDF. I used her basic design, but was able to use design software to edit the style and fonts so that they would match her book’s look perfectly. And I added a few fun graphics suiting the theme for good measure!

cleaned up graphic for self published book.jpg

Talking through your needs with your designer ahead of time can save you a lot of time and money! Sometimes authors contact me months in advance of their book being ready, just to talk through the best way to collect or create their images. If tables, charts or graphics play an integral part in your book, consider booking a brainstorming session with me or at least email me your questions before you create all your graphics. This can potentially save you—and me—days of work! Here’s to your complex book, and making it as neat, beautiful, and readable as possible!

Case Study - Self-Published Humorous Political Memoir

In her self-published political memoir, The Total Nobody Who Ran for Office, Silky reflects on those critical moments in one’s life when they step outside of their comfort zone… even if it means nearly dying from embarrassment! 

2018 was the year that a record breaking 528 women ran for congress. Many of these women won their seats, including Ilhan Omar and AOC. Silky was not one of them. She ran though! This book is her story.

cover with interior.jpg

Silky’s Book Done Timeline

🐣 Idea hatched: July 2019
✍️ Writing started: July 2019
🎨 Files ready for editing, design and layout: September 2020
✔️ Book done (released): October 2020

Silky’s Book Done Take-Aways

Here are my questions to Silky about self-publishing her memoir. 

How did you come up with your book's title?

Weirdly enough, my title came to me as I was falling asleep one night. If I’m being honest, I came up with the title first, and that set the outline for how I wanted my book written.

Did you use a print-on-demand printer?

Yes, I used Ingram Spark (for hardcover) and Amazon (for softcover). Both were easy to use, and allowed me to ensure my book would be printed and shipped to customers in a timely manner.

Screenshot 2021-06-01 at 15.33.09.png

Which part of your book project was the most fun or rewarding? Which was the most challenging?

I’ve never felt more excited than when I finished my first draft. It was a surreal moment and I let myself celebrate for a whole day! Then I got back to work and started the editing process, which proved to be more challenging than writing the book in the first place!

What was the biggest surprise during your book project?

Ensuring I made time to write every week was hard. Rewrites and editing are arduous and suck the fun out of writing. But if you do it right, you end up with the best version of your work possible, and that’s worth it!

Which partners did you have in producing your book? 

Red Shift Writers were my editors, David Drummond designed my cover, and Julie Karen Hodgins designed and formatted my book’s interior. I would recommend each of these folks a million times over if I could! They made my dream of writing a book a reality, and helped ensure I put my best foot forward and produced my best work. I was thrilled to see how their creative talent kept my voice authentic, while ensuring their ideas were really capturing the essence of my book.

IMG_6959.jpg

Silky’s Book Done marketing tips

  1. Build a professional website to drive potential readers to! (Silky’s fun website is a great example: SilkyJMalik.com💻

Screenshot 2021-06-08 at 07.30.58.png

2. Create a mailing list and email your subscribers with updates about your book! ✉️

Screenshot 2021-06-01 at 15.29.45.png

3. Post on the social media platform your readers are most likely to use about your book (before, during and after the release!) I used Instagram.

Screenshot 2021-06-08 at 07.34.20.png

4. Ask people who have purchased your book to write a review on Amazon.

Screenshot 2021-06-01 at 15.33.46.png

5. Look for opportunities for interviews about your book within your network! 🎤

Screenshot 2021-06-08 at 07.35.59.png

Silky’s Book Done technical details

Amazon KDP and other print-on-demand printers offer a limited number of paper types and book sizes. If you need an unusual size or paper, you may need to print with a traditional printer.

Quantity ordered: no minimum quantity (print on demand)
Page count: 174
Dimensions (page size): 5.25 x 8 inches
Binding: Paperback

Interior details
Ink colors: Black ink
Paper: White bond
Bleed: Yes 

Cover details
Cover stock: 100# white paper with matte finish
Ink colors: Full color

Silky originally came to me after reading this article about how to make your book look longer than it really is! She partnered with me for interior design and layout and ebook conversion for her 33,000 word book, which ended up being 174 pages long.


How is your book project going?

I hope Silky’s tips are helpful on your journey to book done. ✔️ Find out if you are ready to work with a book designer or sign up to get more of these case studies in your inbox via my newsletter!

Case Study - Full Color Illustrated Business Book

If you have been wanting to self-publish your book, but want to make sure it has a professional polish (ie: doesn’t “look self-published"!), you’re in the right place. In this case study you’ll gain a lot of insight from Alison and Mary’s journey in self-publishing their business strategy book FrameShifting.

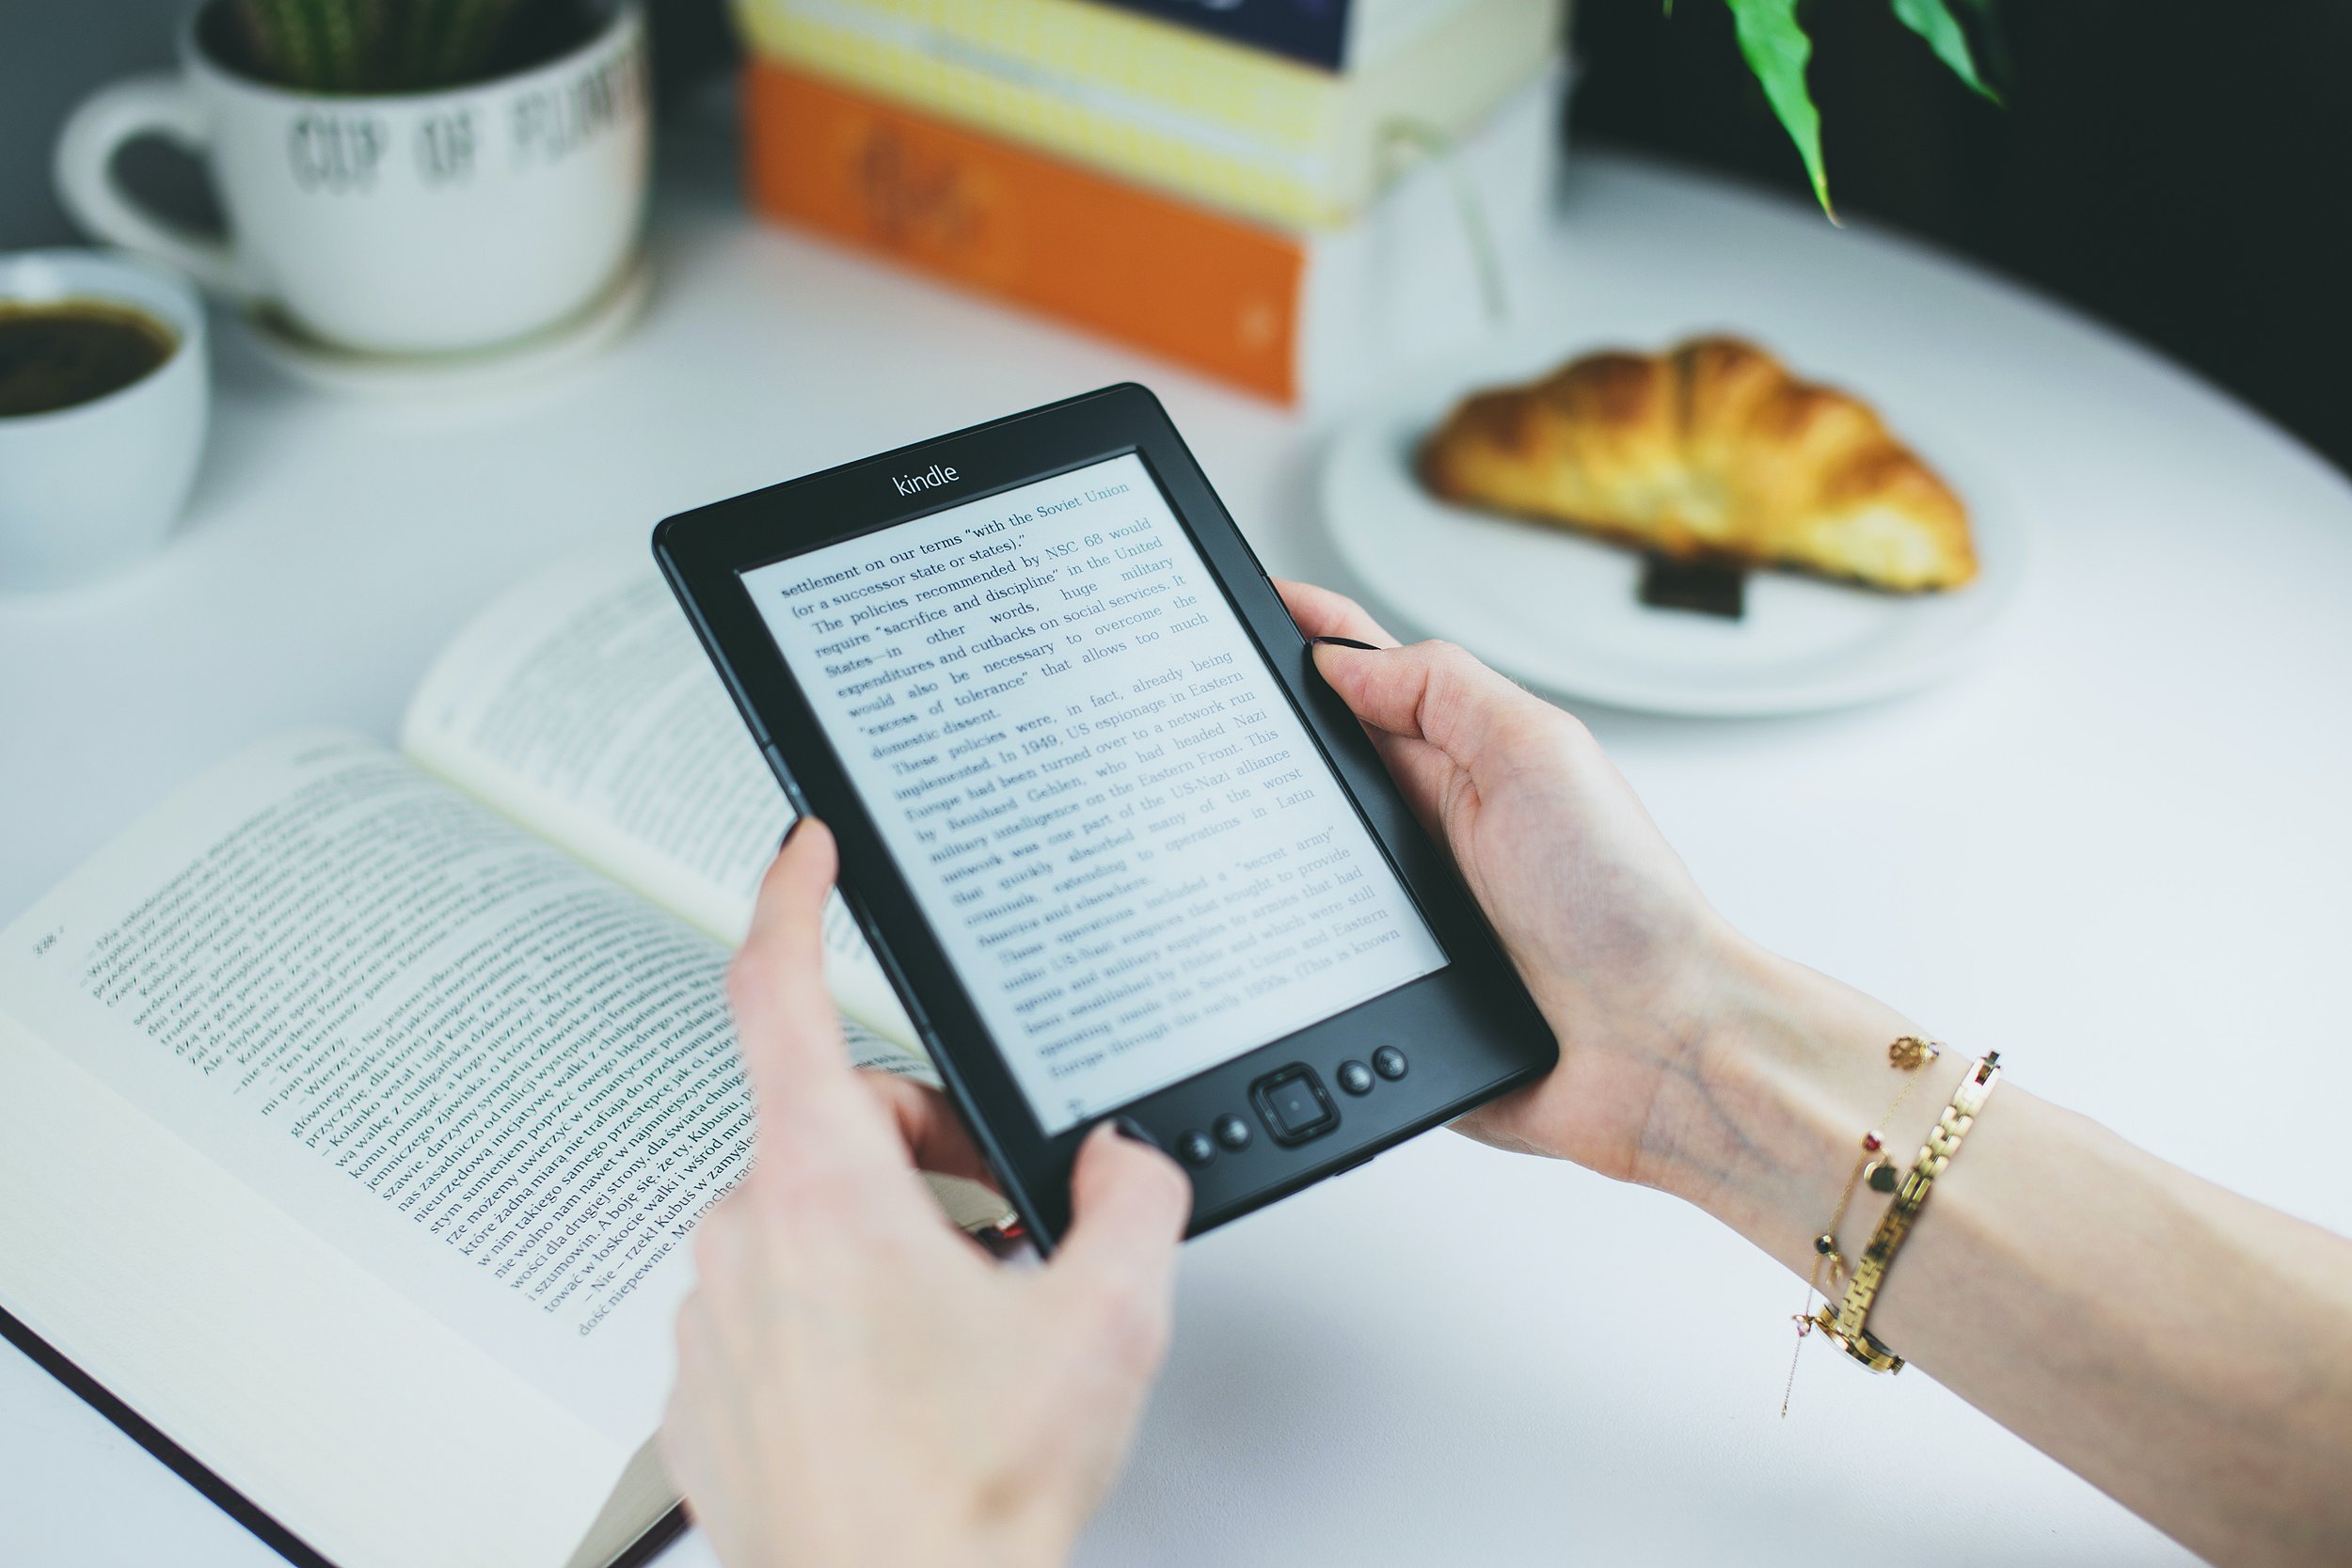
FrameShifting is a must-have guide for anyone who wants to learn to solve gnarly problems—and, importantly, to solve the right problems—with greater insight and rigor. This book is packed with practical advice, helpful checklists, and a troubleshooting guide, along with colorful illustrations for an enjoyable, thought-provoking read.

design of a business book

Alison Heiser and Mary O’Conner Shaw drew upon their extensive experience working with prominent business leaders at global organizations to develop the concepts in their book.

In this case study, the co-authors of the book share how the concept of FrameShifting came into being and talk about their publishing journey. If you’re considering self-publishing, you’ll find the reasons they decided to self publish through Amazon KDP especially helpful.

Alison and Mary’s professionalism made this book a joy to bring to the finish line as I helped them with cover design, interior design and layout, and ebook conversion.


Alison and Mary’s Book Done Timeline

From concept to completion, FrameShifting took just over three years to materialize. 

🐣 Idea hatched: August 2017
✍️ Writing started: October 2017
🎨 Files ready for editing, design and layout: September 2020
✔️ Book done (released): December 2020

Business book cover design

Alison and Mary’s Book Done Take-Aways

Here I interview Alison and Mary about what they learned during the process of getting their book ready for publication.

How did you come up with your book's title?

Jim Heiser (Alison's husband) coined the term "FrameShifting." and we crafted the sub-title. We wanted something that described not just what FrameShifting is, but what it can do for the reader. During our journey to Book Done we trademarked the term “FrameShifting”. 

Tell me a bit more about the cover design you chose.

During our initial consultation, Julie listened carefully as we described our vision. She presented several cover designs, but her first one was our immediate favorite. Like the lightbulb illustration on the cover, her clean, crisp design captured the concept perfectly. We loved it at first sight and we still do—it's a timeless design!

Frameshifting book interior.jpg

Why did you decide to self-publish, rather than go down the traditional publishing route? Which print-on-demand printer did you use and why? 

After doing our research, we decided to use the Amazon KDP platform to self-publish our book because:

  1. We knew exactly what we wanted the book to look like and didn't want to compromise on our vision through collaboration with a publisher.

  2. We also felt that the content was timely (with the pandemic presenting unprecedented challenges to business leaders) and we wanted to expedite publication.

  3. Finally, for convenience: Amazon KDP enabled us to get both our print and e-book products into readers' hands quickly and efficiently.

What was the biggest surprise during your book project?

We were surprised how many times it was possible to go through the manuscript with a fine-tooth comb and still miss things, so engaging with a professional proofreader was certainly money well spent.

Book interior design.jpg

Which part of your book project was the most rewarding?

We loved the creative collaboration with each other and with everyone who contributed to the final product. Nurturing this book from a seed of an idea to a real, tangible book was one of the most fun, rewarding and challenging experiences of our careers.

Which part of your book project took longer than you expected, and why?

  1. Working with traditional publishers was time-consuming! Self-publishing was way faster!

  2. It also took a long time for early readers to provide voluntary feedback.

  3. Getting the book from final manuscript stage to print-ready only took about two months, but it felt like a lot longer. At this stage, every detail counts and you can't afford to lose focus. (Here, we must credit Julie for injecting fresh energy and creativity into the process. She re-energized us and brought the book to life with her design and layout. When we were starting to lose steam, Julie never took her eye off the ball, making sure everything was perfect.)

Amazon KDP full color interior sample

When you write another book, what will you do the same way? What will you do differently?

This book was a pretty big undertaking. But, if we were to do it again, we would probably do it the same way. We’re really glad that we engaged other professionals for specialized tasks, like editing, proofreading, and design/layout. Their contributions helped us produce a book to be proud of.

Notes and sketch pages.jpg

✏️ Every chapter in FrameShifting ends with a Notes page (for linear thinkers) and a Sketches page (for the artists among us)!


Alison and Mary’s Book Done tips:

  • Send pre-launch copies of your book to key reviewers. This will provide useful feedback for your launch, and useful content to share on social media, too.

  • If you plan to self-publish on Amazon KDP, create a short manuscript to use as a test file for working with the KDP software. This will help you understand the settings and quirks of KDP. Then, when your designer gives you the final book files for your launch, you’ll know exactly how to get it uploaded and ready to distribute, and won’t lose any time working out KDP bugs.

  • Consult published authors for advice!

🐛The KDP uploading bug is real! So many authors tell me that they lose time or almost launch their books late because of problems with KDP’s software or process. This tip about using a test file is gold!


Alison and Mary’s Book Done technical details:

Amazon KDP and other print-on-demand printers offer a limited number of paper types and book sizes. If you need an unusual size or paper, you may need to print with a traditional printer.

Quantity ordered: no minimum quantity (print on demand)
Page count: 126
Dimensions (page size): 7.5 x 9.25 inches
Binding: Paperback

Interior details
Ink colors: Full color
Paper: White bond, matte finish
Bleed: Yes* 

Cover details
Cover stock: 100# white paper with matte finish
Ink colors: Full color

*Bleed refers to whether your book has images or graphics that go off the edge of the paper. This is important for the printer to know, because it determines how big the sheets of paper your book is printed on need to be.


What’s next for your book?

I hope Alison and Mary’s story has been inspiring, no matter where you are on your journey to book done. ✔️ What kind of book project are you working on? Find out if you are ready to work with a book designer or sign up to get more of these case studies in your inbox via my newsletter!